
This article describes how to configure a client for the Fidelity Loan Feedback to UKG moov definition used for 360 integration. Each client configuration will vary based on their plan specification and will need to be configured accordingly.
Configuring the UKG API with a Service Account
Before you can configure your client for the Fidelity Loan Feedback to UKG moov, you will need to create a UKG Premier Integration. Please review the Configuring the UKG API with a Service account article.
Create a UKG Scheduled Deduction Report
detamoov uses a Scheduled Deductions saved report that is called through the UKG API. Each company will need to have this report created before the 360 integration can be configured. See the Create the Scheduled Deduction Report for 360 Retirement Integrations article for steps on how to create this report.
Create an SFTP Account in detamoov
Fidelity will send the deduction feedback file to detamoov via SFTP. To create an SFTP account, make sure you are logged in with an administrator level account. Click on your initials in the top right corner and select the Admin Console link.
Note: If you have already created a detamoov SFTP user for the Fidelity Deduction Feedback to UKG moov, you don't need to create another user for the Fidelity Loan Feedback to UKG moov. One SFTP user can be used for both feedback files.

Within the Admin Console, select the Settings tab and click on the SFTP row. Once the SFTP area expands, click the Add button to add a new SFTP account.

The side sheet will be where you'll enter information on your new SFTP account. All fields are required. Here's some information on each field:
- Username: required, cannot contain spaces and must be unique across all SFTP accounts.
- Password: required and must adhere to the standard detamoov password requirements.
- Confirmation password: required and must match the password field exactly (case sensitive).
- Description: required and used to describe why you're creating this account.
Once you've entered all the information above, click Save and your account will be created.
Provide Fidelity with the SFTP credentials created above to allow them to send the deduction feedback files for your client.
Host: sftp.prod.detamoov.com
Port: 22
Username: username created above
Password: password created above
After the UKG Premier Integration has been activated on your account and the SFTP account has been created, please add the Fidelity Loan Feedback to UKG moov to your account by following these steps.
Once the Fidelity Loan Feedback to UKG moov has been added to your account, access the moovs section on the left side menu and click on the Fidelity Loan Feedback to UKG moov.

Importance of the Memo field on the UKG Loan Deduction
When a loan deduction record is included in the feedback file from Fidelity, the Loan ID s required to map to the Memo field in UKG. This is important when an existing loan deduction is either modified or a request to end the loan is sent from Fidelity. If the Loan ID does not match the existing loan deduction's Memo field in UKG, a new loan deduction will be created instead of modifying or ending the existing loan deduction.
In the event that no Loan ID is sent on a loan deduction record, the Fidelity Loan Feedback to UKG moov will validate if the Loan ID sent from Fidelity exists and generate a notification email. If the loan deduction record creates a new loan deduction in UKG, the deduction will be created, but the Memo field will be blank.
An example of the validation report generated when a loan deduction has no Loan ID:

This shows that the first record in the deduction feedback file is a 401k Loan and that no Loan ID was found for this record.
To edit the validate file step, click on the cog icon under the Action - Validate Files step on the left. Then toggle the "Use default parameters" off and enter in the email addresses you would like to receive the notification. If you would like to enter multiple email addresses, separate them with a comma. A Reply to email is also required in the event that a recipient of the notification replies to the email.

To save your parameters click on the Save Changes button.
The Fidelity Loan Feedback to UKG moov provides a notification once the moov is complete with a summary of the deduction changes that were made in UKG. The notification can be sent to any email address you wish and can also be configured to send to multiple email addresses.
To edit the send file step, click on the cog icon under the Action - Send File step on the left. Then toggle the "Use default parameters" off and enter in the email addresses you would like to receive the notification. If you would like to enter multiple email addresses, separate them with a comma. A Reply to email is also required in the event that a recipient of the notification replies to the email.

Note: these settings apply to any client configuration you set up for this specific moov. You also have the ability to configure the send file step for each client configuration if you wish to add or remove email addresses per client.
To save your parameters click on the Save Changes button.
In the moov configuration section, click the Add button to add a new client to the moov.

Client/Entity - either select an existing client or click the + sign to create a new client.
Status - Set to Active
Expected Frequency - the client's payroll frequency
File Name Starts With - odc[Fidelity provided value]
File Name Contains - lon
(The "l" in "lon" is a lower-case L)
Note: make sure that the File Name Starts With and File Name Contains fields match as this can cause issues pulling the Fidelity feedback file and updating UKG.

Click Next once you have completed the ID and source section.
UKG Earnings List Transformation Override
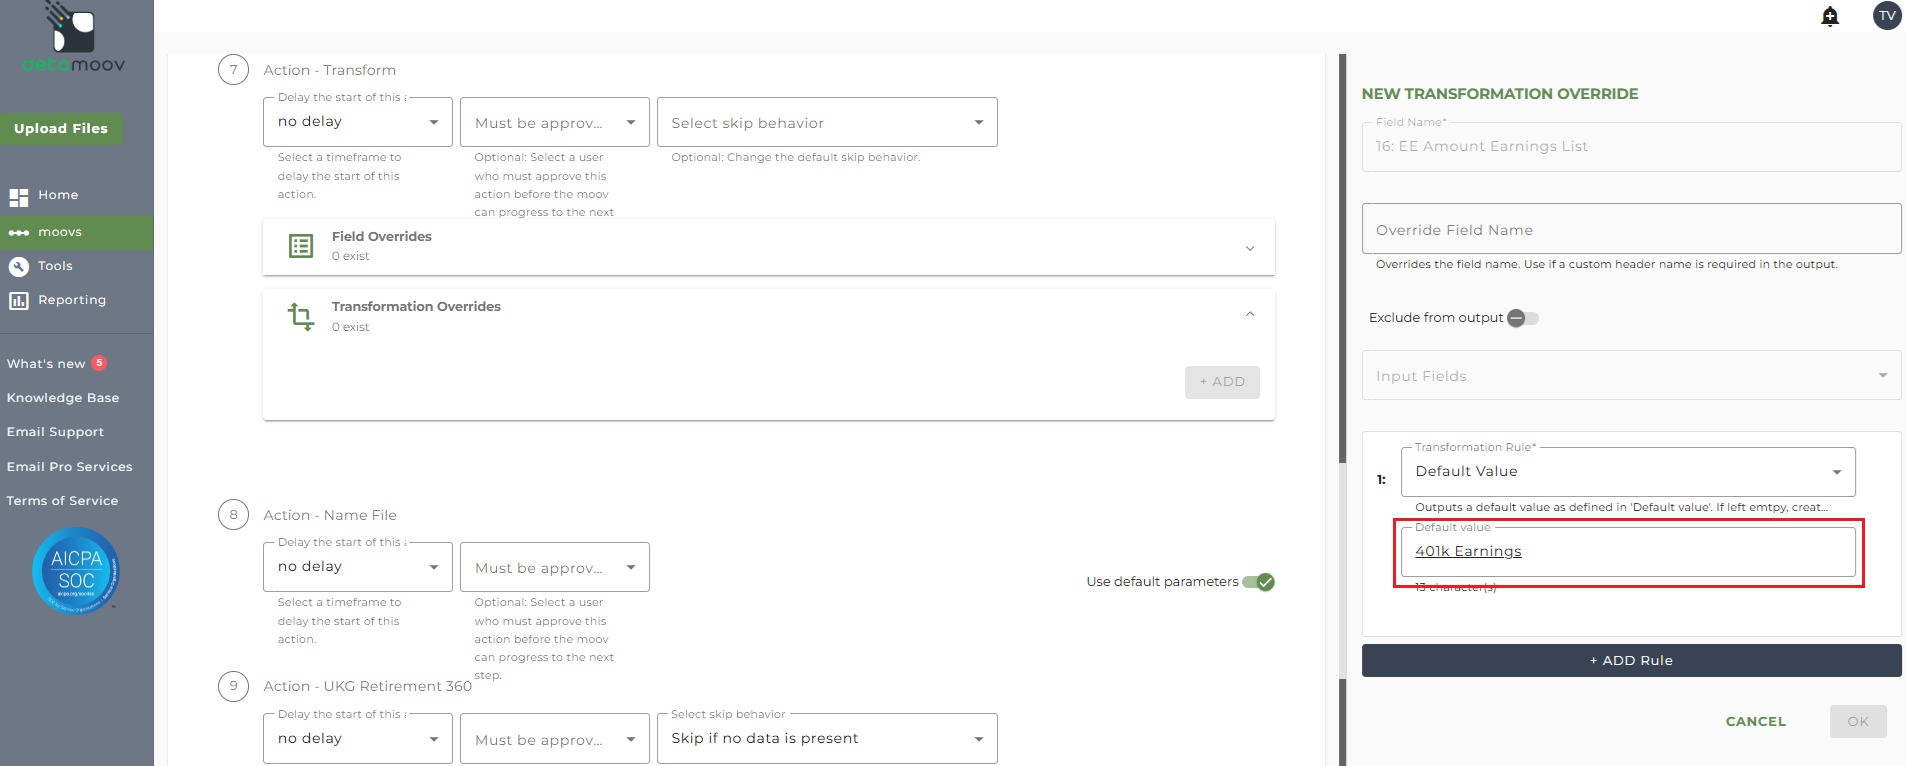
detamoov has a default value of "401k Earnings" set as the Earning Lists sent to UKG. If your client's plan has a different value, you will need to create an override to set this value.
Note: The Fidelity Loan Feedback to UKG moov contains 3 separate Transform steps. The following information relates to step 7 Action - Transform only.
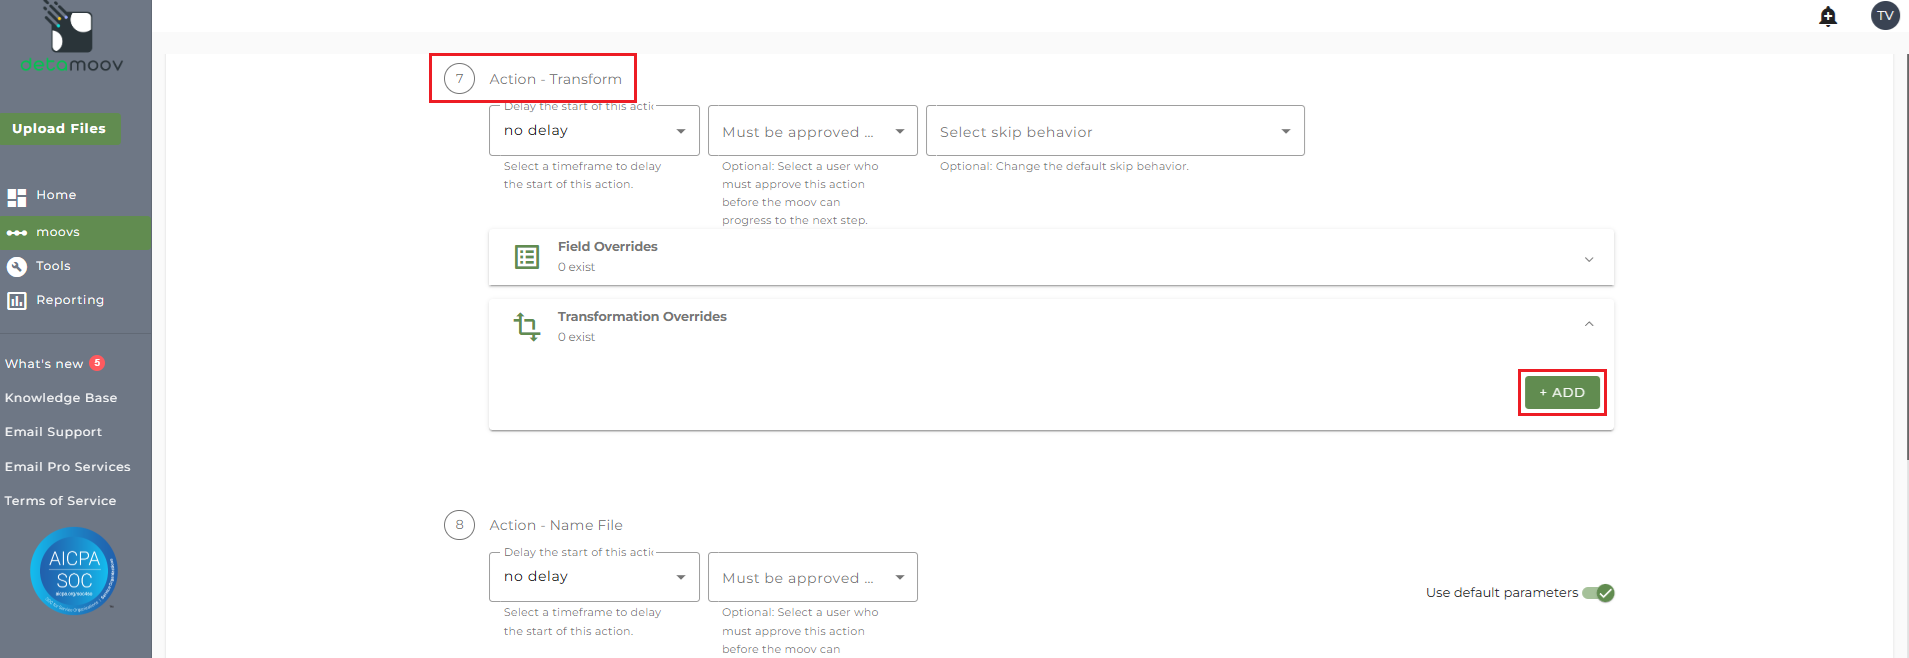
To provide a transformation override, locate step 7 - Action Transform, expand the Transformation Overrides panel and click ADD.
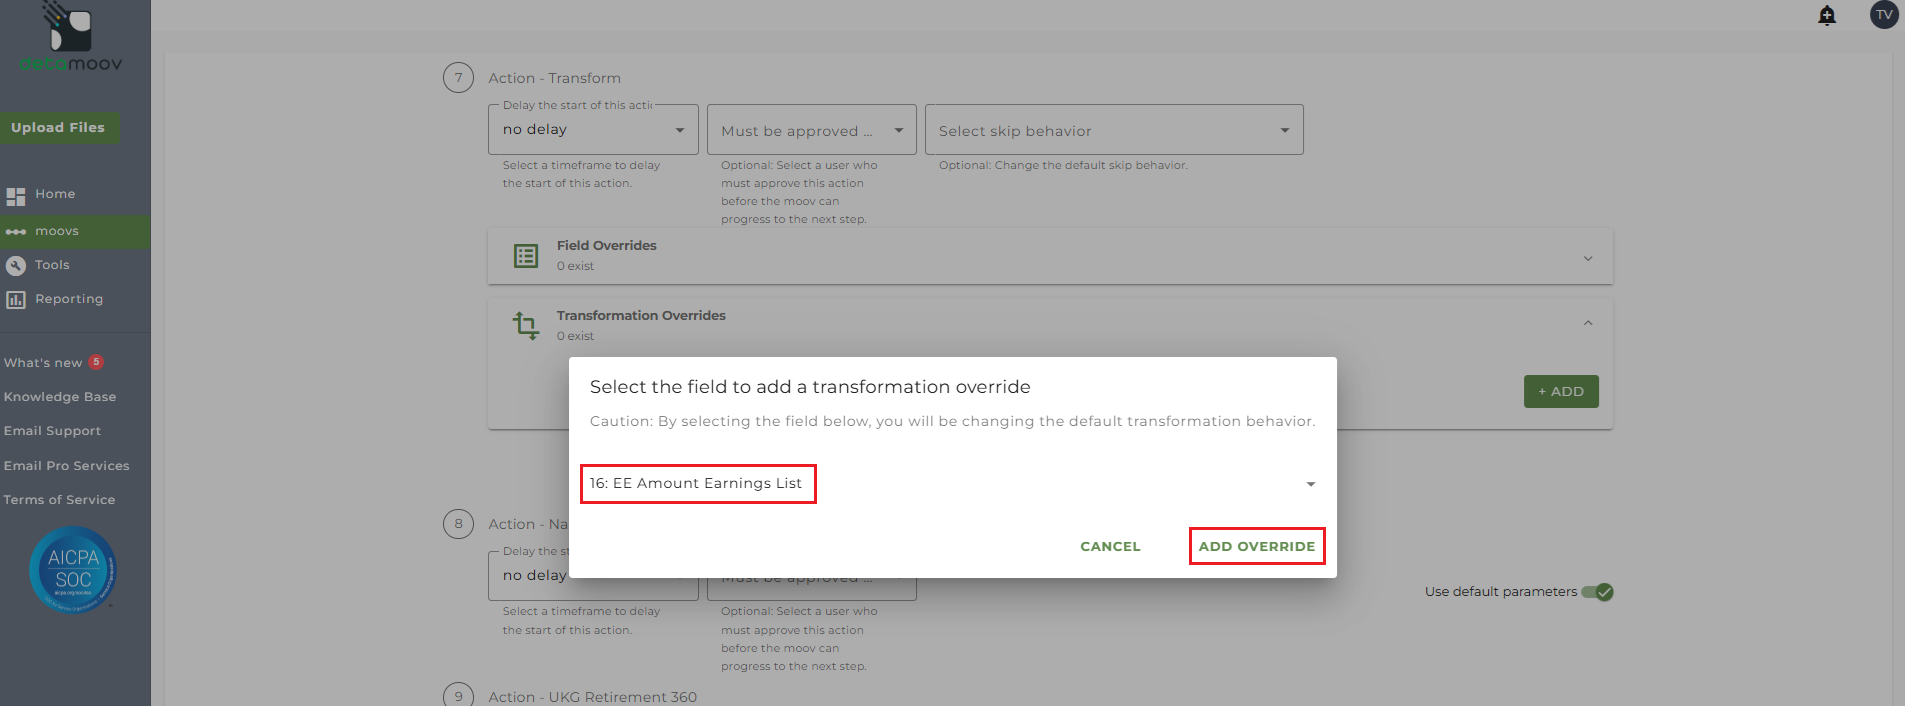
Then select field 16: EE Amount Earnings List and click ADD OVERRIDE.
On the side panel that appears, replace "401k Earnings" with your Earnings List value and click OK.
If detamoov receives a Loan Goal Amount from Fidelity the GoalEnabled setting will automatically be set to "Y". If you do not want GoalEnabled to be set, a transformation override is required.
Note: The Fidelity Loan Feedback to UKG moov contains 3 separate Transform steps. The following information relates to step 7 Action - Transform only.
To provide a transformation override, locate step 7 - Action Transform, expand the Transformation Overrides panel and click ADD.
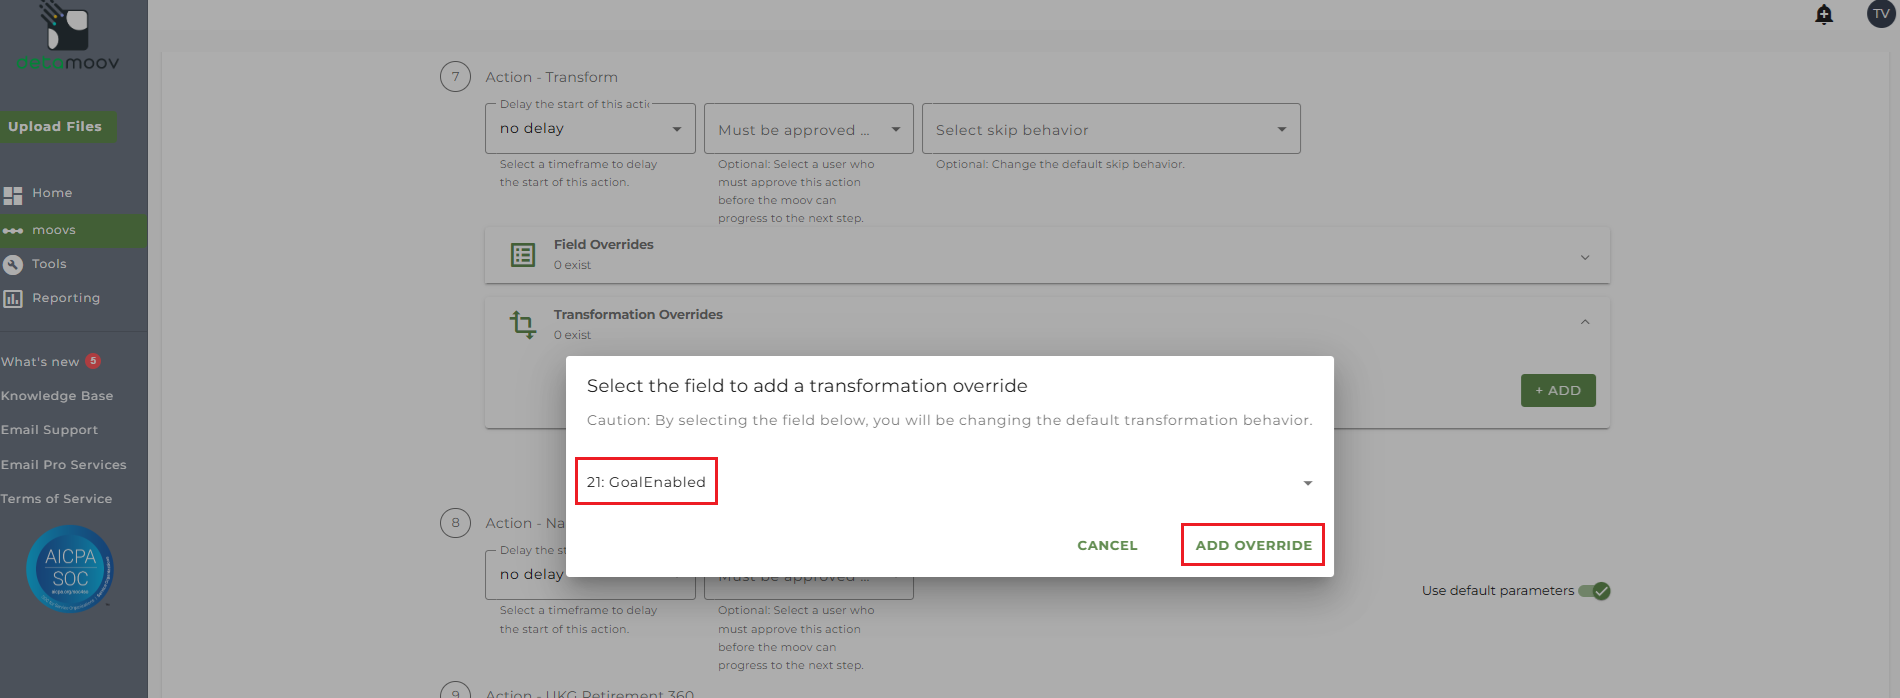
Then select field 21: GoalEnabled and click ADD OVERRIDE.
Then delete the Nested-IF-THEN-ELSE rule.

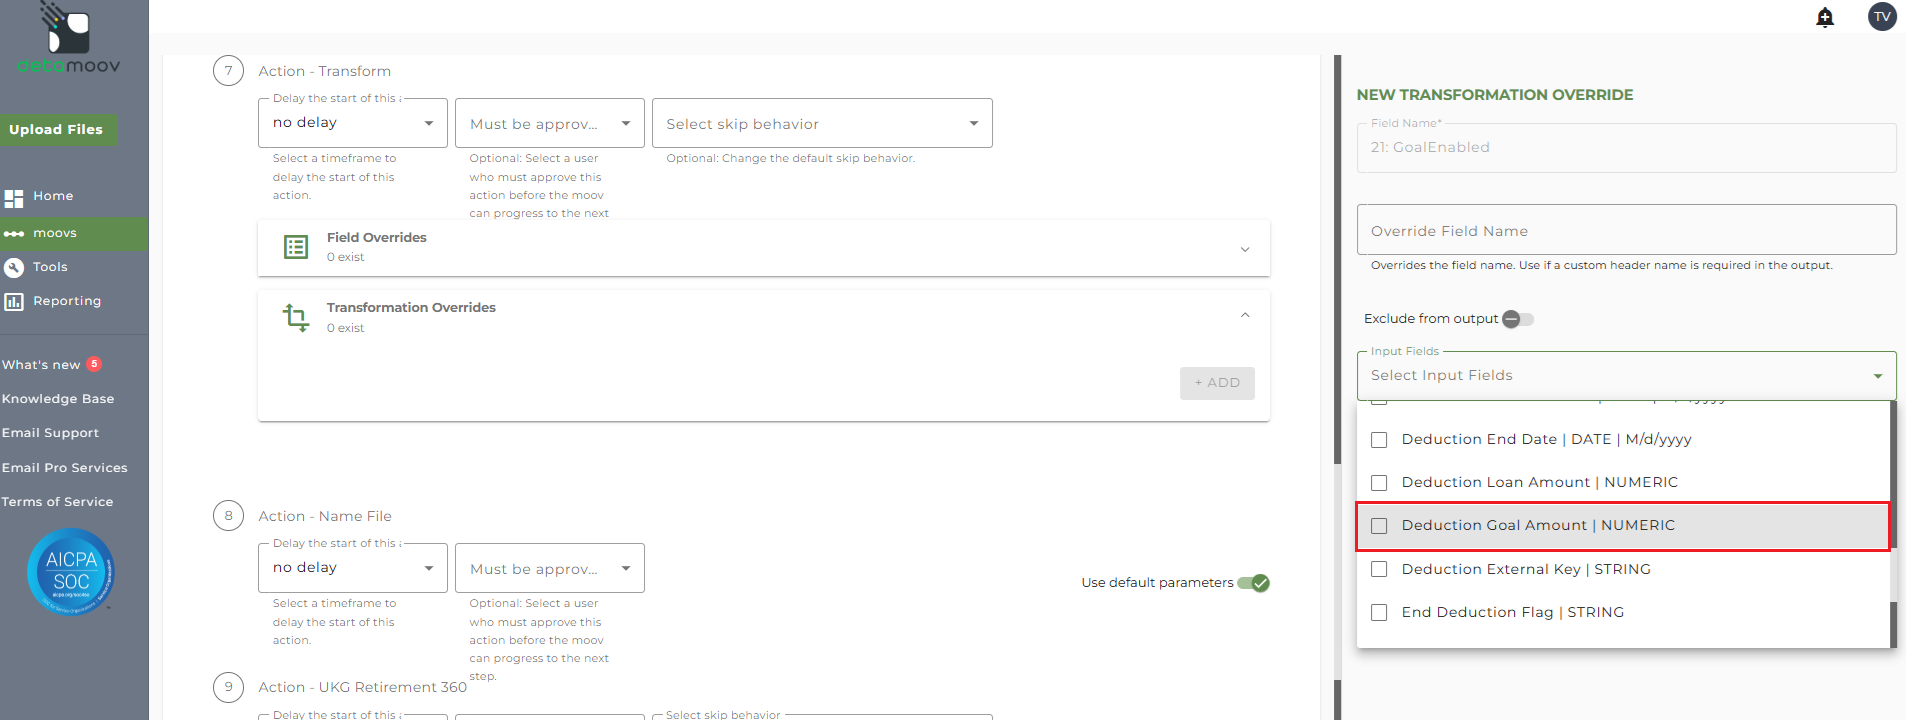
Then uncheck the Deduction Goal Amount Input Field and click OK.
Division Name for a Single Plan with Multiple EIN
Fidelity will send a Division Name in the loan feedback data when a single plan has multiple divisions. To map the Division Name from Fidelity to an EIN Tax Id or EIN Name, a transformation override is required.
Note: The Fidelity Loan Feedback to UKG moov contains 3 separate Transform steps. The following information relates to step 7 Action - Transform only.
To provide a transformation override, locate step 7 - Action Transform, expand the Transformation Overrides panel and click ADD.
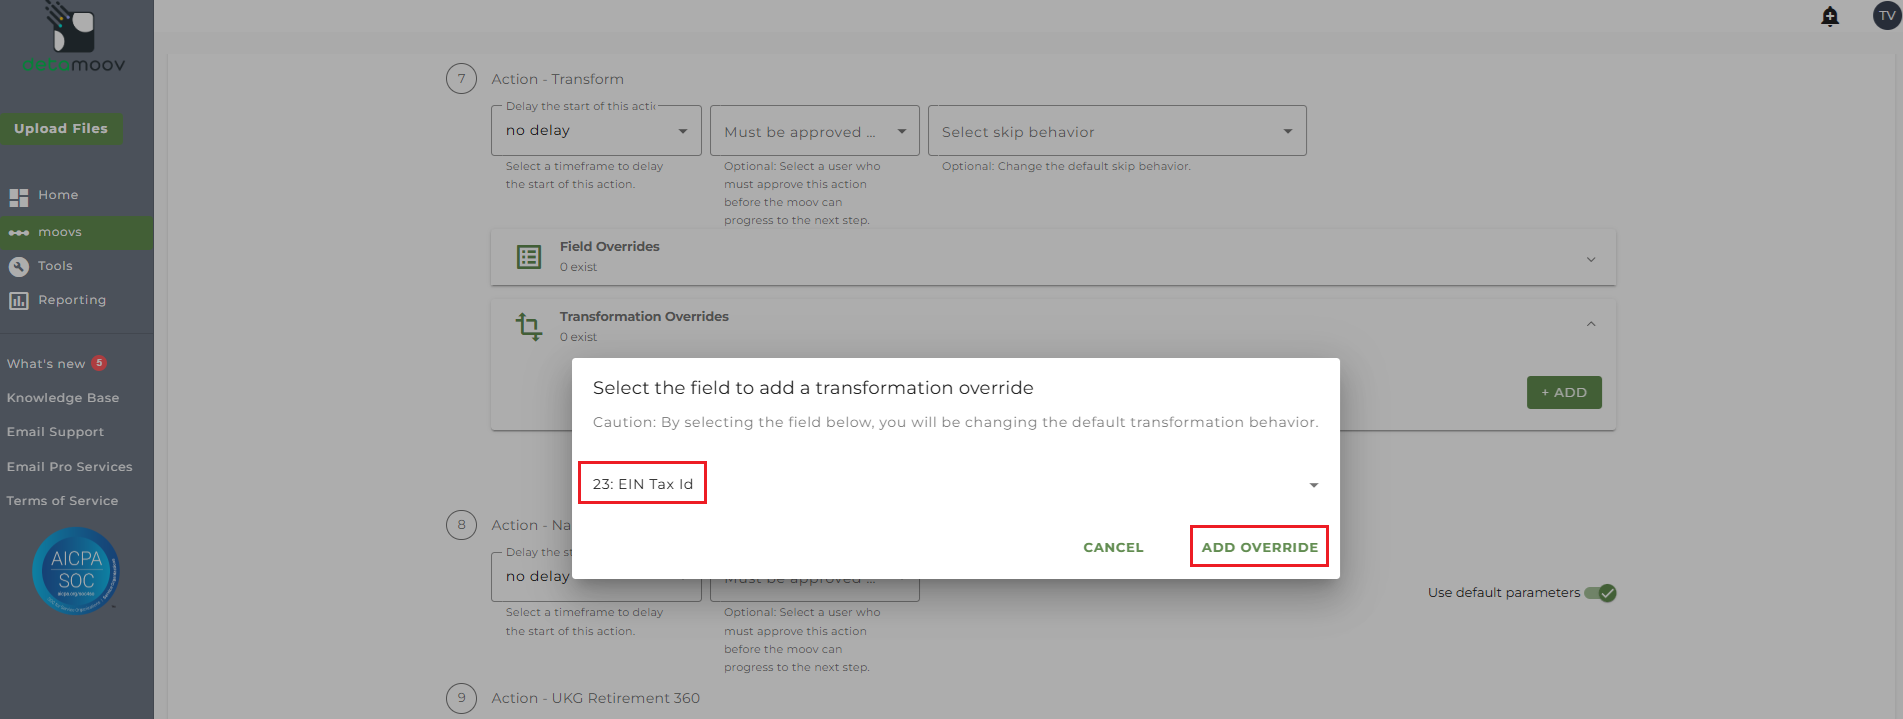
Then select field 23: EIN Tax Id or 24: EIN Name and click ADD OVERRIDE.
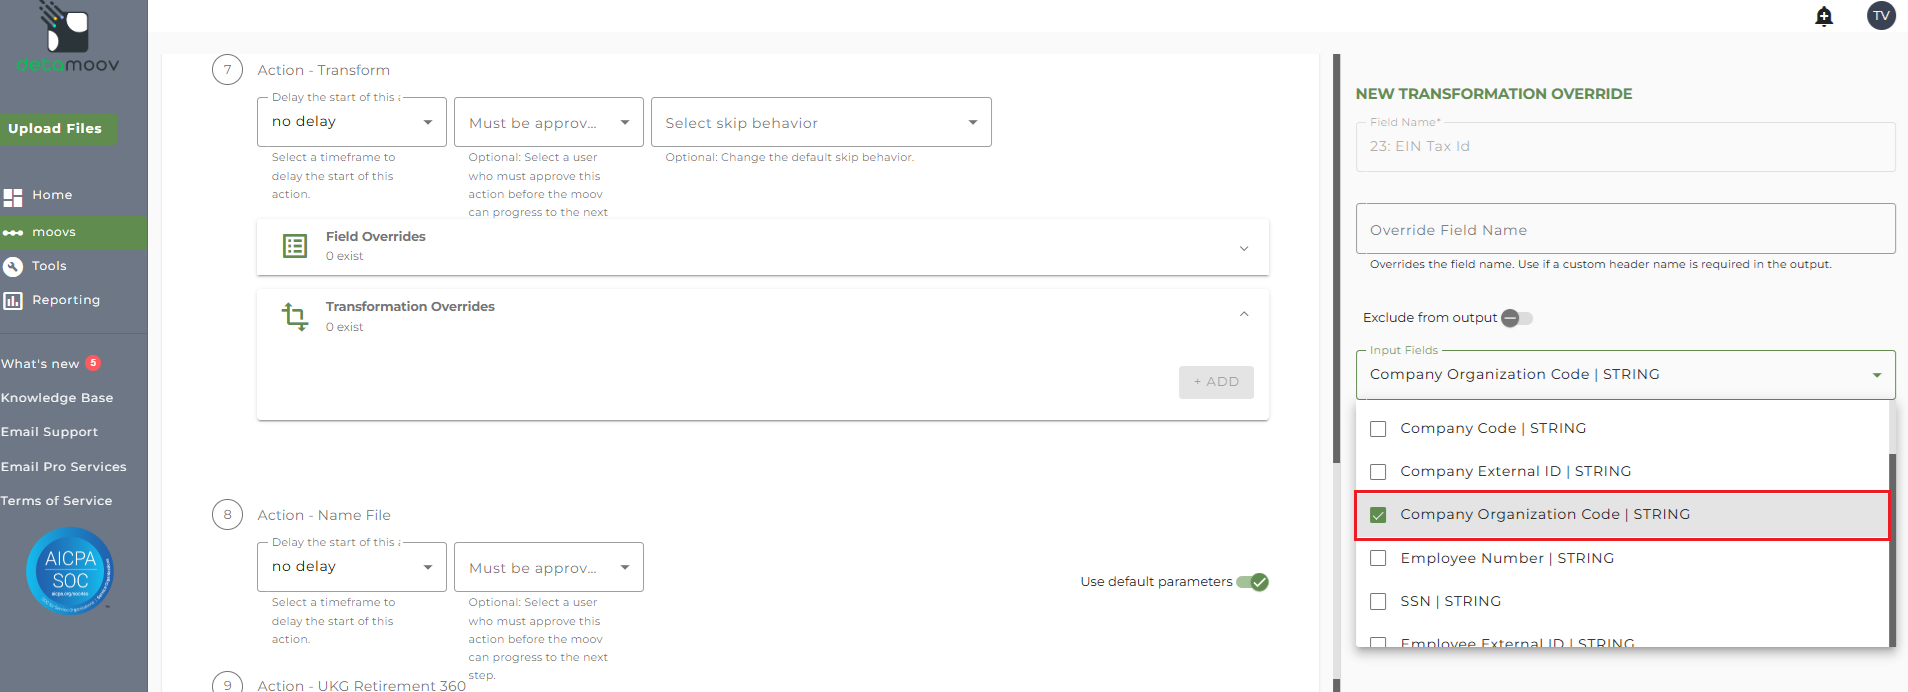
Then select 'Company Organization Code' from the Input Fields dropdown menu.
Then click the Add Rule button and select the 'Replace/Remove exact value using a list' rule. In the Replacement Groups field, create a group for each of the expected Division Names and the EIN Name or Tax Id you want to replace it with. For example, if we expect the Division Name 'ABCD' and wish to map it to the EIN Tax Id 99-9999999, we would create a Replacement Group as ABCD|99-9999999.
Note: the Division Name and EIN value you want to replace it with are separated by the "pipe" character.
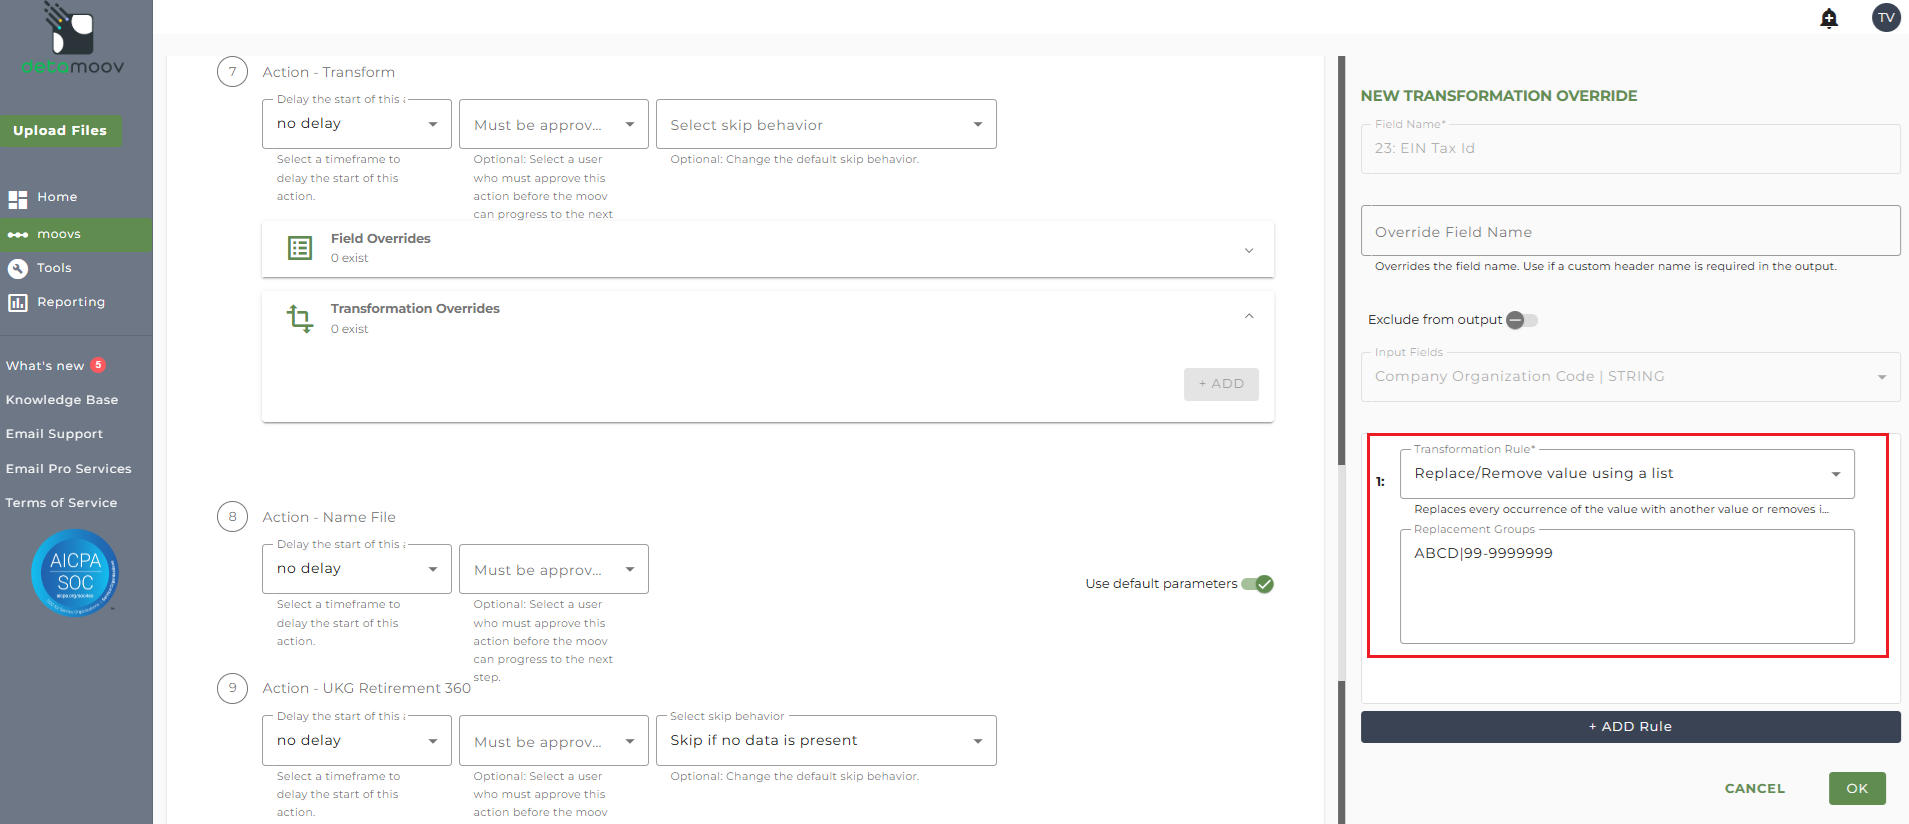
Click OK once you have created all your Replacement Groups.
Configure the UKG Retirement 360 Step
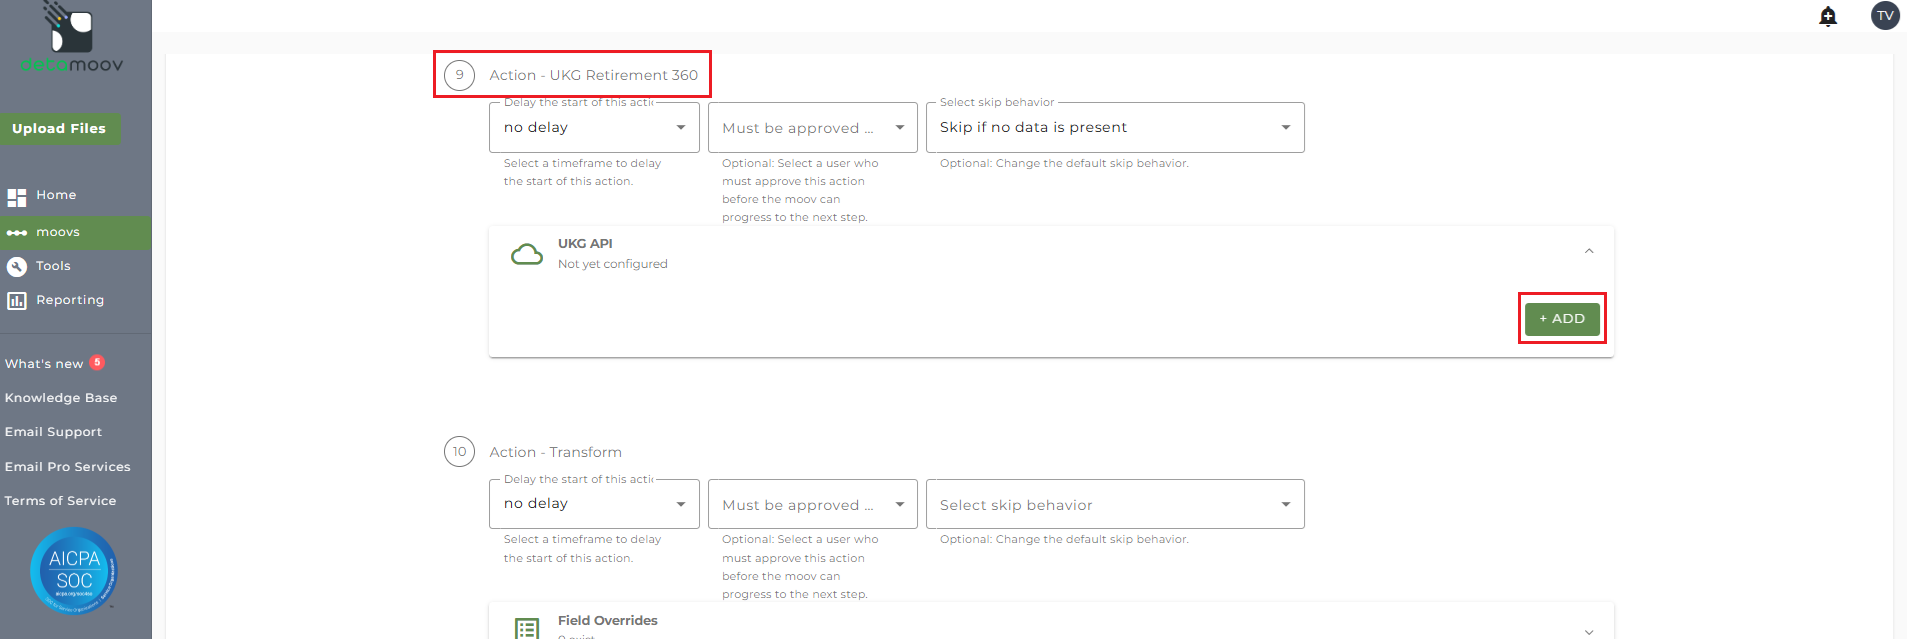
To configure the UKG Retirement 360 step for you client, locate the Action - UKG Retirement 360 step, expand the UKG API panel and click ADD.
On the side panel that appears, select your UKG API Premier Integration and enter in the following parameters:
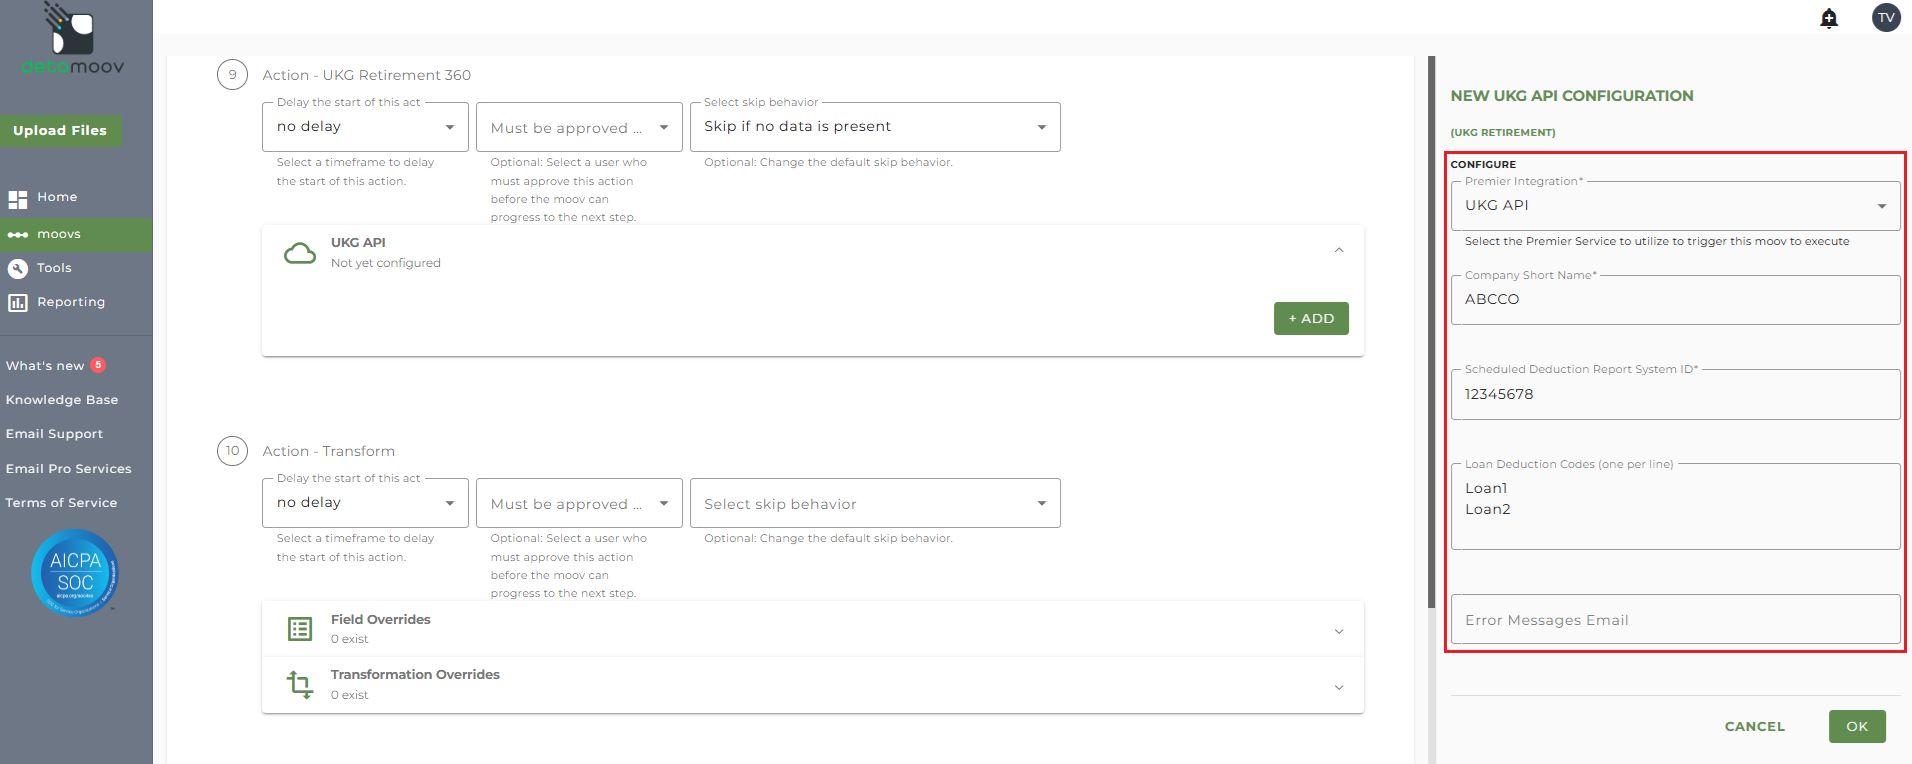
- Company Short Name - the company short name in UKG
- The Scheduled Deduction Report System ID - If you have not created this report, refer to the Create the Scheduled Deduction Report for 360 Retirement Integrations article
- Loan Deduction Codes - any loan deduction codes for this company
You can also enter in one or more email addresses in the Error Messages Email. If left blank, all detamoov users on your account will receive emails if the UKG API import fails.
Click OK to complete the UKG Import configuration.
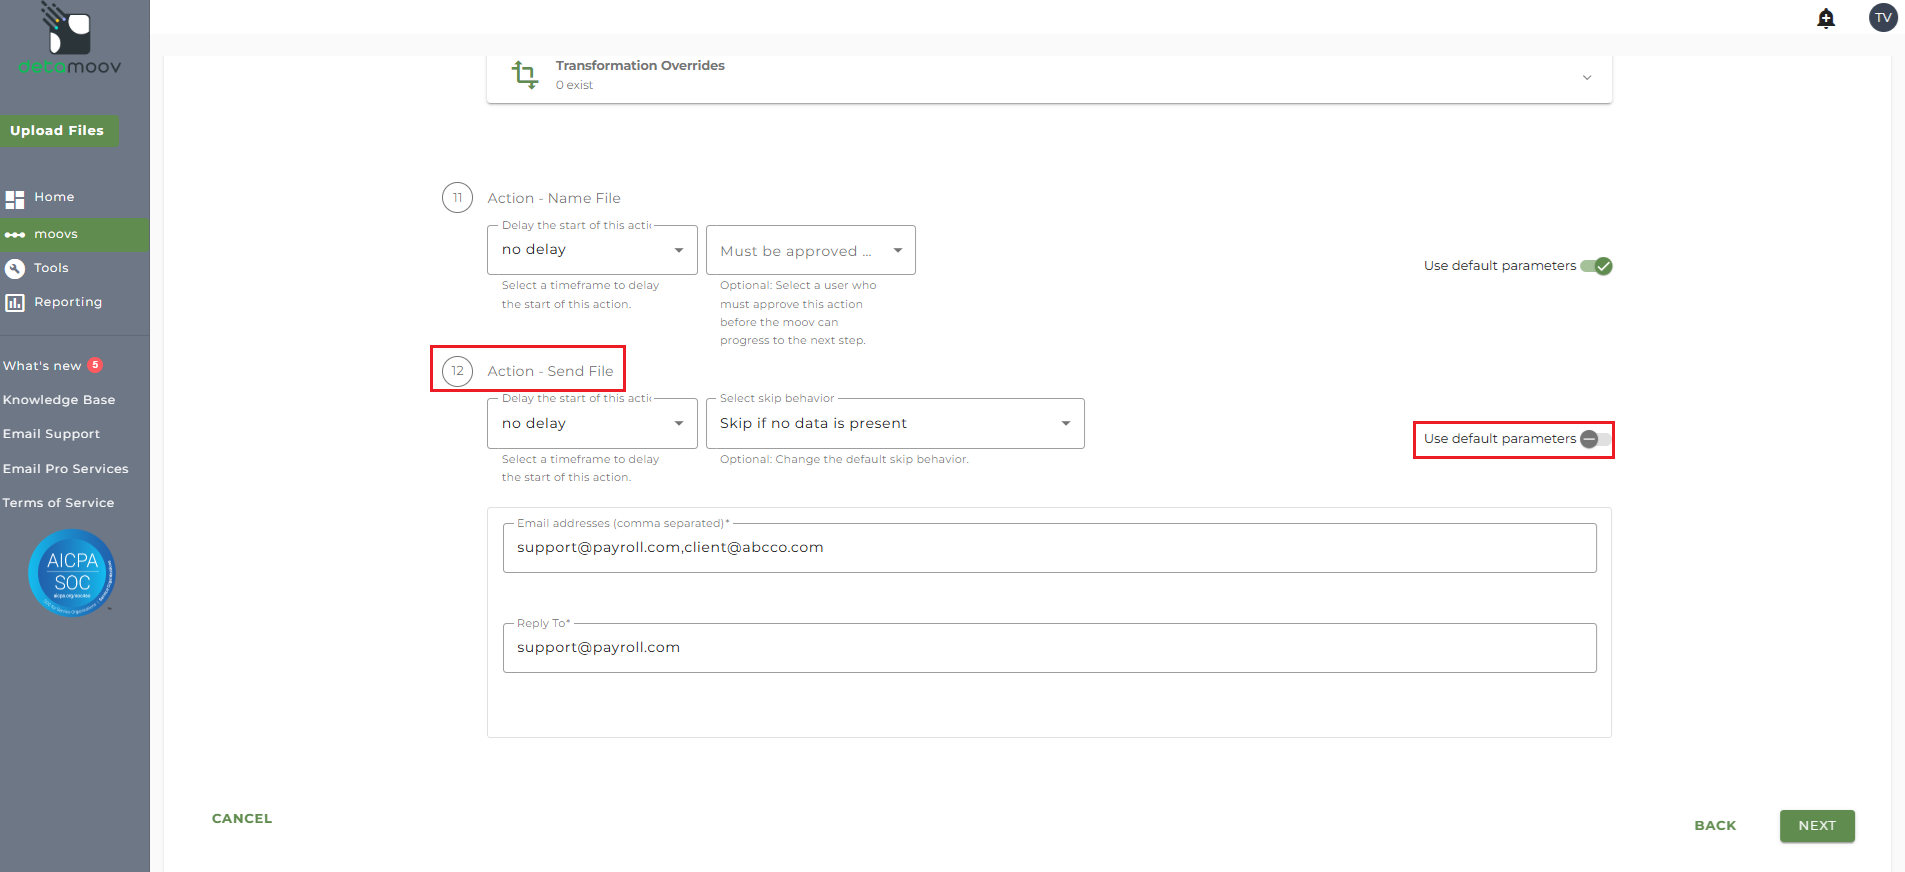
At the beginning of this article you configured the send file step for the moov to send a notification once the moov had completed. You also have the ability to configure the send file step for each client configuration if you wish to add or remove email addresses per client.
To override the send file step, locate the Action - Send File step and toggle the "Use default parameters" off and enter/remove email addresses from Email Address and Reply To fields. If you would like to enter multiple email addresses, separate them with a comma.
To complete the configuration for your client, click the Next button at the bottom of the page and then the Save button on the moov summary page.

