
This article describes how to configure the July Services Deduction Feedback Split by Division ID moov for PrismHCM. This moov is intended for July Services plans where there are multiple PrismHCM client IDs within a single plan. If your client's plan does not have multiple client IDs tied to a single July Services plan, please see How to configure the July Services Deduction Feedback to PrismHCM moov.
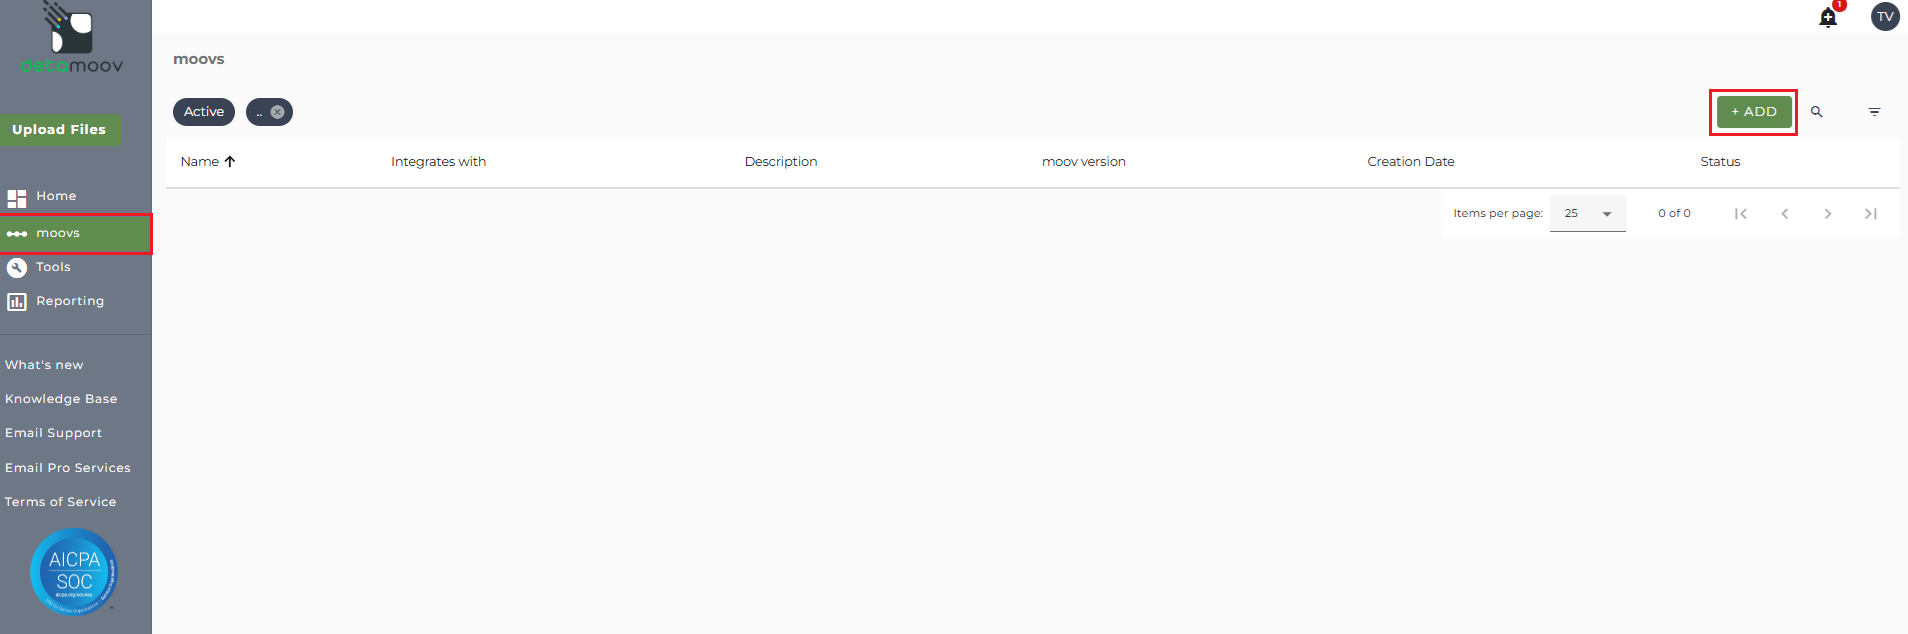
To adopt the July Services Deduction Feedback Split by Division ID moov, click on the moovs option on the left and click the ADD button in the upper right.
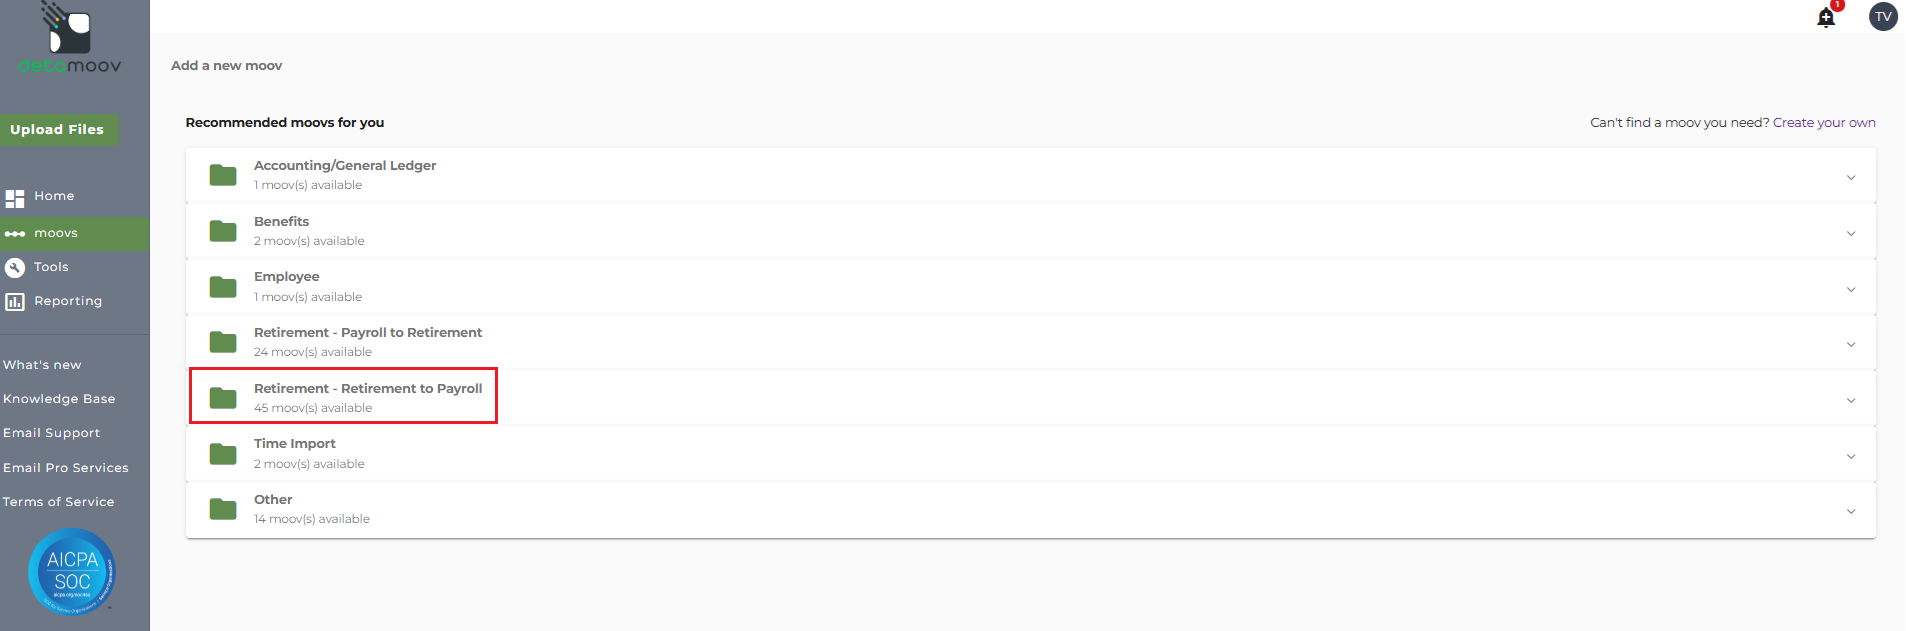
Then expand the 'Retirement - Retirement to Payroll' section.
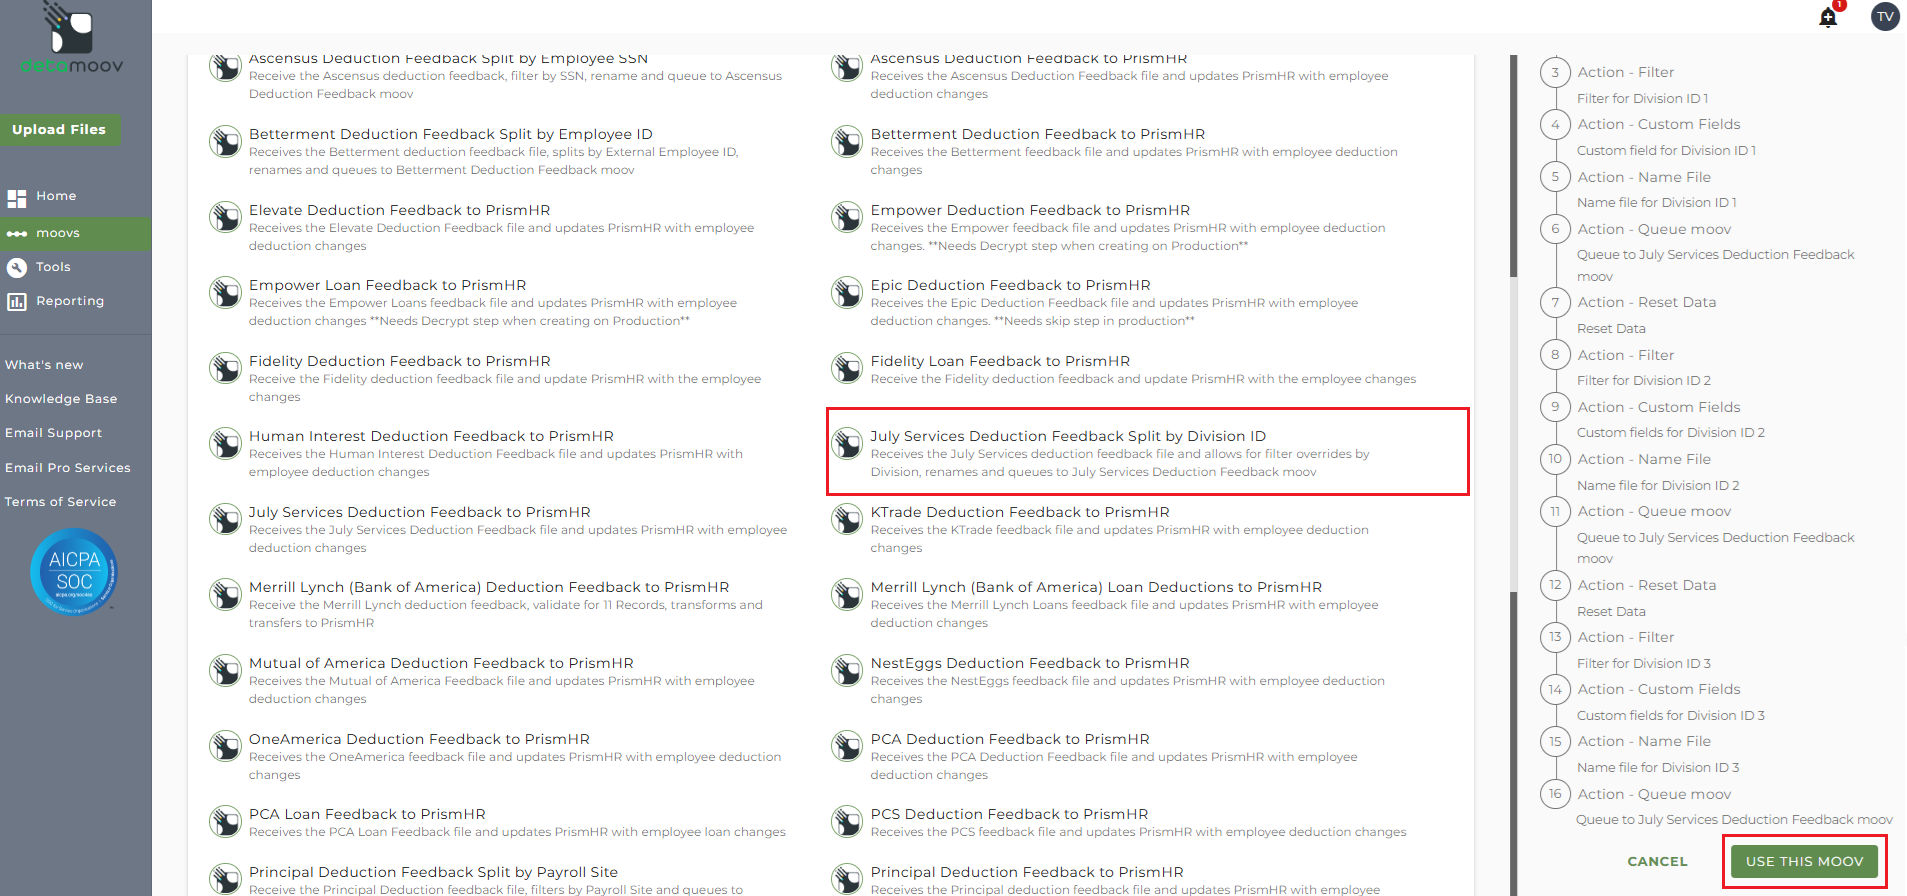
Locate and click on the 'July Services Deduction Feedback Split by Division ID' moov and click USE THIS MOOV by scrolling down to the bottom of the right sidenav.
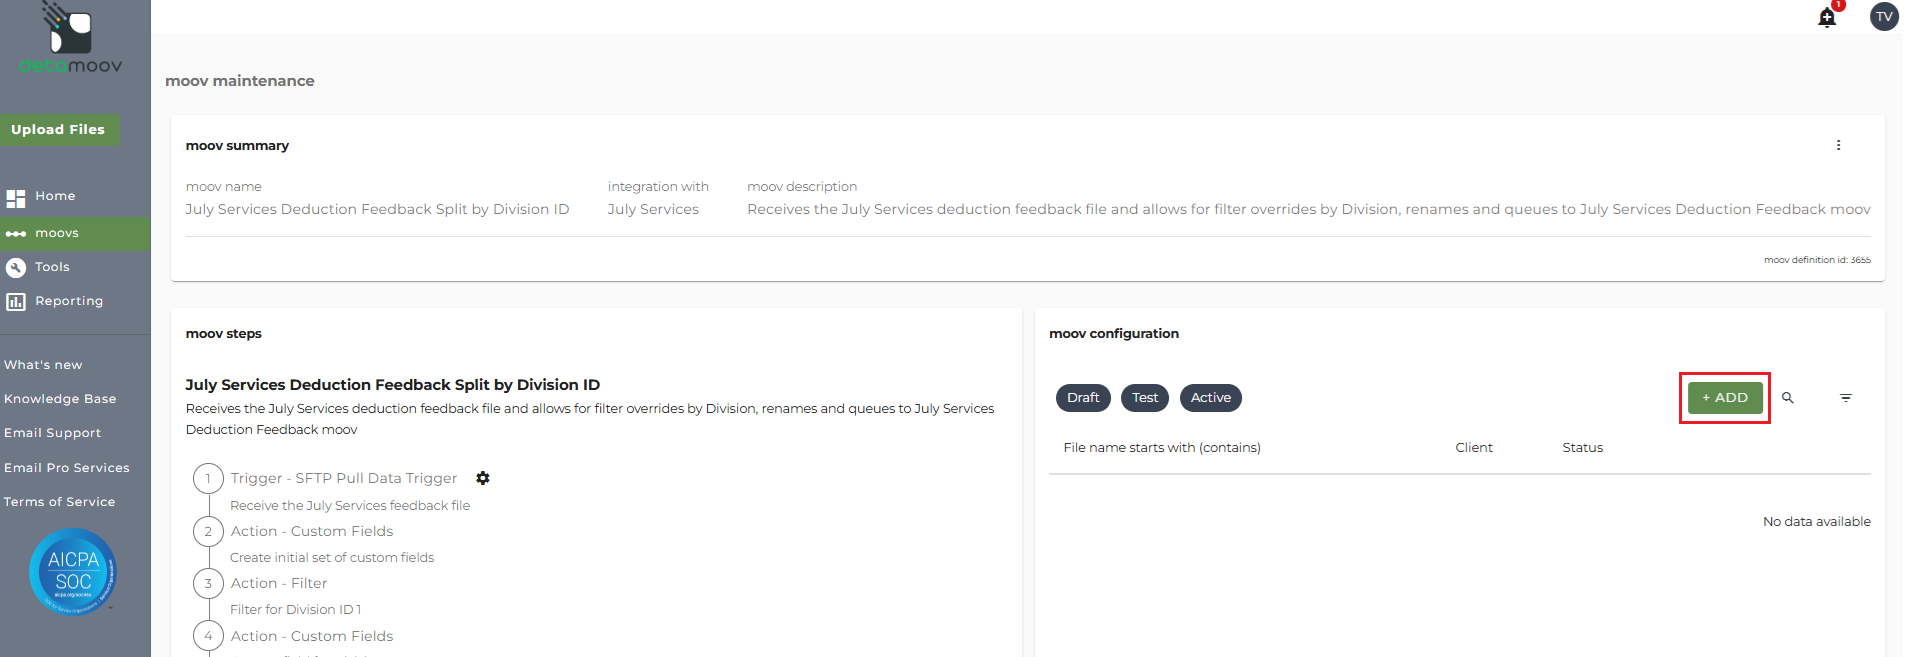
In the moov configuration section, click the Add button to add a new client to the moov.
Client/Entity - either select an existing client or click the + sign to create a new client.
Status - Set to Active
Expected Frequency - the client's payroll frequency
File Name Starts With - Feedback_[July Services Plan ID]
File Name Contains -
Note: make sure that the File Name Starts With and File Name Contains fields match as this can cause issues pulling the July Services feedback file and updating PrismHR.
To automate the 360 integration, configure the SFTP schedule. Click the SFTP banner under the Trigger - SFTP Pull Data Trigger step and click Add.
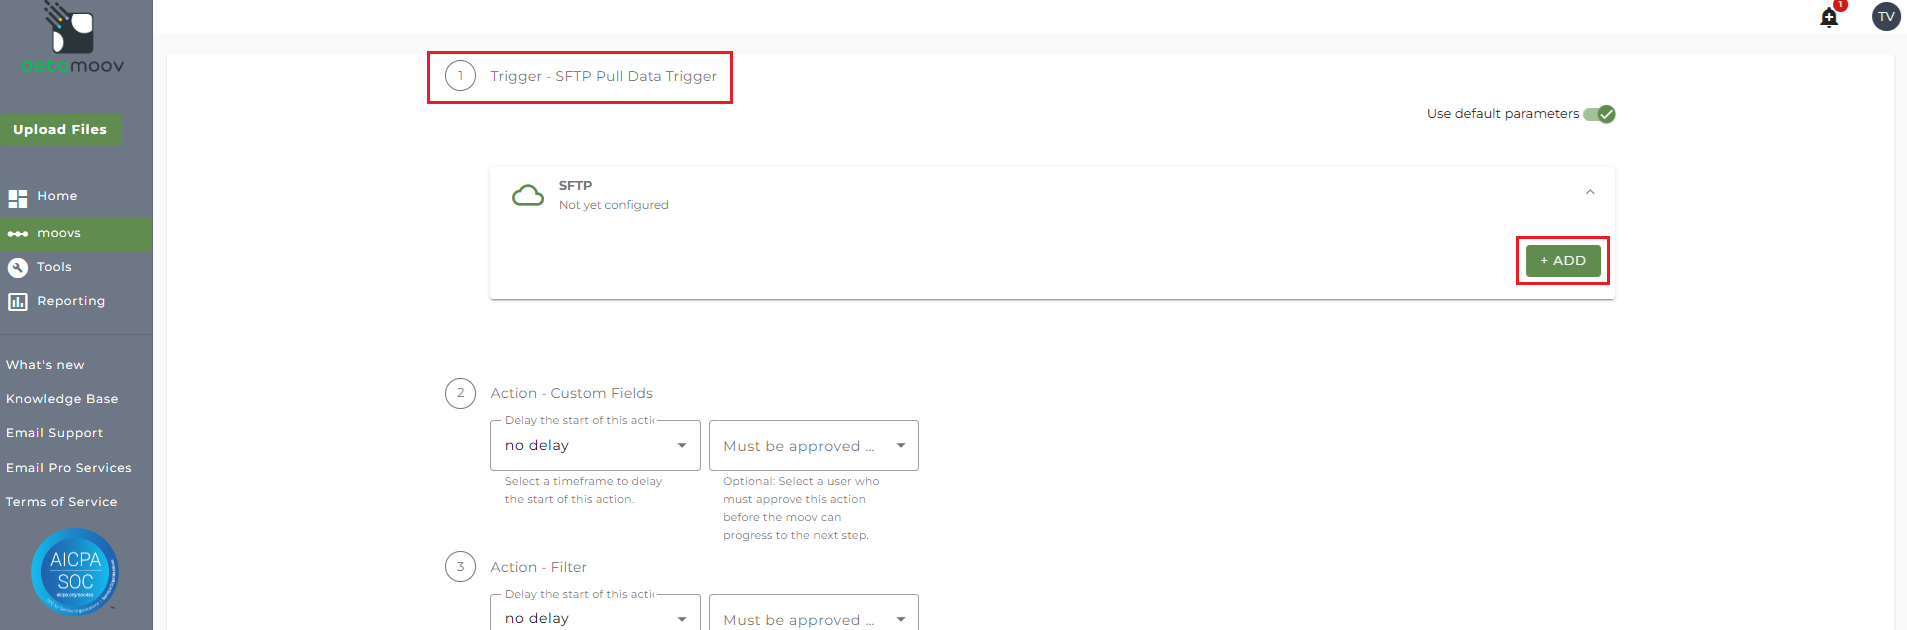
On the New SFTP Configuration section on the right, select the SFTP Pull option from the Premier Integration menu. Then select either "Every X weeks" or "On certain days of the month", depending on how often you would like detamoov to check for new deduction files. We recommend that you check for feedback files at least twice a week. In the example below, we have set up a schedule to check for files twice a week on Tuesdays and Fridays.

Before you configure the moov for each Division, scroll through the moov steps and set each Action - Queue moov step's Skip Step setting to 'Skip step if no data to process'. This needs to be set for the following steps:
- Step 6
- Step 11
- Step 16
- Step 21
- Step 26
This will ensure that blank files will not be sent if the filter results in zero records.

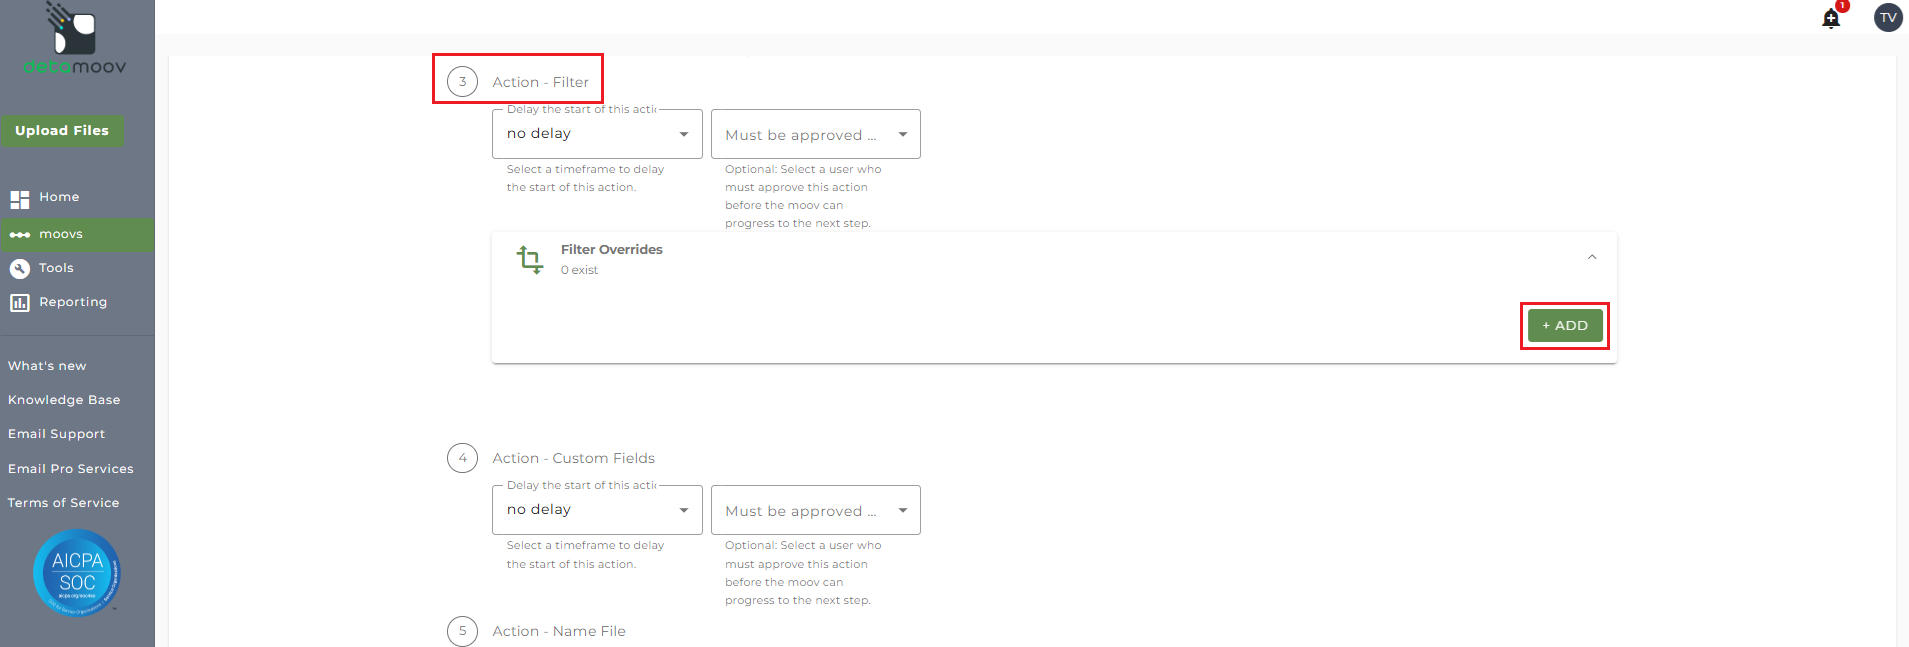
Overrides for the Filter Step for each Division ID
To properly split the July Services Deduction Feedback file by Division ID, you will need to provide filter overrides for each division. For example, if our client's July Services plan has three divisions that we expect in the feedback file, then we need to set filter overrides for the first three filter steps. If there are four locations, then four filter overrides are needed, and so on.
The table below shows the steps that will need a filter override based on the number of Divisions expected in the feedback file:
| # of Division IDs | Filter Steps to Override |
| 2 | Step 3, Step 8 |
| 3 | Step 3, Step 8, Step 13 |
| 4 | Step 3, Step 8, Step 13, Step 18 |
| 5 | Step 3, Step 8, Step 13, Step 18, Step 23 |
To set a filter override, click on the Filter Overrides panel, click the ADD button.
Then select Filter 1: Division ID and click ADD OVERRIDE.
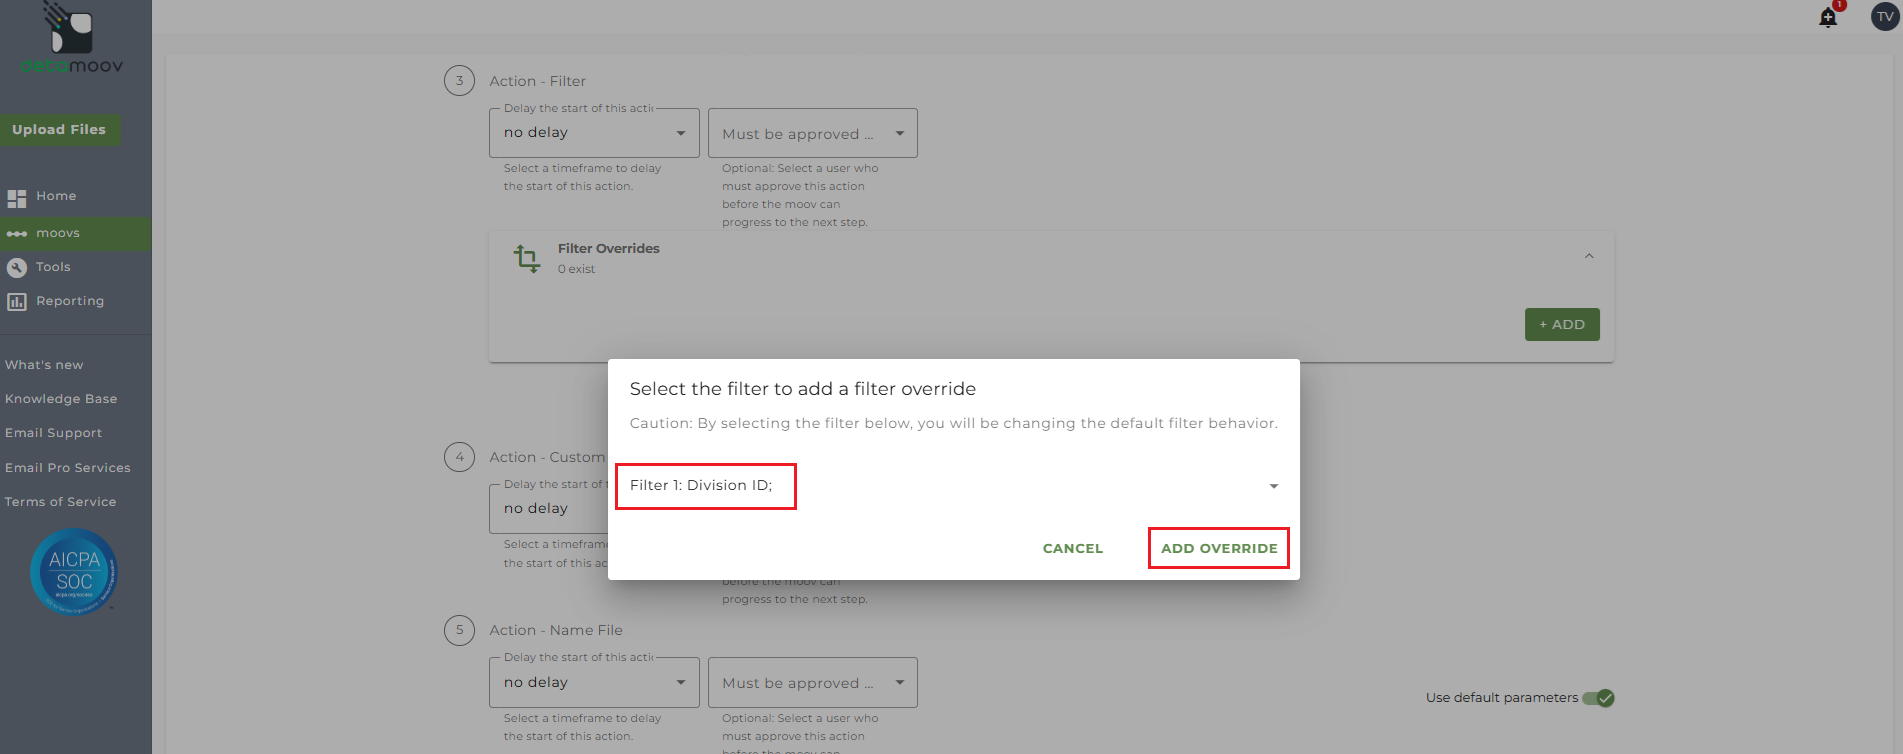
The default filter is set to filter out any record where the value is not 9999. You will need to replace the value 9999 with the Location Code you expect and click OK.
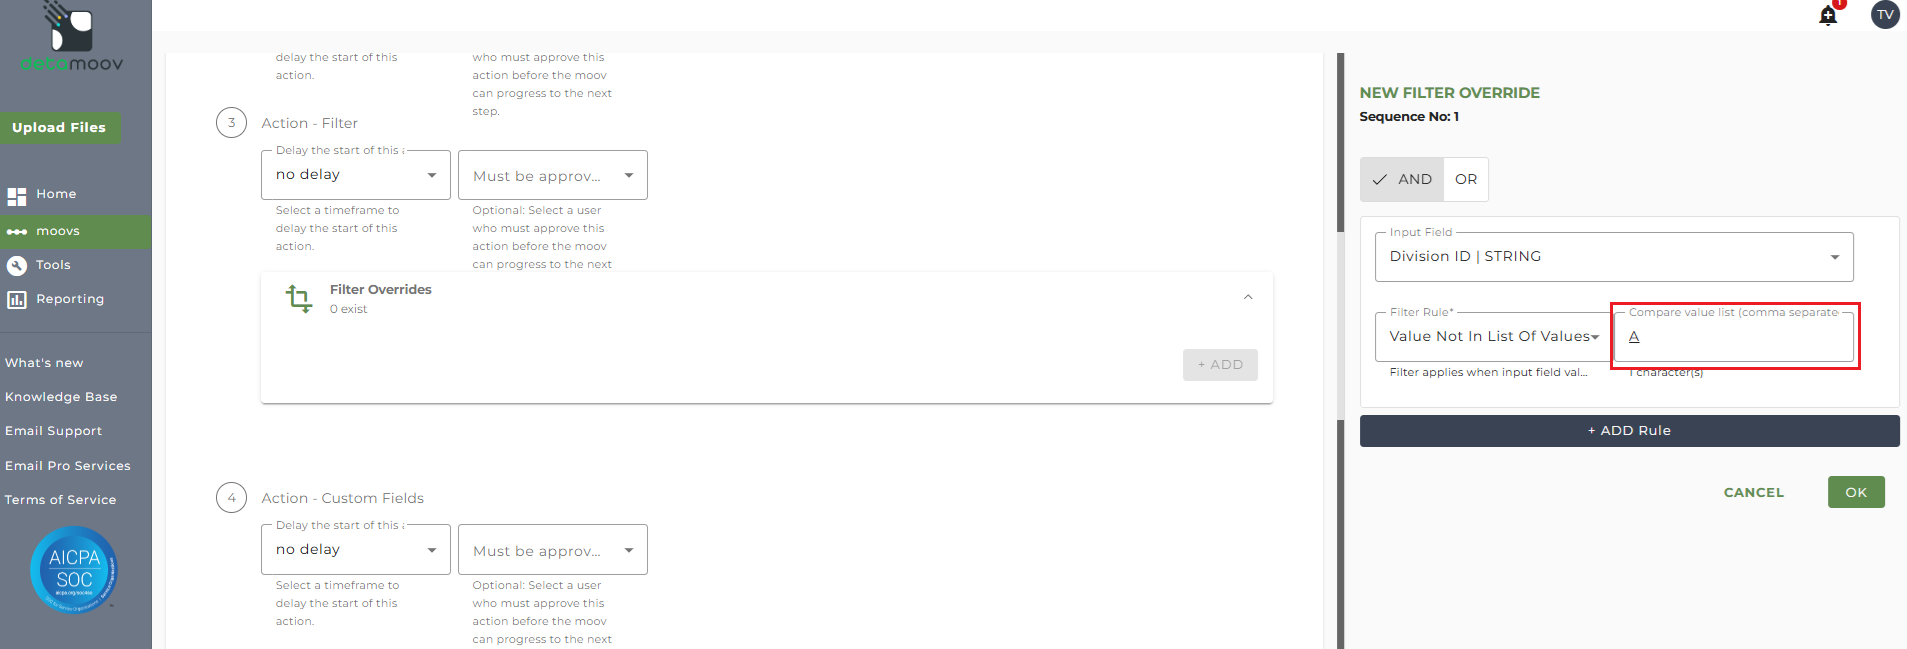
The above filter override will need to be repeated for each Division ID you expect in the feedback file. Any other Filter steps beyond the number of Division IDs you expect should not be changed.
Once you have provided a filter override for each Division ID, scroll to the bottom of the page and Click Next. Then click Save on the summary page.
Configuring the July Services Deduction Feedback to PrismHCM moov
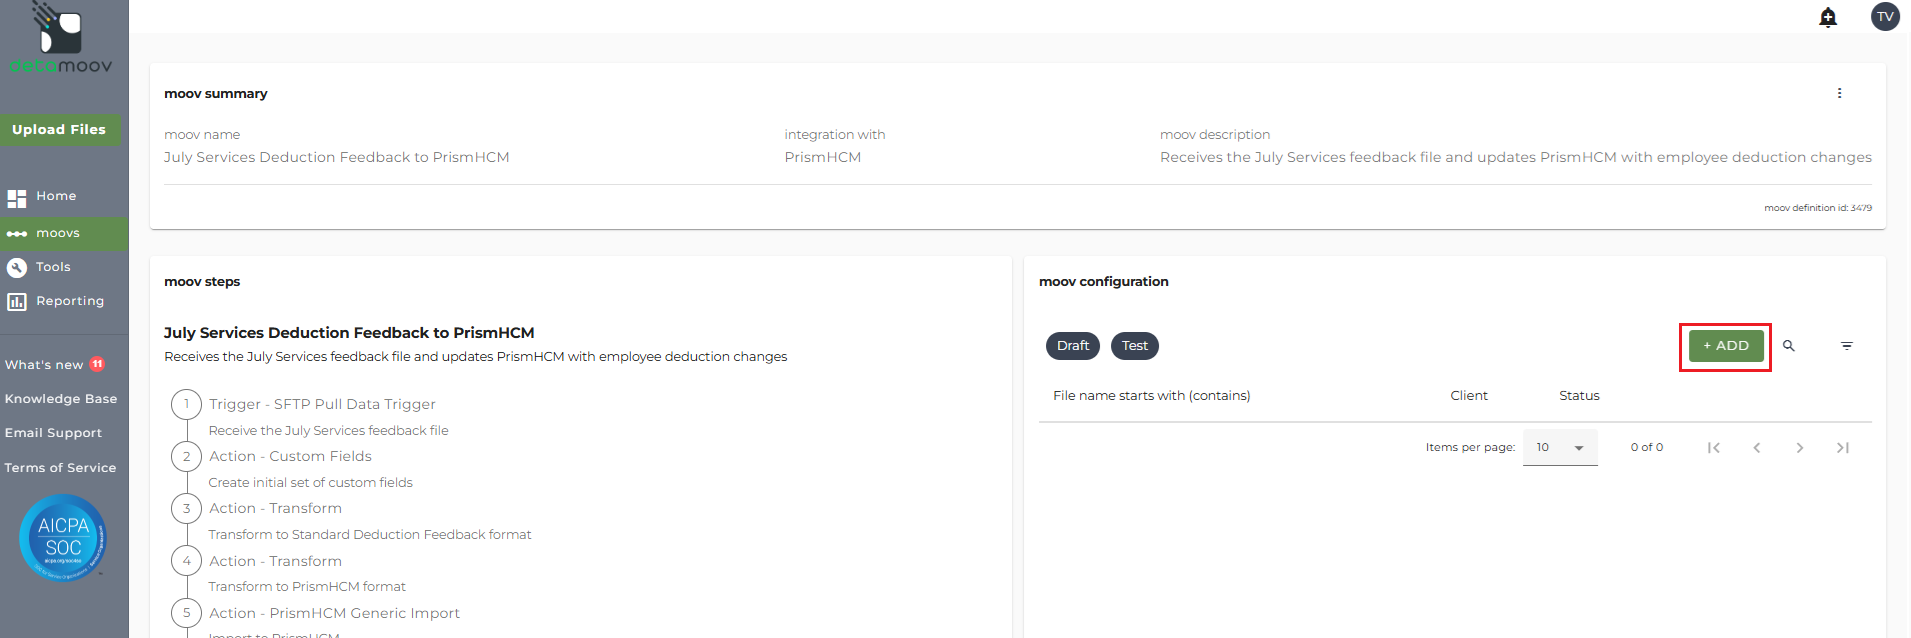
Each client location will need to be separately configured for the July Services Deduction Feedback to Prism HCM moov. To adopt this moov, click moovs on the left, click the Add button in the upper right, locate and click on the July Services Deduction Feedback to Prism HCM moov. Then click ADD THIS MOOV.
Once the July Services Deduction Feedback to PrismHCM moov has been added to your account, access the moovs section on the left side menu and click on the July Services Deduction Feedback to PrismHCM moov.

The July Services Deduction Feedback to PrismHCM moov provides a notification once the moov is complete with a summary of the retirement plan and loan changes that were made in PrismHCM. The notification can be sent to any email address you wish and can also be configured to send to multiple email addresses.
To edit the send file step, click on the cog icon under the Action - Send File step on the left. Then toggle the "Use default parameters" off and enter in the email addresses you would like to receive the notification. If you would like to enter multiple email addresses, separate them with a comma. A Reply to email is also required in the event that a recipient of the notification replies to the email.
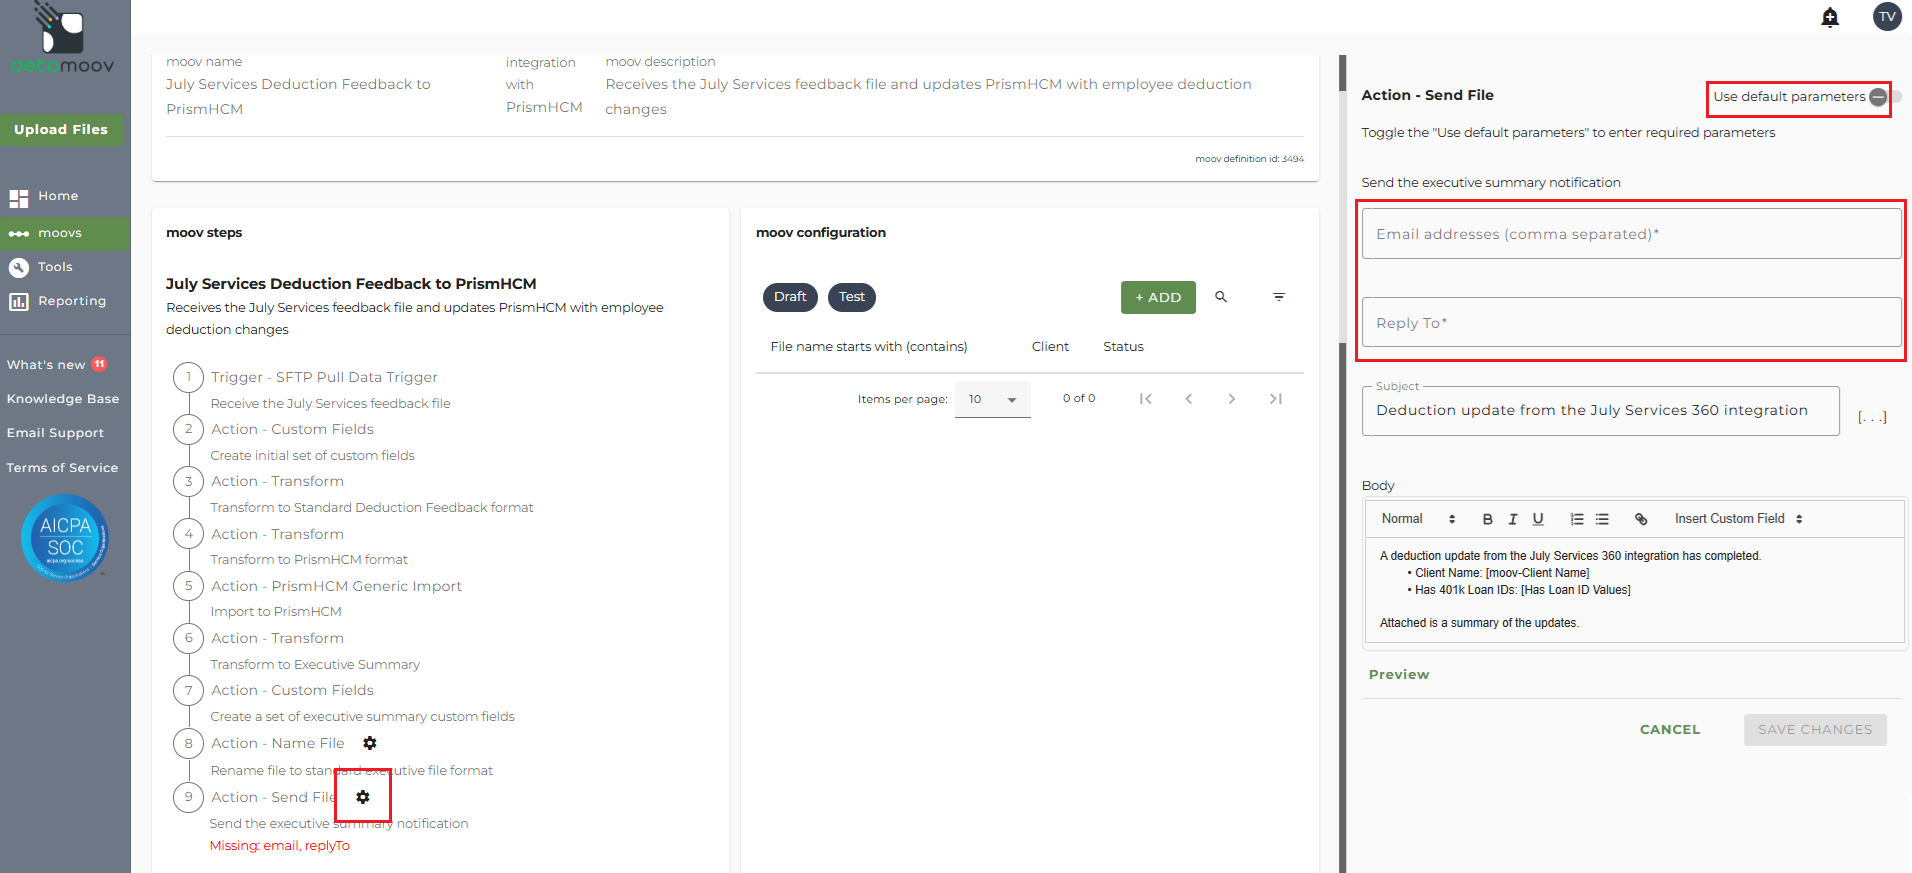
Note: these settings apply to any client configuration you set up for this specific moov. You also have the ability to configure the send file step for each client configuration if you wish to add or remove email addresses per client.
To save your parameters click on the Save Changes button.
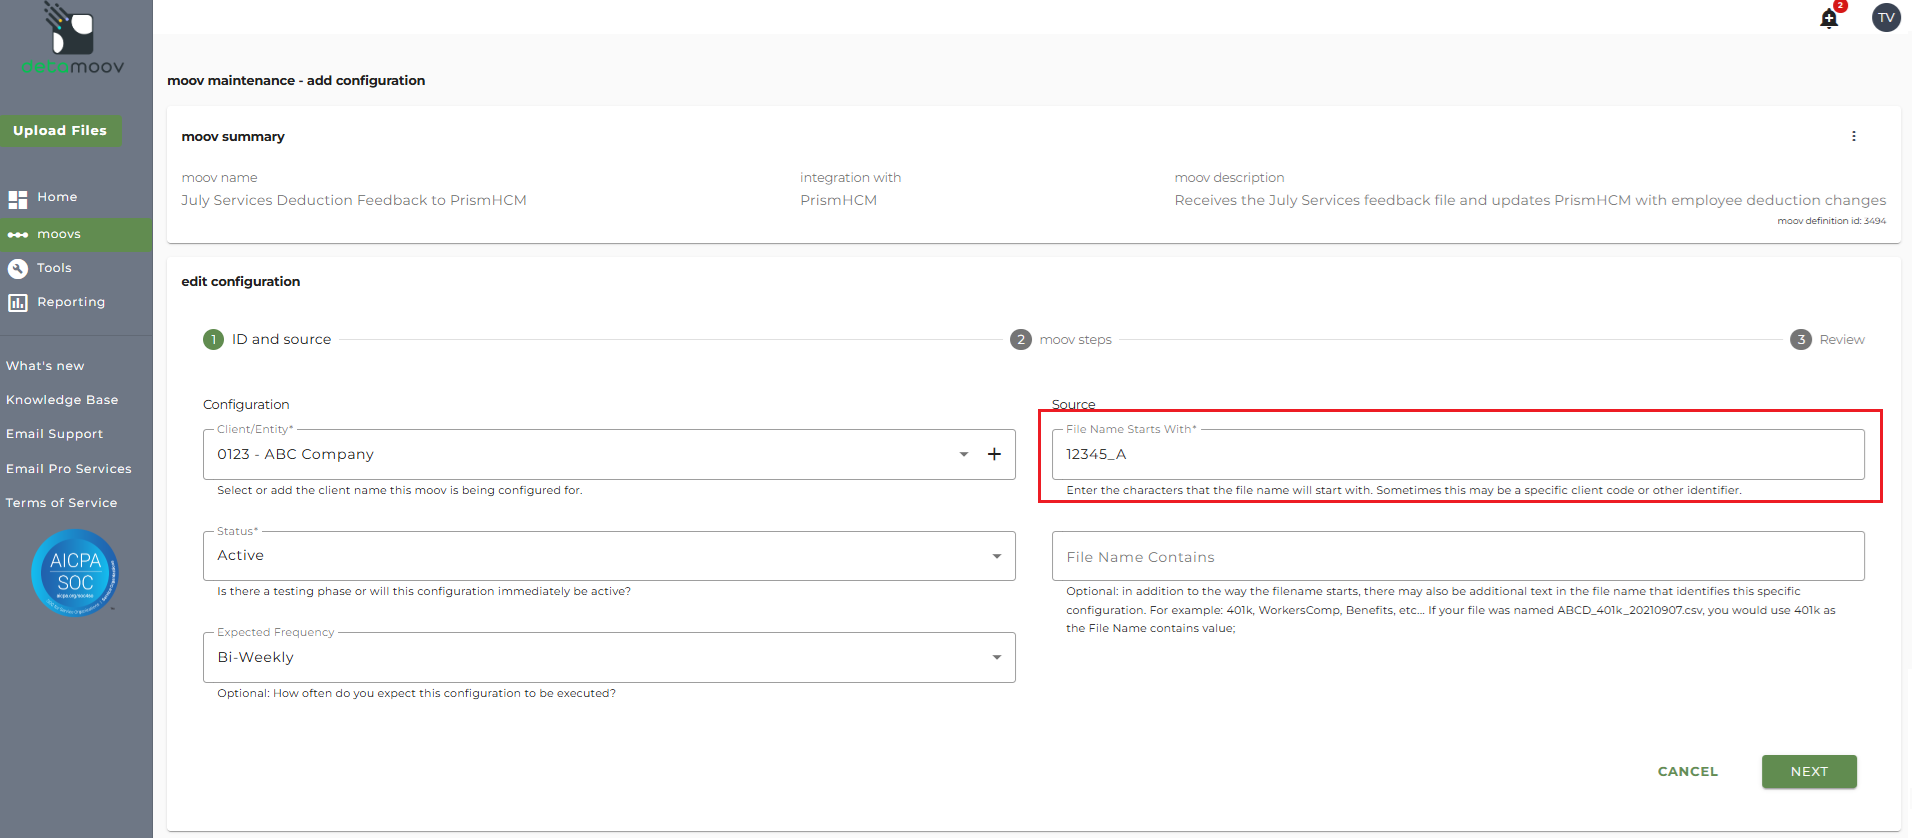
In the moov configuration section, click the Add button to add a new client to the moov.
Client/Entity - either select an existing client or click the + sign to create a new client.
Status - Set to Active
Expected Frequency - the client's payroll frequency
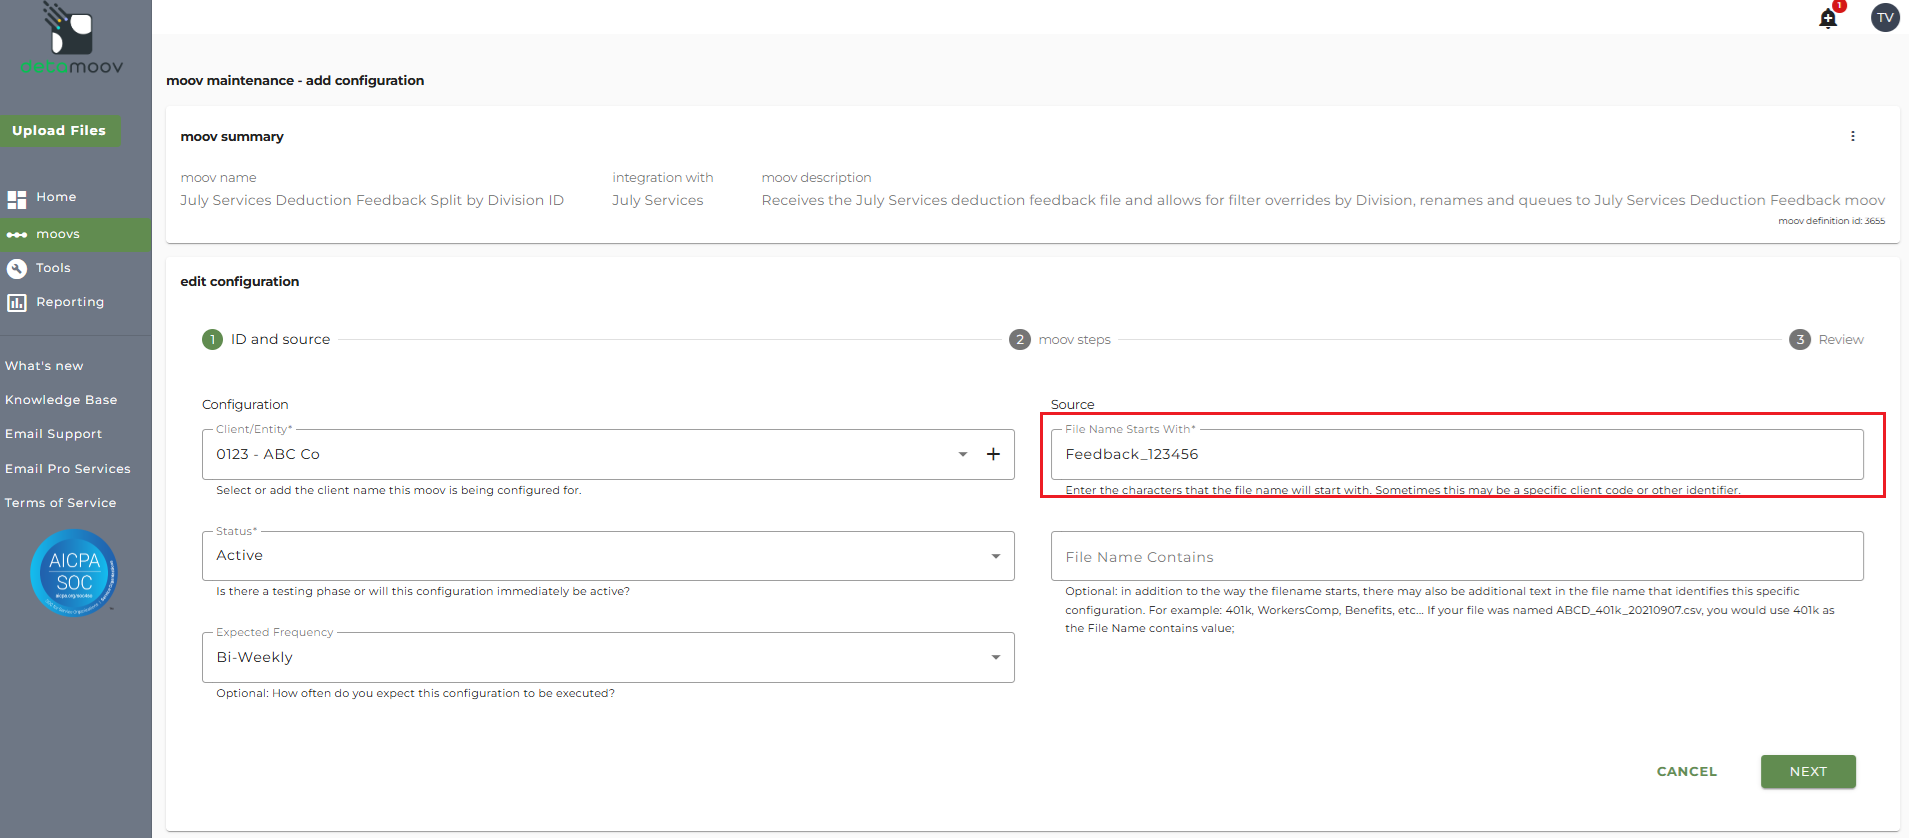
File Name Starts With - [July Services Plan ID]_[Division ID]
File Name Contains -
When adding a new client configuration it is important to understand the naming convention used in the July Services Deduction Feedback Split by Division ID moov. Each Division file is renamed using the naming convention:
[July Services Plan ID]_[Division ID]_YYMMDD.csv
Note: make sure that the File Name Starts with field matches as this can cause issues pulling the July Services feedback file and updating PrismHCM.
To ensure that each Division ID file is associated with the correct client configuration, the File Name Starts With field must be correct. For example, if we provided a filter override for Division ID 'A' and the Plan ID is 12345, our ID and Source would look like this:
Click Next once you have completed the ID and source section.
Important: The SFTP Pull Data Trigger section should NOT be configured when you are using the July Services Deduction Feedback Split by Division ID moov.
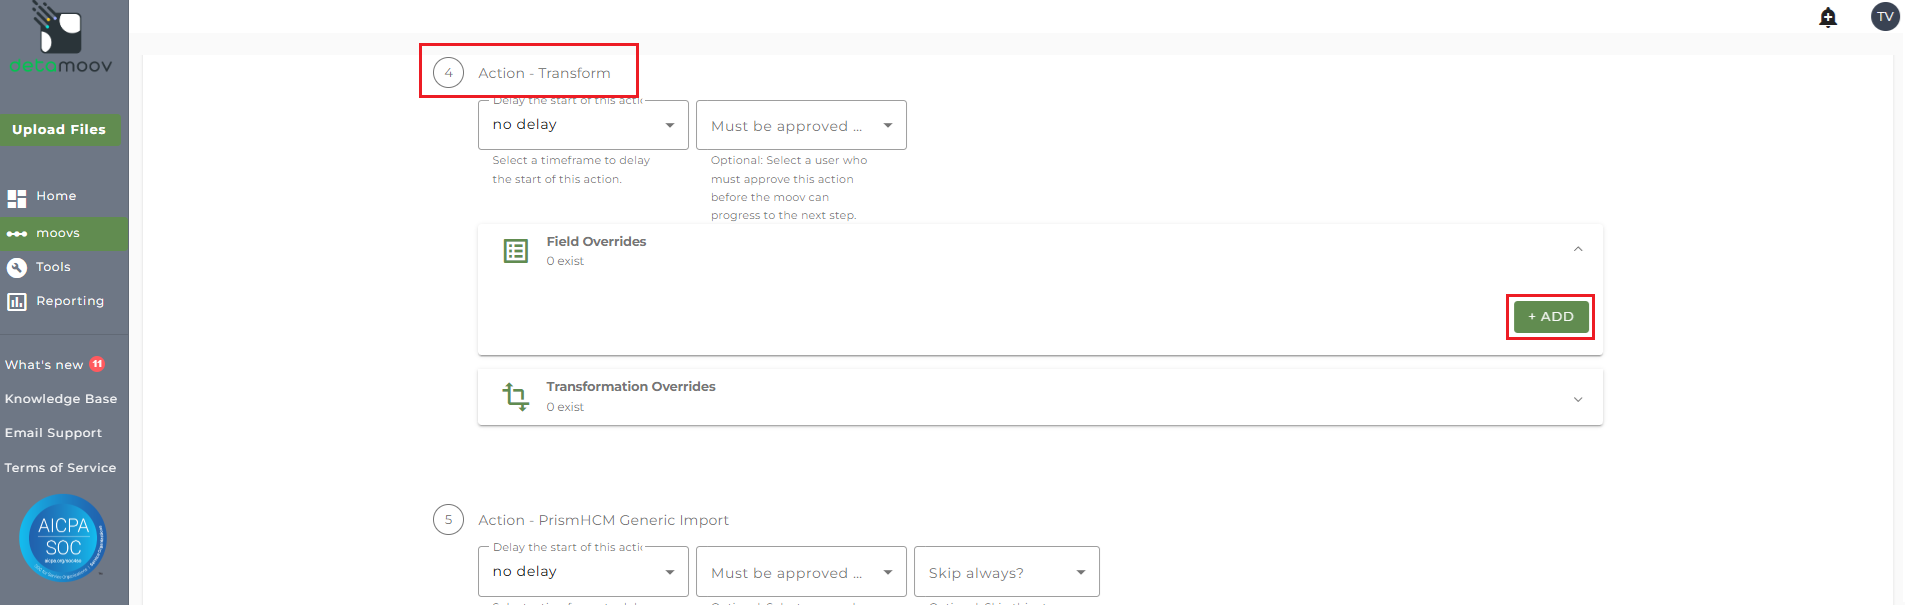
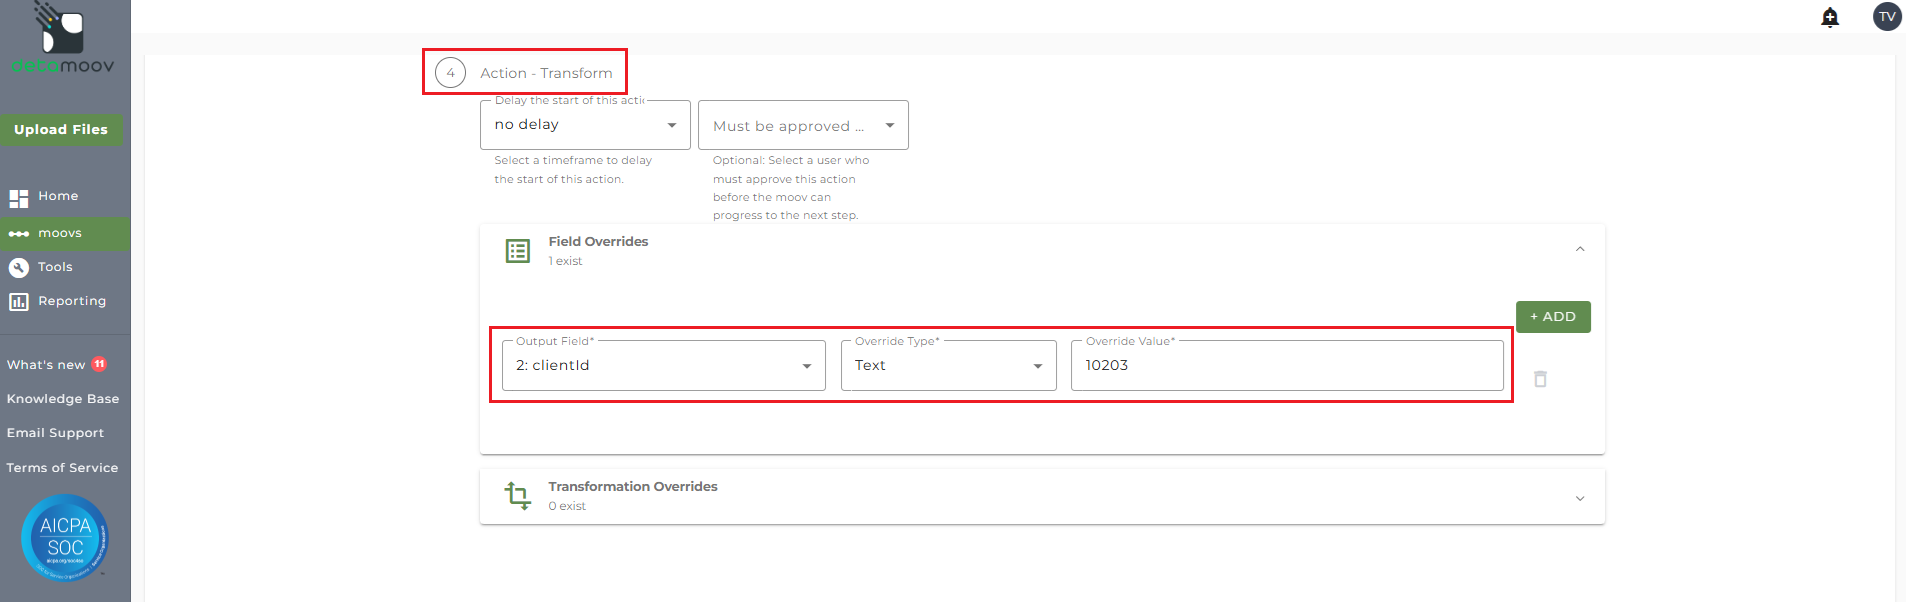
The clientId field is required to properly update the client in PrismHCM. To provide the clientId, locate step 4 Action - Transform, click the File Overrides panel and then click the ADD button.
NOTE: There are three separate Transform steps on the July Services Deduction Feedback to PrismHCM moov. Make sure are you creating the field override on step 4 Action - Transform.
Then select field 2: clientId and enter in the client ID in the Override Value field.
Transformation Overrides - Contribution Codes
The table below shows the July Services deduction code for the employee, the code detamoov maps the July Services code to by default, and the associated PrismHCM Deduction Field:
Deduction Code Table
| July Services Code | detamoov Code | PrismHCM Deduction Field |
| 401K | 401k | 8: employeePreTaxContributionCode |
| ROTH | 401k Roth | 24: employeeRothContributionCode |
| LOAN | 401k Loan | 49: employeeRetirementLoanDeductionCode |
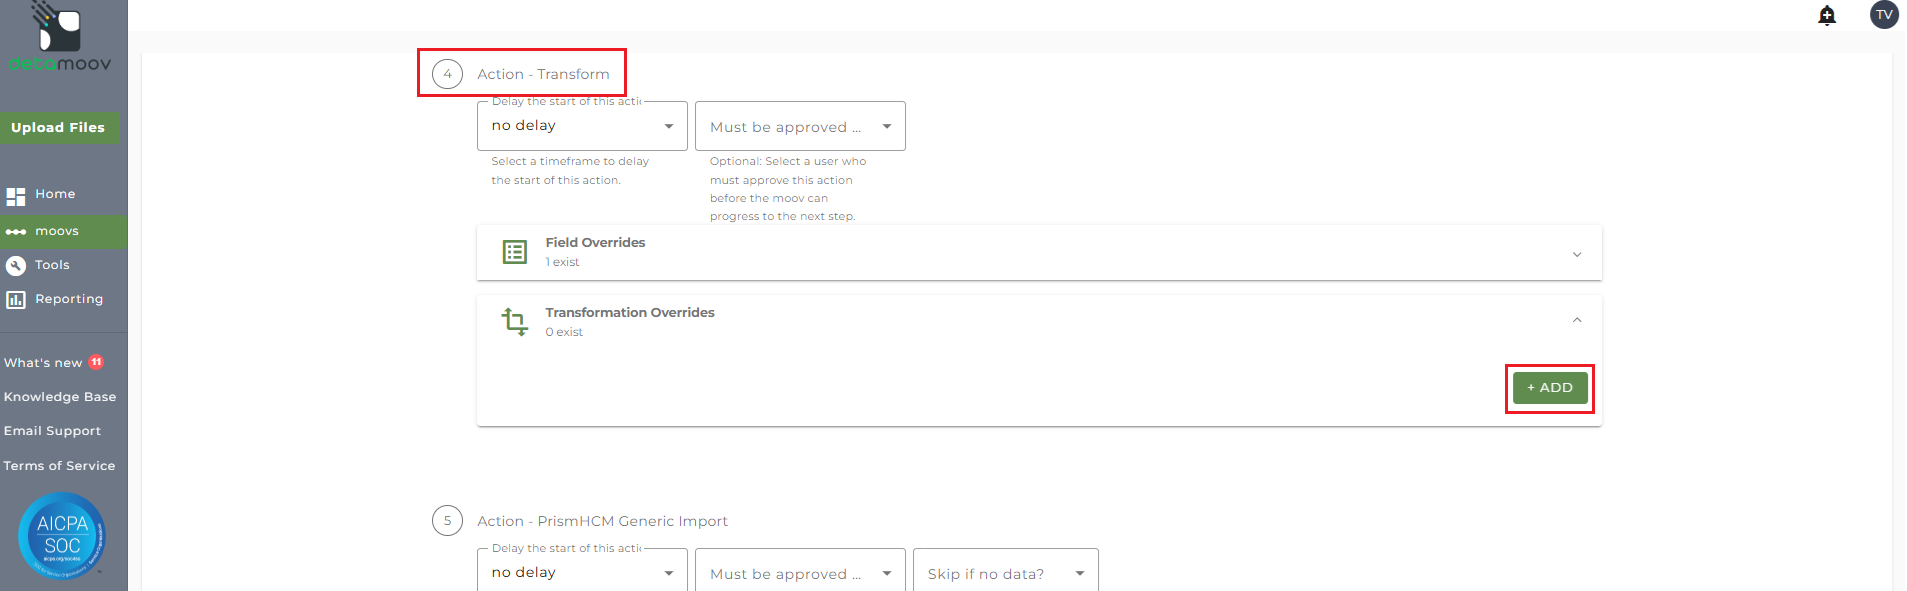
Each PrismHCM deduction code is client specific and must be provided for each type of contribution. For example, if your client's deduction code for PreTax is 401k-1, then an override is required for field 8: employeePreTaxContributionCode. To provide the deduction code for your client, locate step 4 Action - Transform, click the Transformation Overrides panel and click the ADD button.
NOTE: There are three separate Transform steps on the July Services Deduction Feedback to PrismHCM moov. Make sure are you creating the field override on step 4 Action - Transform.
Then select field 8: employeePreTaxContributionCode and click the ADD OVERRIDE button.

On the override page, enter in your client's deduction code in the'With' field for the Replace/Remove String Transformation Rule and click OK. For our example, the value '401k-1' is entered.
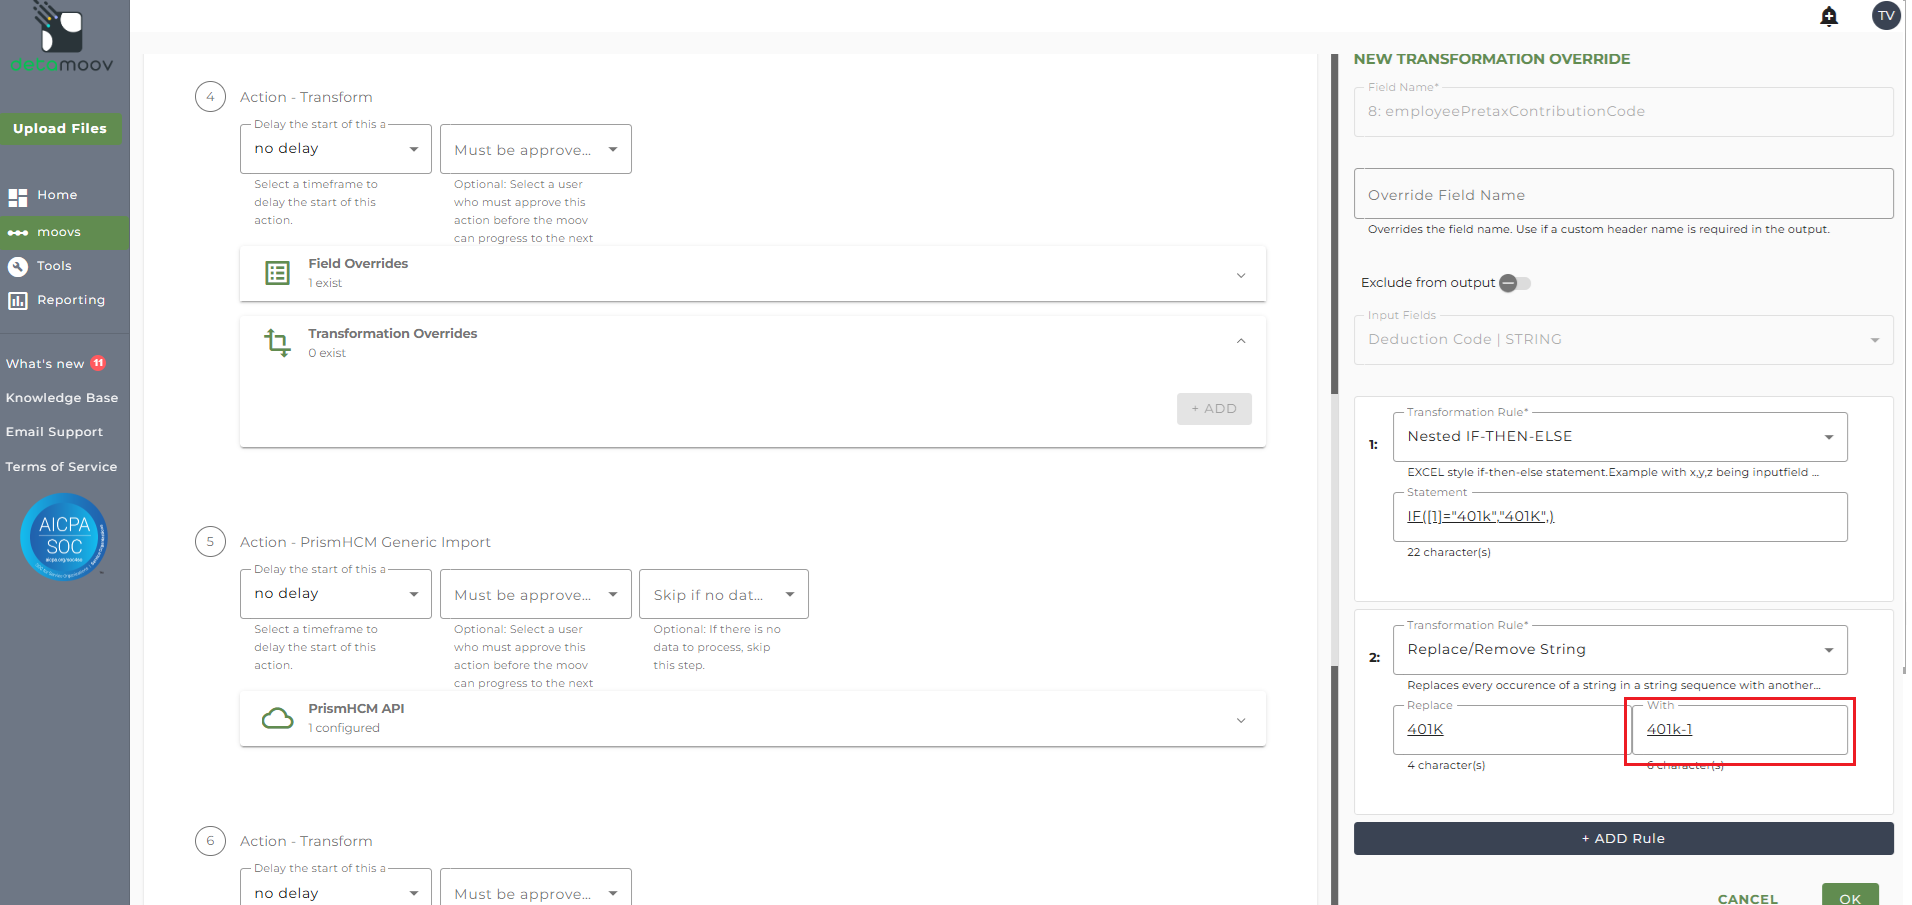
Repeat the transformation override for each of your client's PrismHCM deduction codes.
Configure the PrismHCM Generic Import step
The PrismHCM Generic Import step uses your PrismHCM API credentials to update the specified client Id. To configure the PrismHCM Generic Import step for you client, locate the Action - PrismHCM Generic Import step, expand the PrismHCM API panel and click ADD.
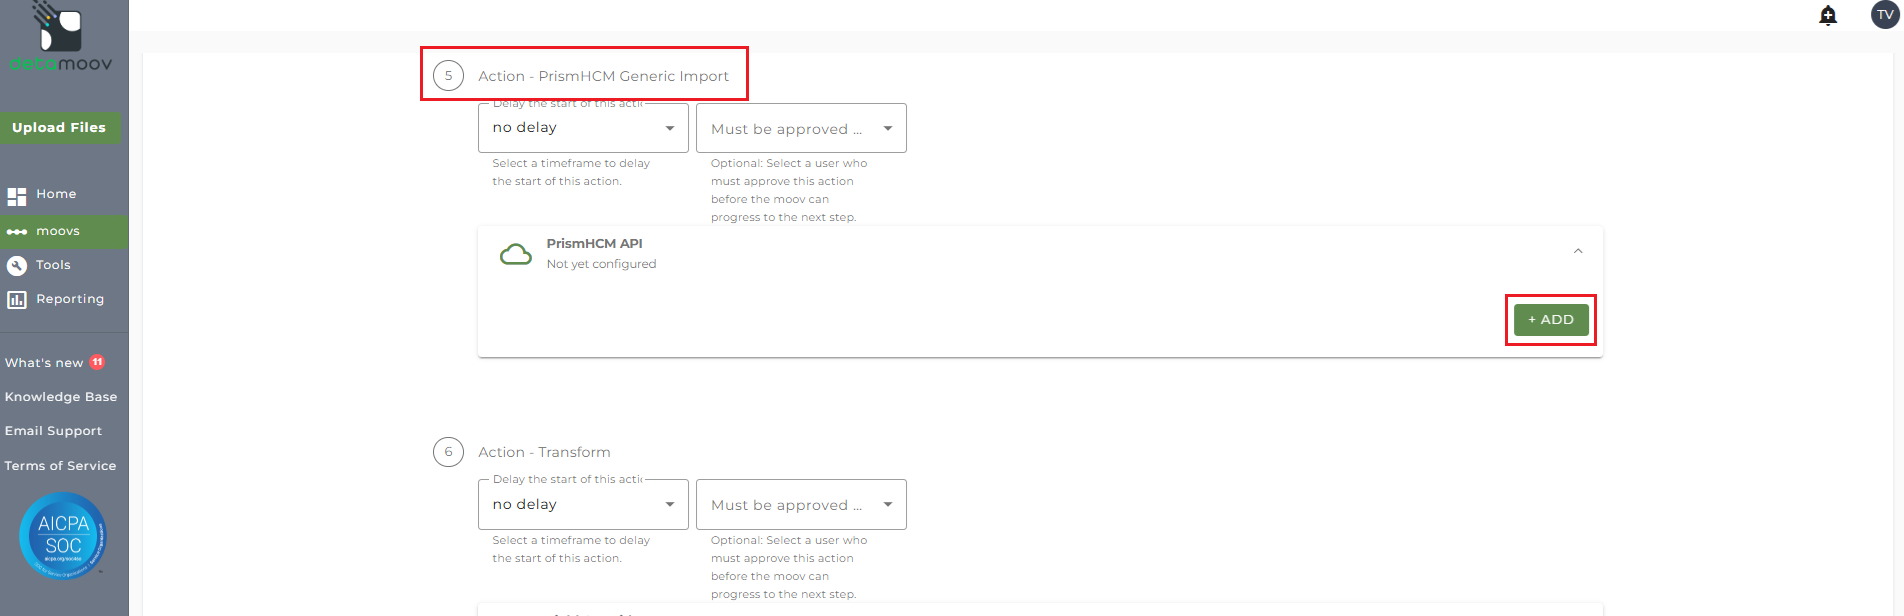
On the side panel that appears, select your PrismHCM Premier Integration, enter in the Client Id and click OK.

At the beginning of this article you configured the send file step for the moov to send a notification once the moov had completed. You also have the ability to configure the send file step for each client configuration if you wish to add or remove email addresses per client.
To override the send file step, locate the Action - Send File step and toggle the "Use default parameters" off and enter/remove email addresses from Email Address and Reply To fields. If you would like to enter multiple email addresses, separate them with a comma.

To complete the configuration for your client, click the Next button at the bottom of the page and then the Save button on the moov summary page.

