
IMPORTANT: The Standard 401k to Corebridge Financial moov requires a custom built moov and payroll specific SFTP credentials. Before you can configure the moov, detamoov will need to build the custom moov on your account. Please contact us at [email protected] to request integration.
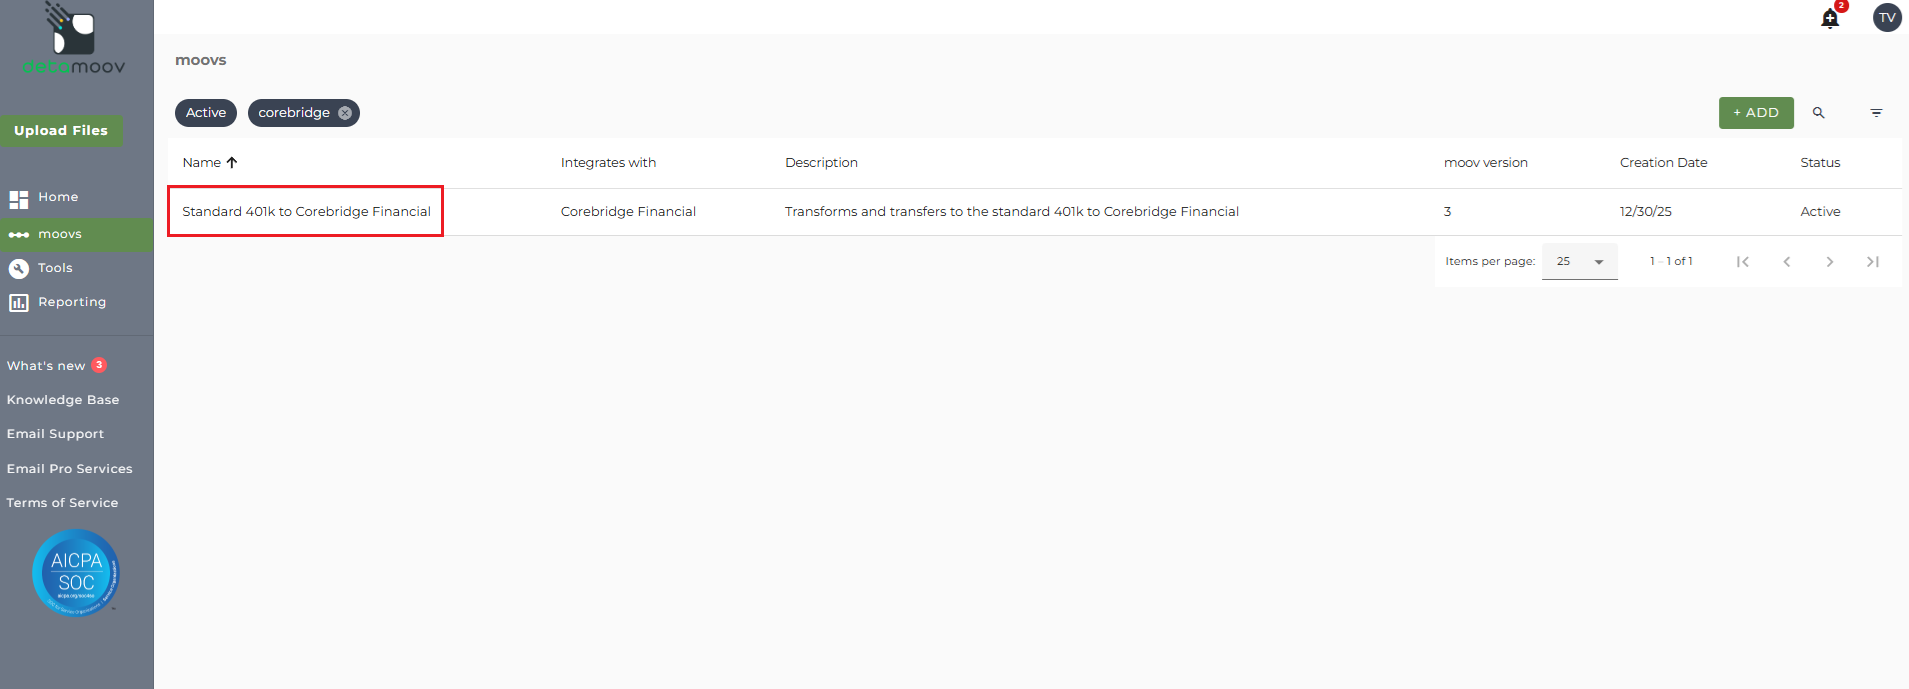
Once the Standard 401k to Corebridge Financial custom moov has been added to your account, access the moovs section on the left side menu and click on the Standard 401k to Corebridge Financial moov.
The Standard 401k to Corebridge Financial moov provides a notification for when the moov is complete. The notification can be sent to any email address you wish and can also be configured to send to multiple email addresses.
To edit the notification step, click on the cog icon under the Action - Notify step on the left. Then toggle the "Use default parameters" off and enter in the email addresses you would like to receive the notification. If you would like to enter multiple email addresses, separate them with a comma. A Reply to email is also required in the event that a recipient of the notification replies to the email.
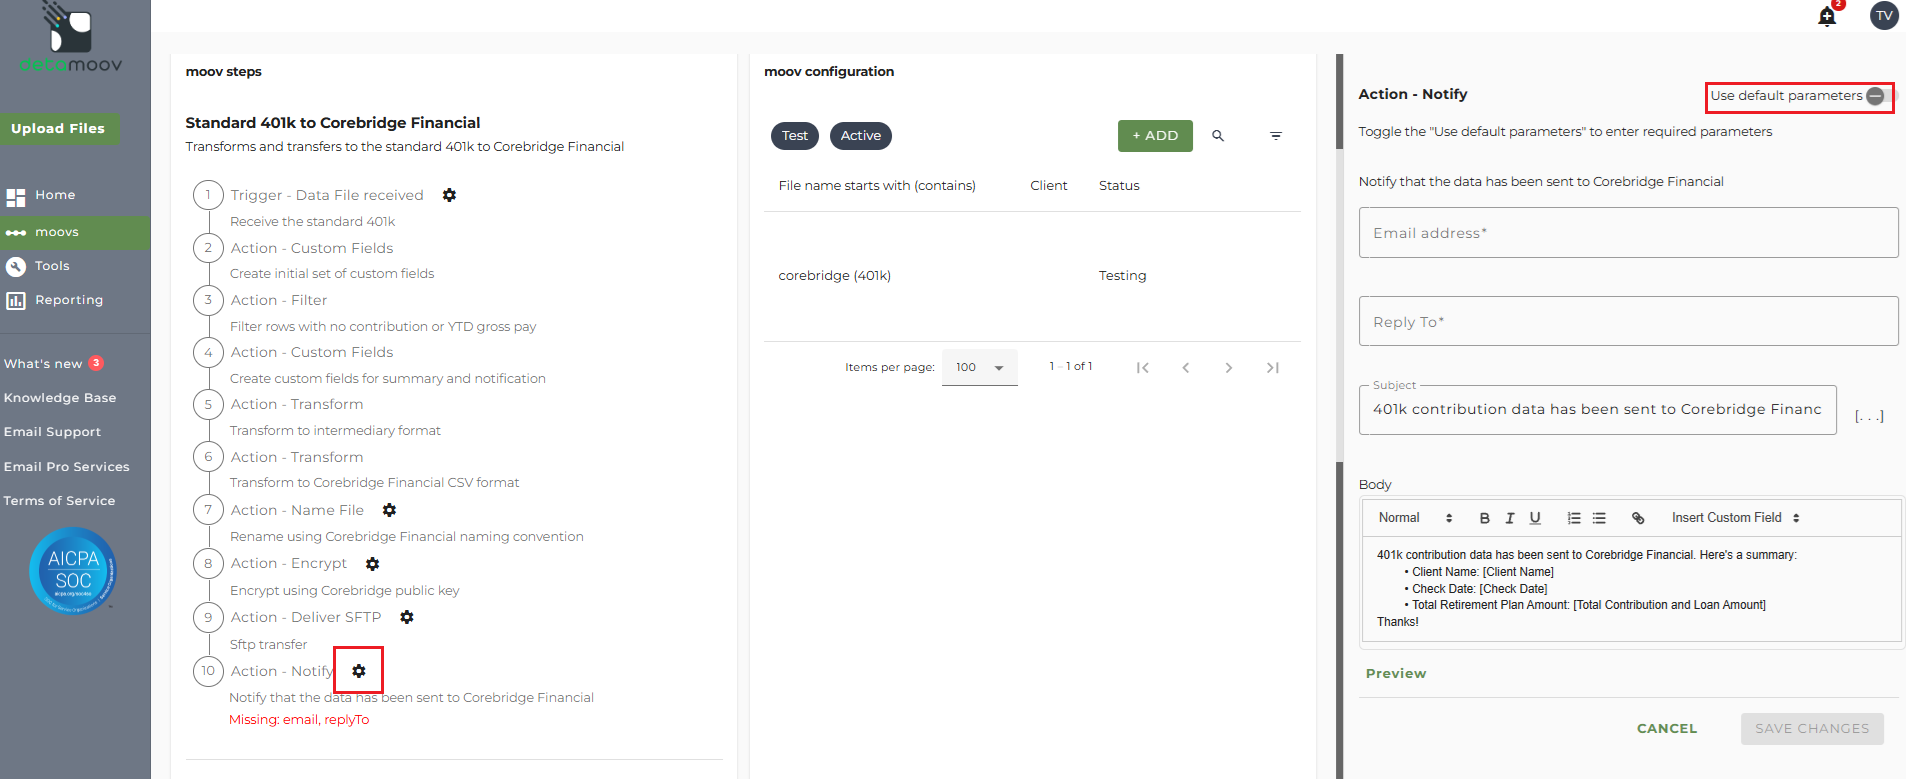
Note: these settings apply to any client configuration you set up for this specific moov. You also have the ability to configure the notification step for each client configuration if you wish to add or remove email addresses per client.
To save your parameters click on the Save Changes button.
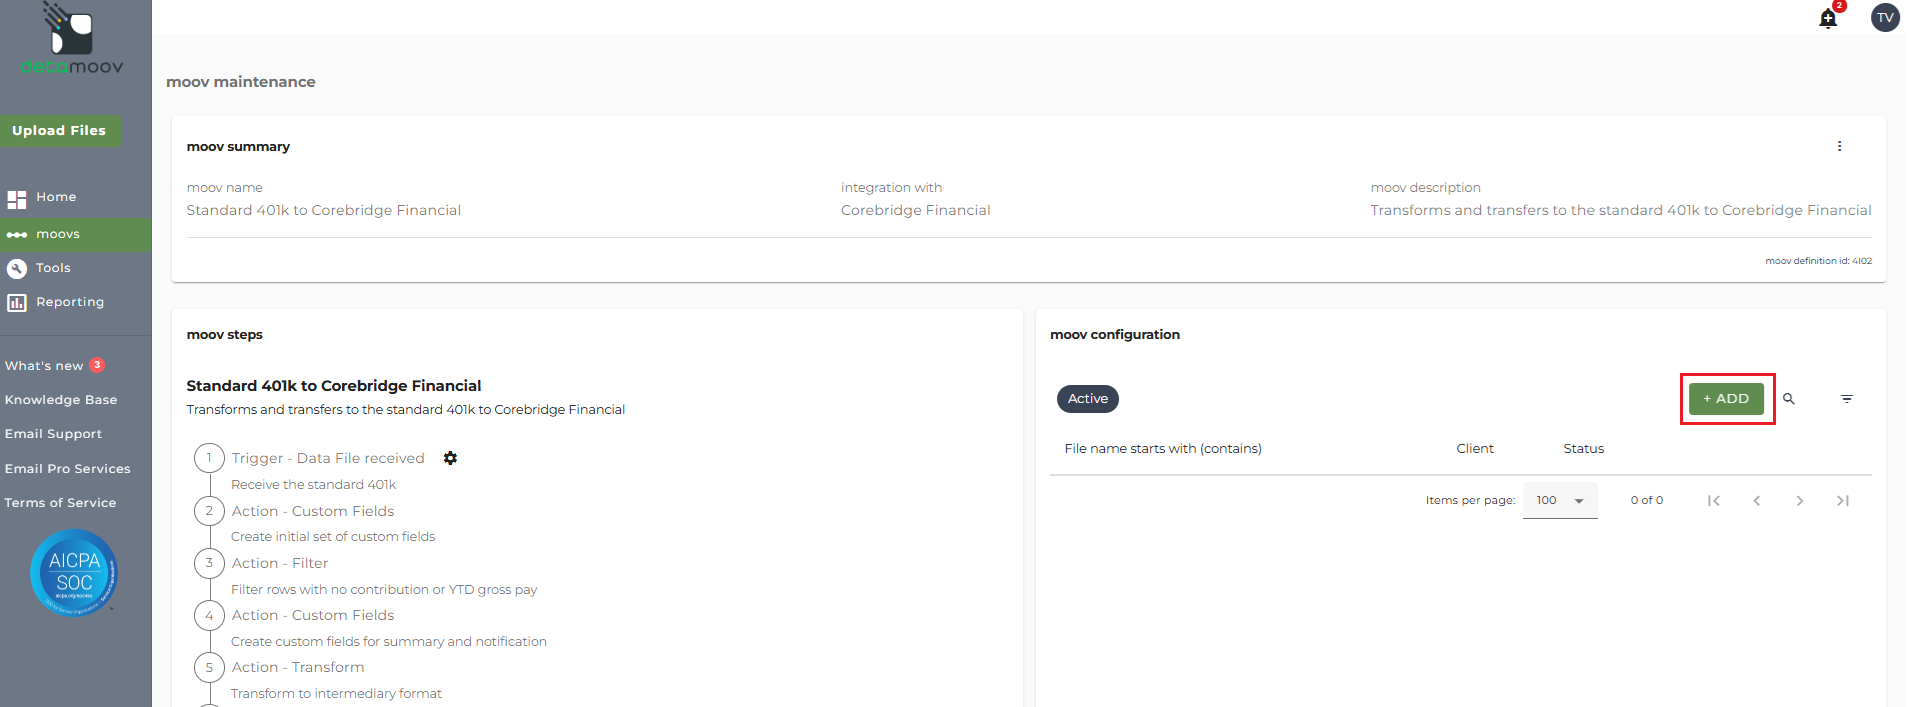
In the moov configuration section, click the Add button to add a new client to send retirement data to Corebridge Financial.
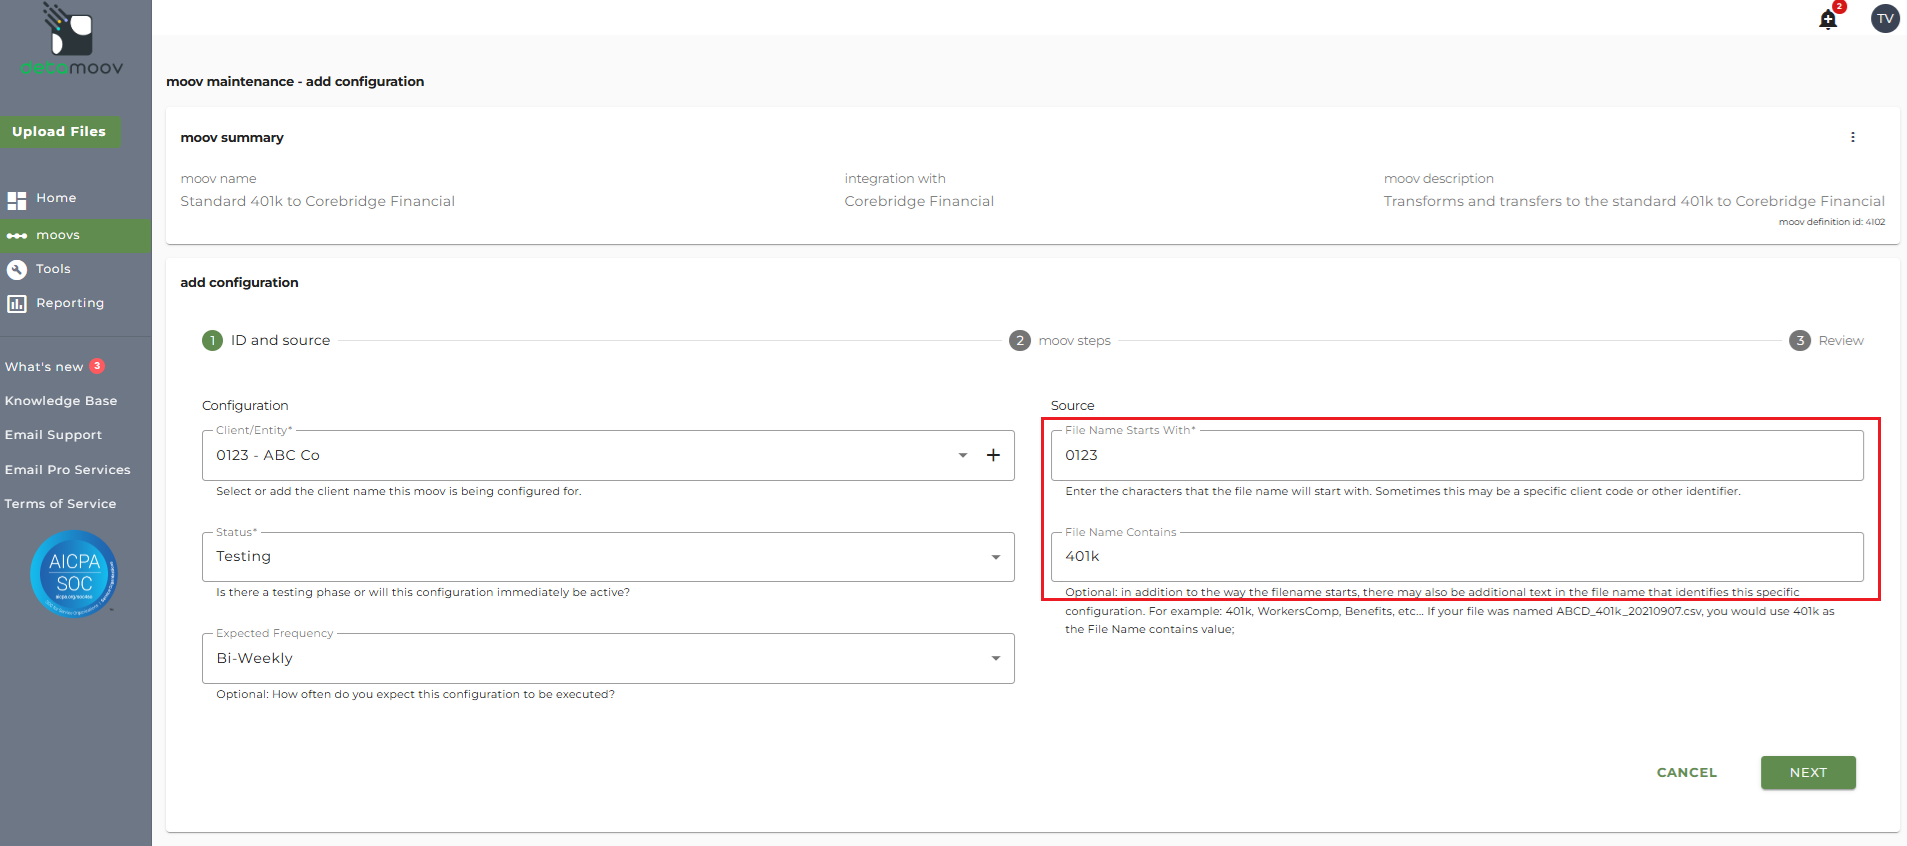
Client/Entity - either select an existing client or click the + sign to create a new client.
Status - the status field is important when configuring a new integration with Corebridge as it provides the correct SFTP directory used to send to Corebridge while in their testing phase. This field should be set to 'Testing' until the testing phase has been completed.
Expected Frequency - the client's payroll frequency
File Name Starts With - typically the client or company code within your payroll platform. The value entered into this field is important as the file you send to detamoov must start with this value.
File Name Contains - optional value that is included in the file name
Corebridge Financial File Specifications
For more information on the Corebridge Financial file specifications detamoov uses to transform the Standard 401k extract file, please visit the Standard 401k to Corebridge Financial help page.
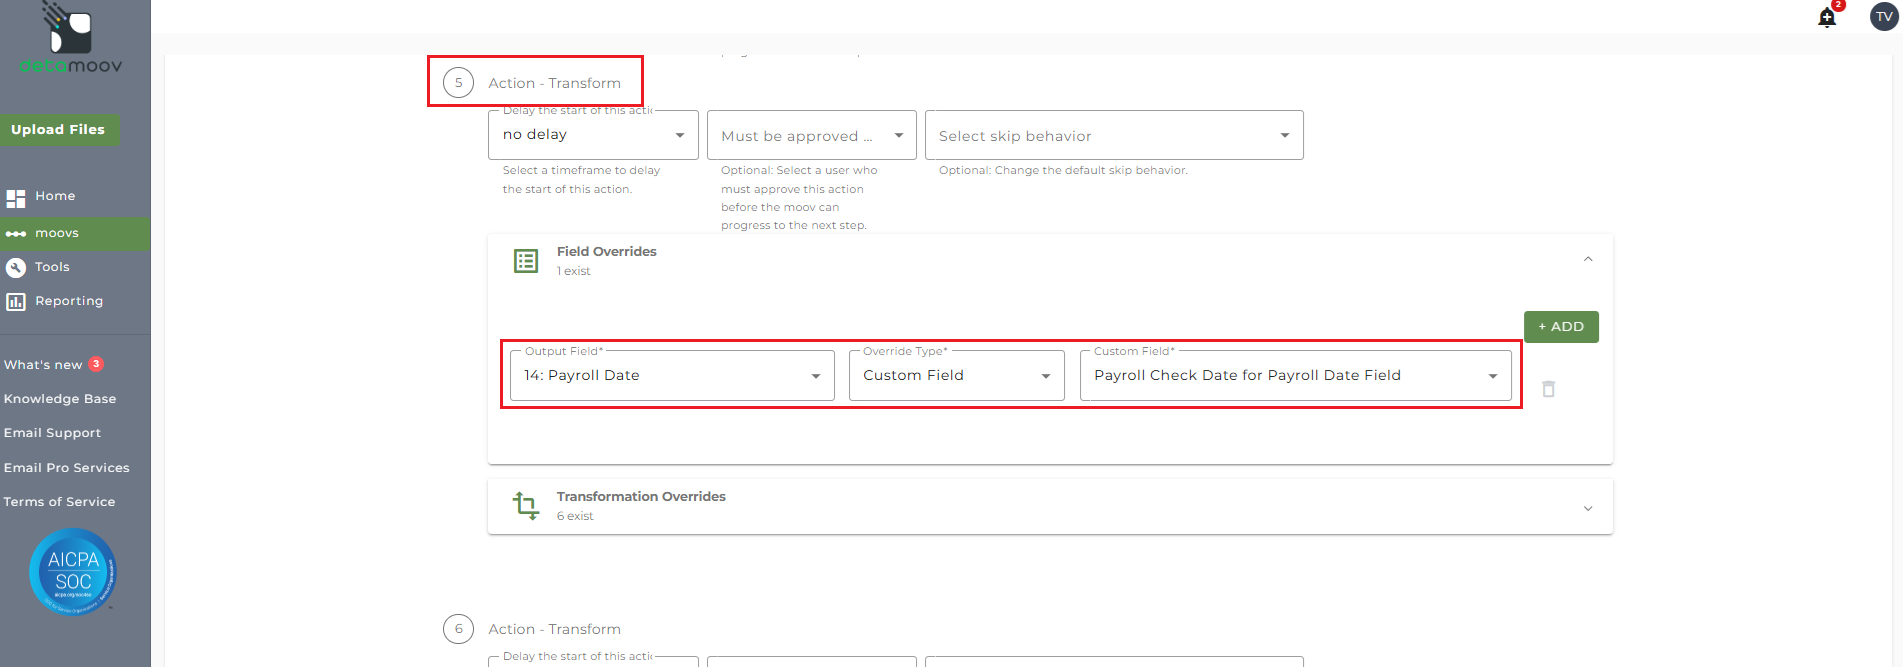
If you are a UKG Ready user and an employee was not paid in the current pay period, a field override is needed to provide the Payroll Date. detamoov has provided custom fields that take the existing dates from the source file and allow you to apply them to the missing fields.
To provide the override custom fields locate step 5: Action - Transform, click the Field Overrides panel, and click the Add button. Then select the appropriate field from the Output Field dropdown, change the Override Type to Custom Field, and then select the Custom field from the dropdown menu as shown below:
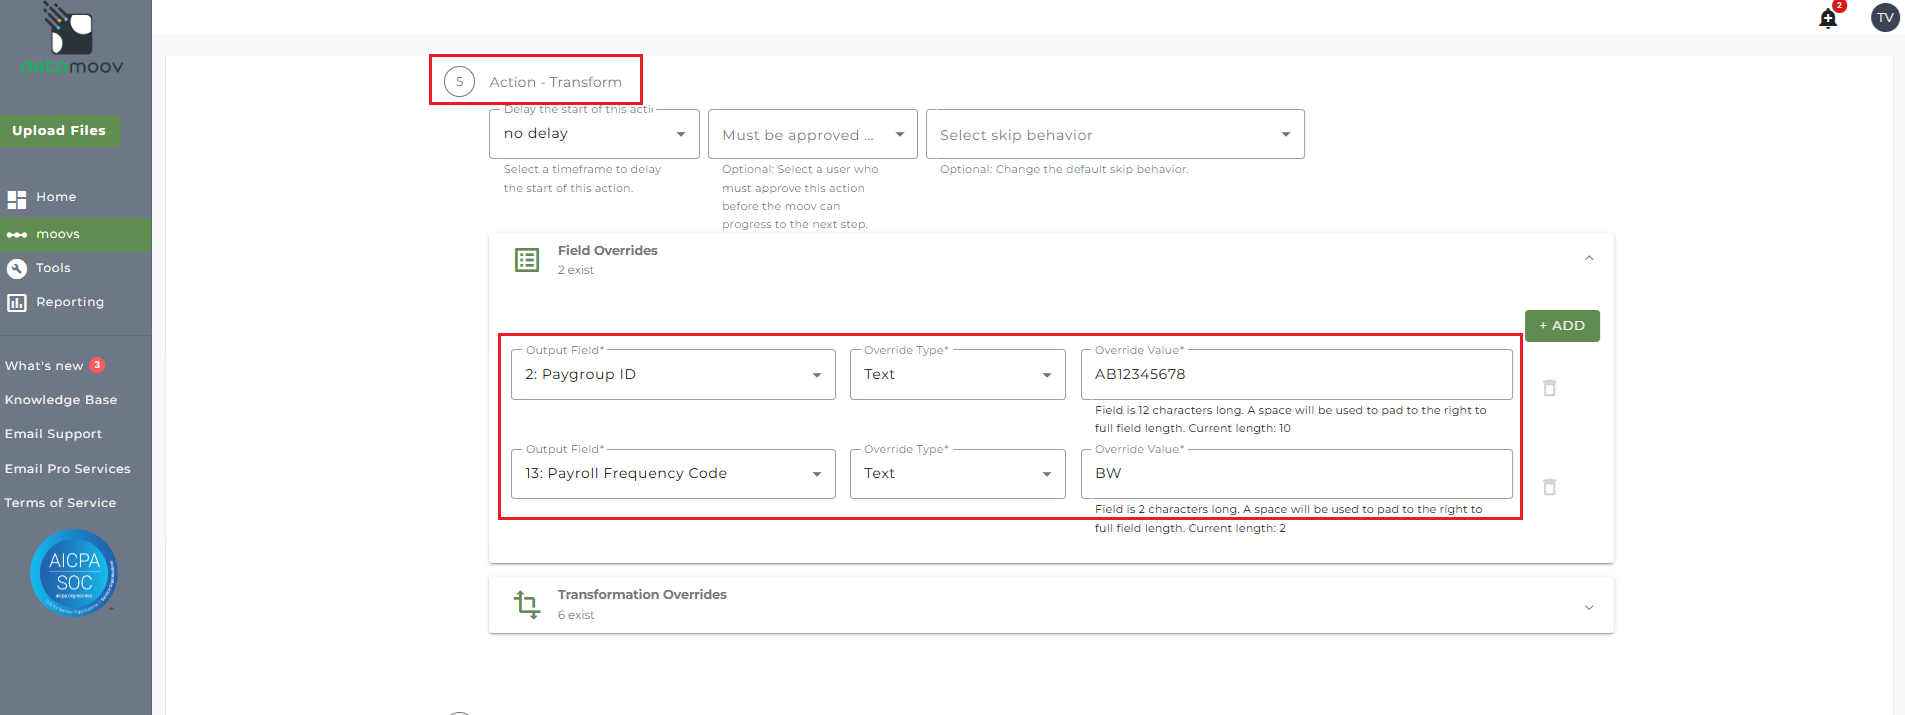
Corebridge Financial requires that the Paygroup ID and Payroll Frequency Code be included for each employee. To include this information a Field Override is required. To add a Field Override locate step 5: Action - Transform, expand the Field Overrides panel and click the Add button. Then select the appropriate Output field, set the Override Type to Text and enter the Override Value.
Corebridge Financial Payroll Frequency Codes
W = Weekly
BW = Biweekly
SM = Semi-Monthly
MO = Monthly
QT = Quarterly
SA = Semi-Annually
AN =- Annually
The contribution and loan fields for each Corebridge Financial plan is custom to that plan and needs to be configured accordingly. Corebridge Financial will provide you with the plan specifications that will outline the contribution field mappings for your client's plan. Here is an example of the mapping:
|
Position |
Field Name |
Char Length |
Data Type |
|
Slot 1 |
Employee Pre Tax Deferral (CS 6) |
7 |
numeric |
|
Slot 2 |
Employee After Tax Roth (CS M) |
7 |
numeric |
|
Slot 3 |
Employer Non Elective (CS 8) |
7 |
numeric |
|
Slot 4 |
Loan Repays |
7 |
numeric |
|
Slot 5 |
Contribution Slot 5 (if not used, zero fill) |
7 |
numeric |
The slot positions in the plan specifications above will need to be mapped to the corresponding detamoov field below using a Transformation override:
Current Payroll Employee PreTax Contribution
Current Payroll Employee Roth Contribution
Current Payroll Employer Match Contribution
Current Payroll Employee PostTax Contribution
Current Payroll Safe Harbor Non Elective
Current Payroll Safe Harbor Employer Match
Current Payroll Non Elective Contribution
Current Payroll Qualified Elective Contribution
Current Payroll Qualified Matching Contribution
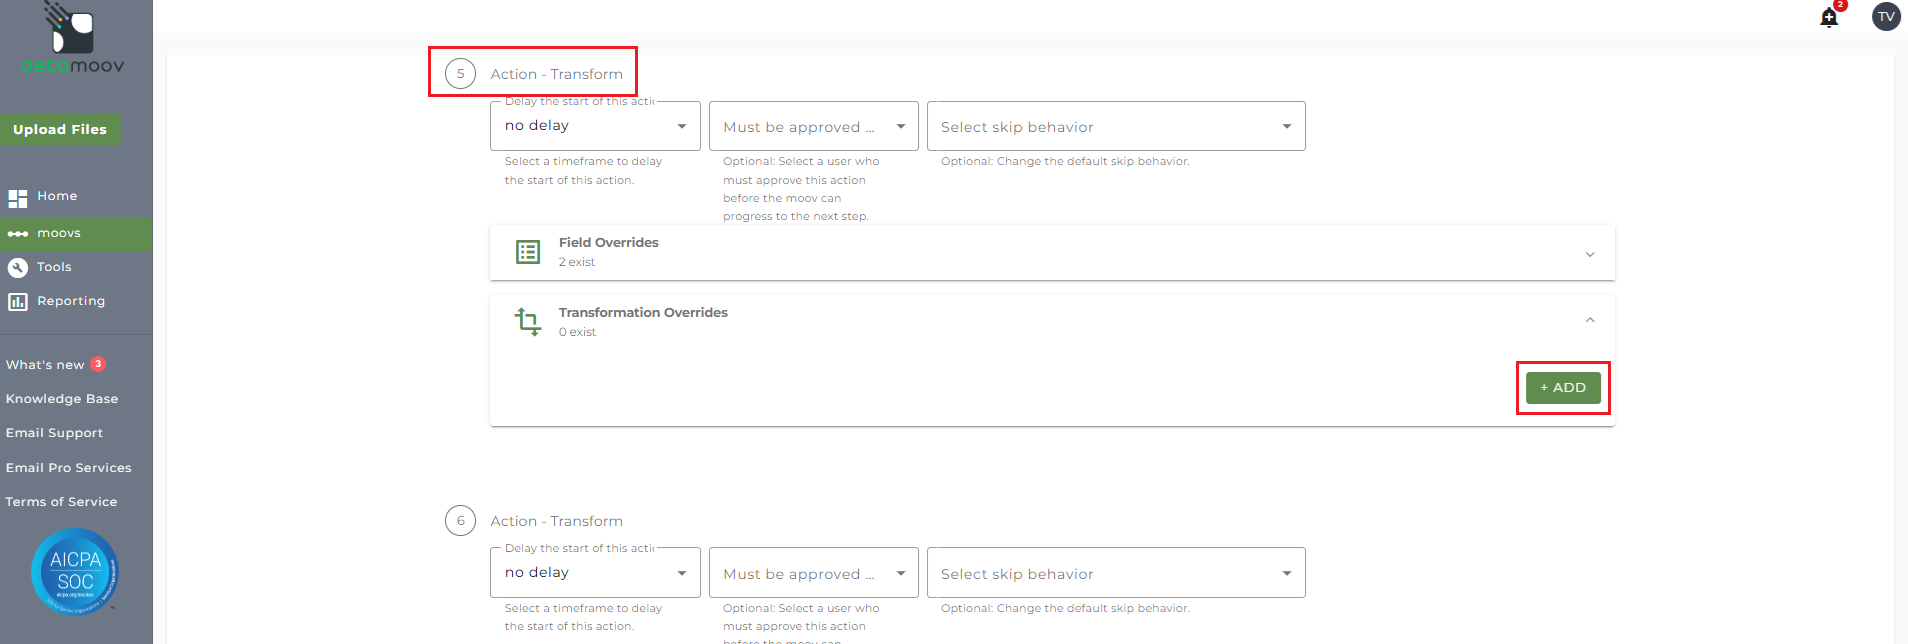
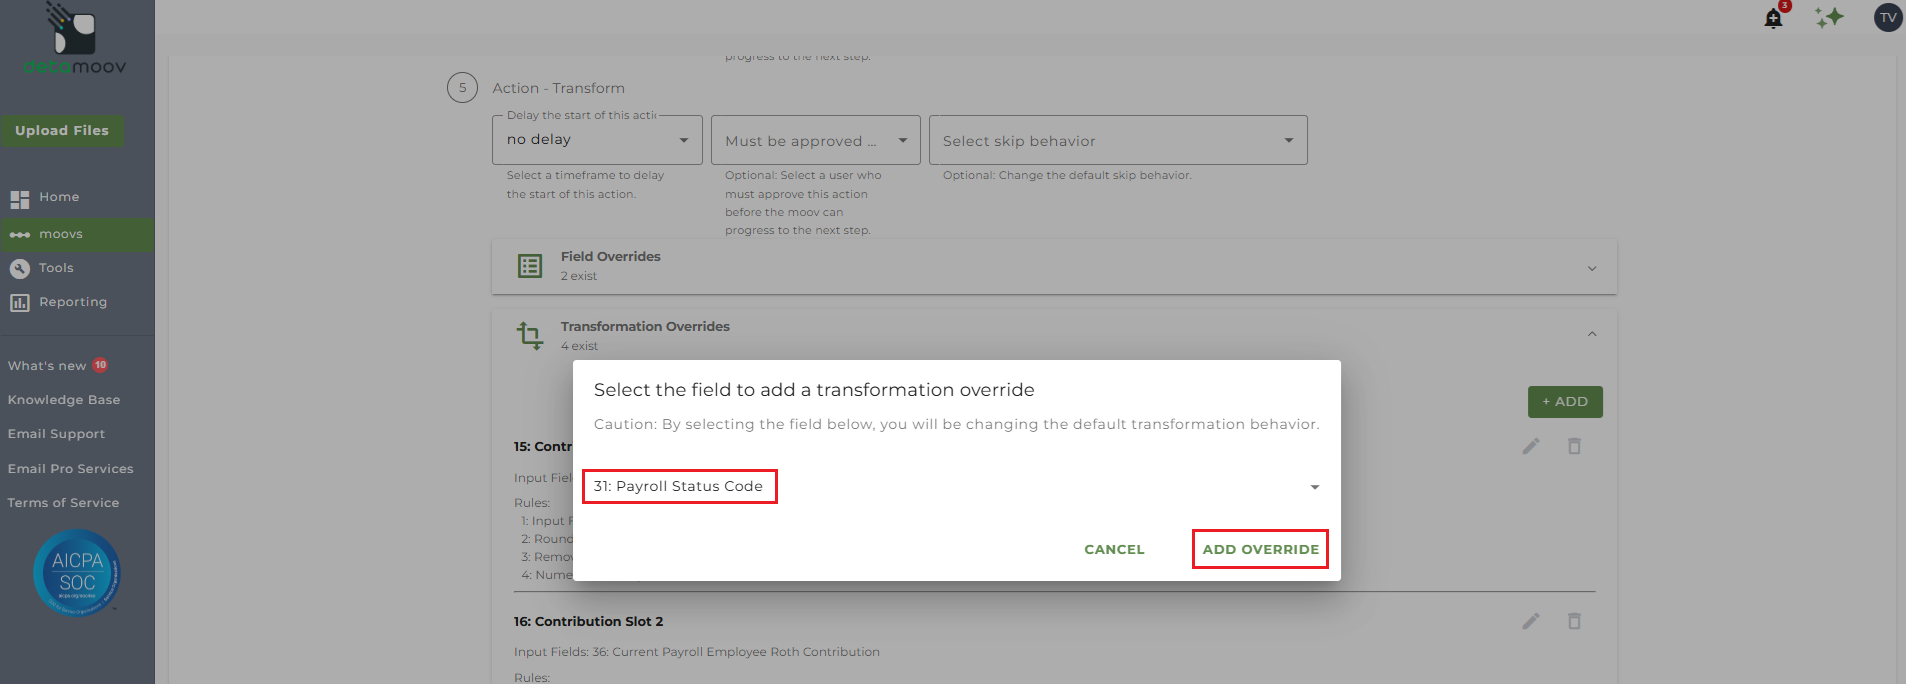
For example, to map the Employee Pre Tax Deferral in Slot 1, locate step 5: Action - Transform, expand the Transformation Overrides panel and click the Add button.
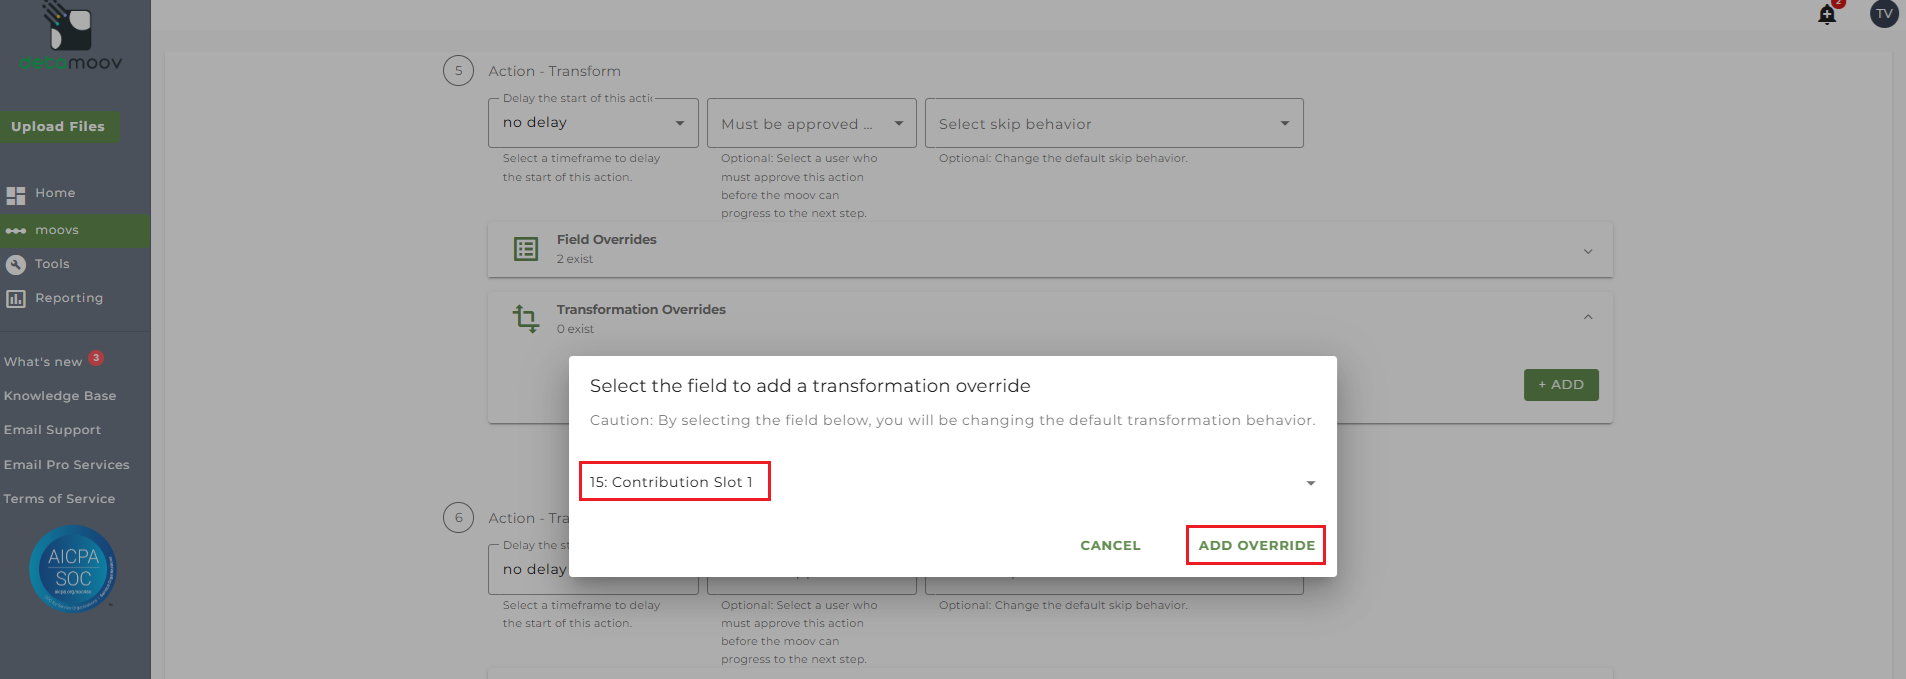
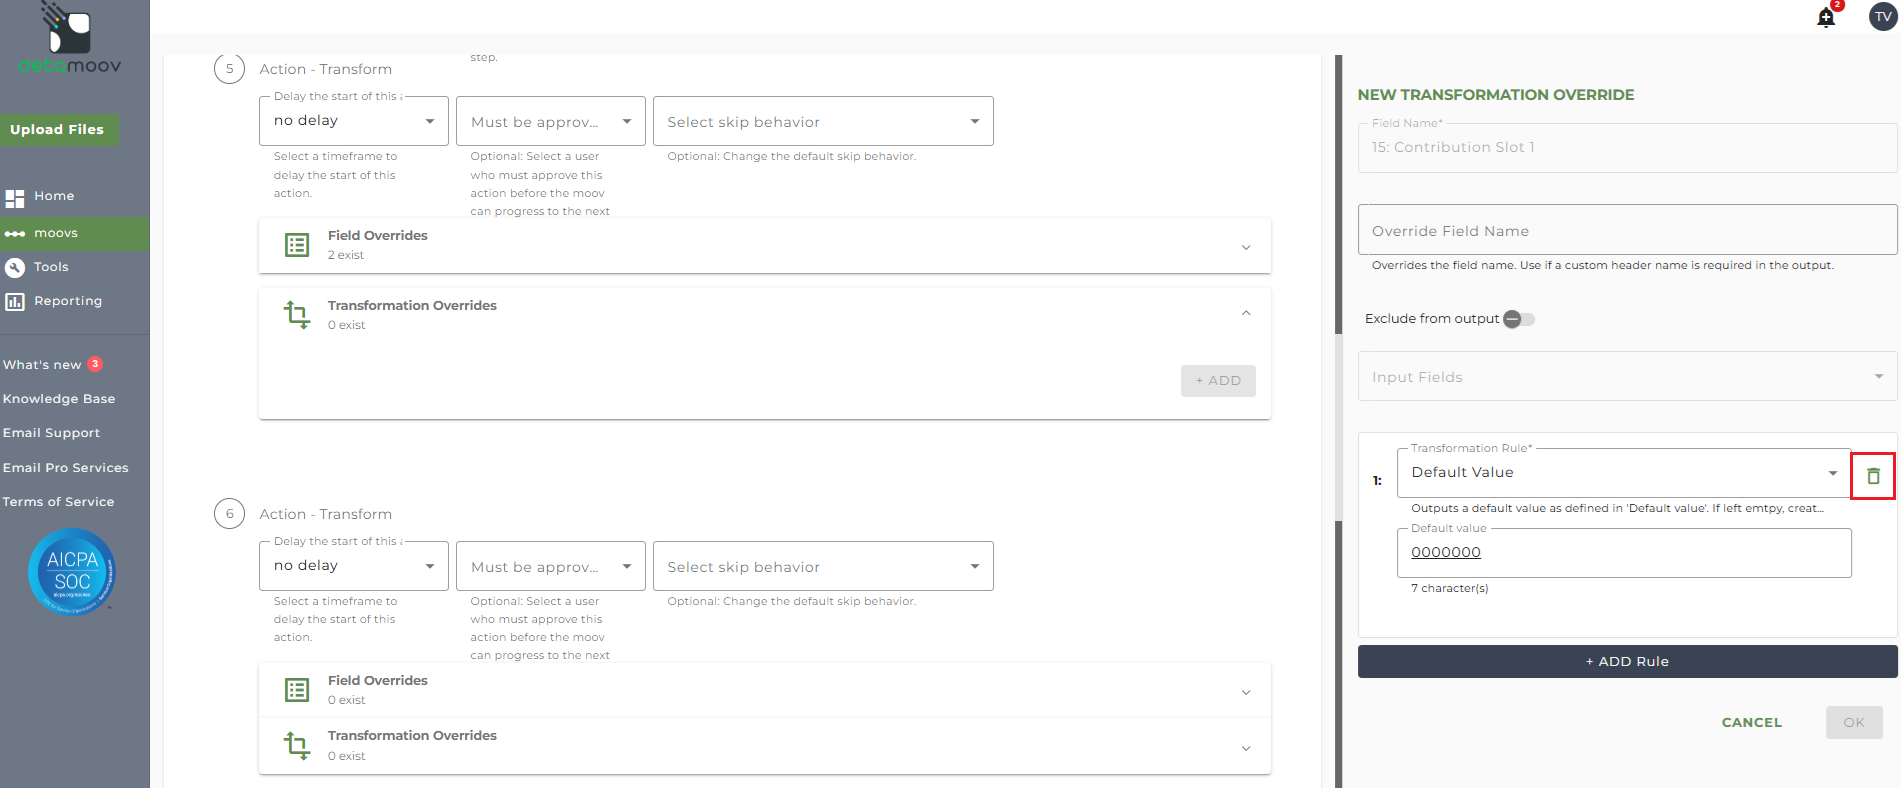
Then select the field 15: Contribution Slot 1 and click ADD OVERRIDE.
Hover over the 'Default Value' Transformation Rule and click the trashcan icon to delete the rule.
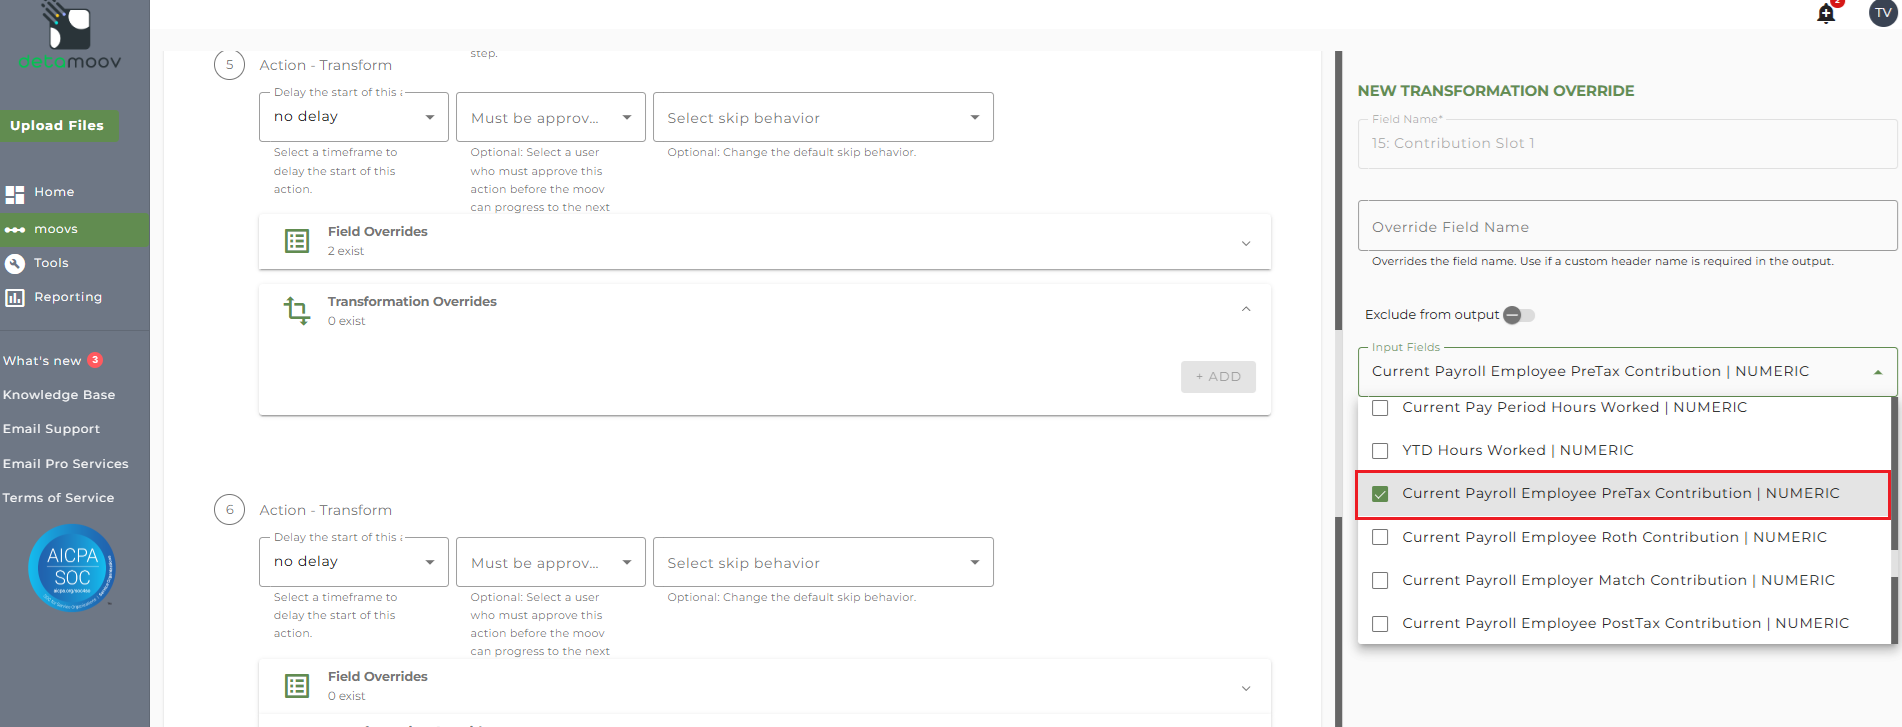
Select 'Current Payroll Employee PreTax Contribution' from the Input Fields dropdown.
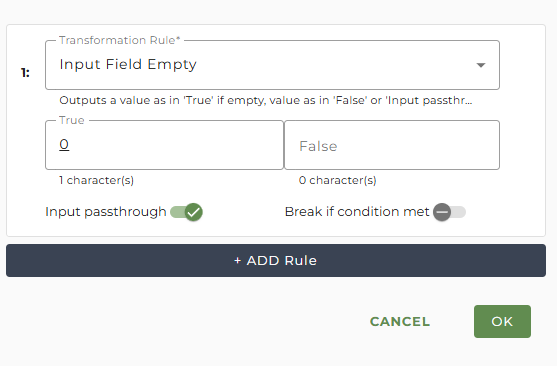
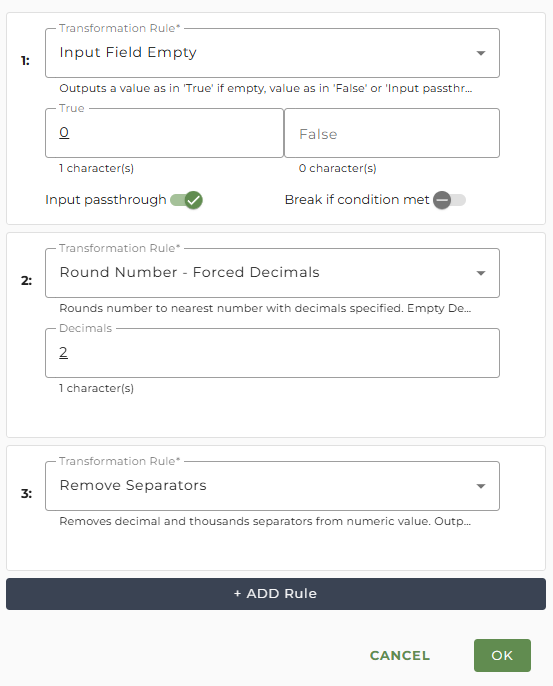
Click ADD Rule and select the 'Input Field Empty' rule.
In the True field, enter in a zero and then toggle the Input passthrough switch ON.
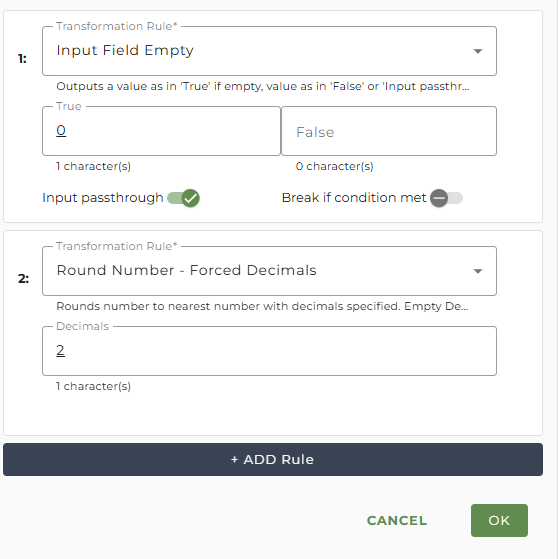
Click ADD Rule to add another rule, select 'Round Number - Force Decimals' and enter a 2 into the Decimals field.
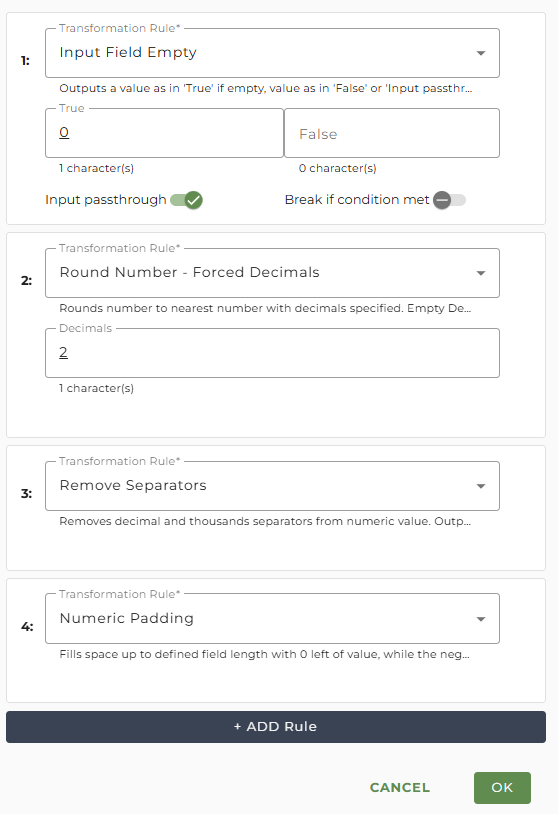
Click ADD Rule to add another rule and select 'Remove Separators'.
Click ADD Rule to add the last rule and select 'Numeric Padding' and click OK.
To ensure all other contribution slots are mapped correctly, repeat this process for each one listed in the plan specifications.
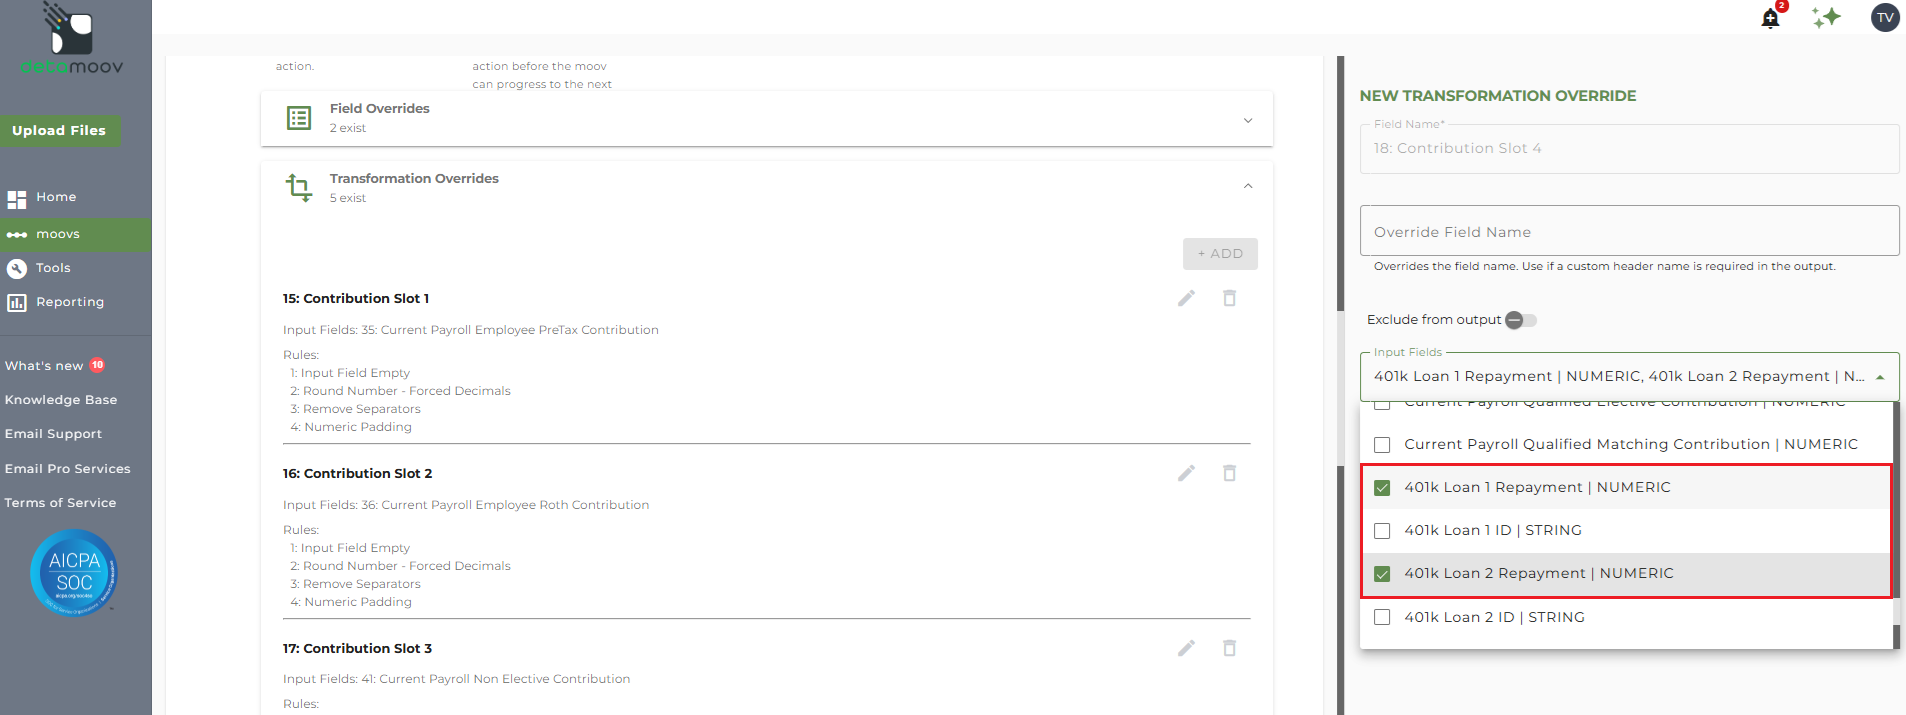
If the plan specifications indicate a loan repayment slot, then the override will need to include both detamoov Loan Repayment fields in case an employee has multiple loans.
Select '401k Loan 1 Repayment and 401k Loan 2 Repayment' from the Input Fields dropdown.
Click ADD Rule and select the Sum Values rule.
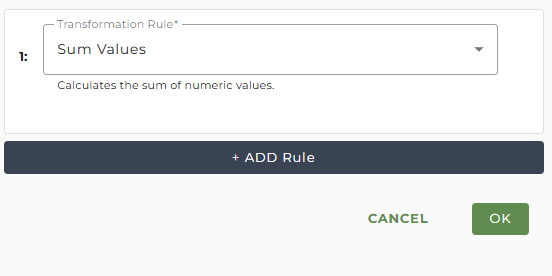
Click ADD Rule to add another rule, select 'Round Number - Force Decimals' and enter a 2 into the Decimals field.
Click ADD Rule to add another rule and select 'Remove Separators'.
Click ADD Rule to add the last rule and select 'Numeric Padding' and click OK.
Corebridge Financial requires that the Payroll Status Code, which indicates if an employee is Full-Time or Part-Time, is included for each employee. The valid values are:
FT = Full-Time
PT = Part-Time
This value is available for PrismHR users when using the API and is mapped to the Reserved4 field by default. If you are not a PrismHR user this value will need to be mapped to one of the five Reserved fields in the Standard 401k format before creating the override.
For PrismHR, this value comes from the Type Codes set up in System/Change/Employee Types. Since this value is user-defined, you will need to include a replace rule if your values are different from the Corebridge Financial required values.
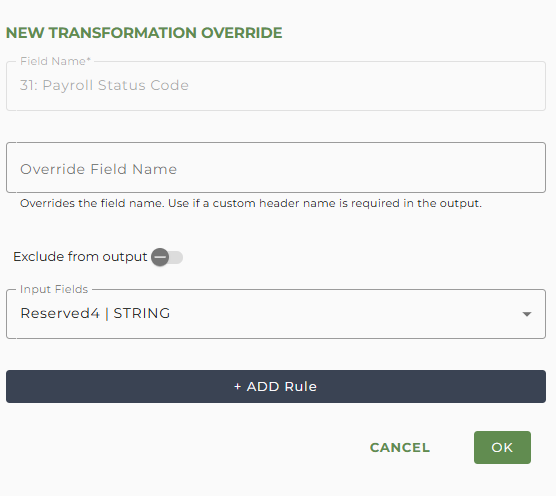
To create an override for the Payroll Status Code, locate step 5: Action - Transform, expand the Transformation Overrides panel, click the Add button, select field 31: Payroll Status Code and click ADD OVERRIDE.
Select the Reserved field related to the employee status from the Input Fields dropdown.
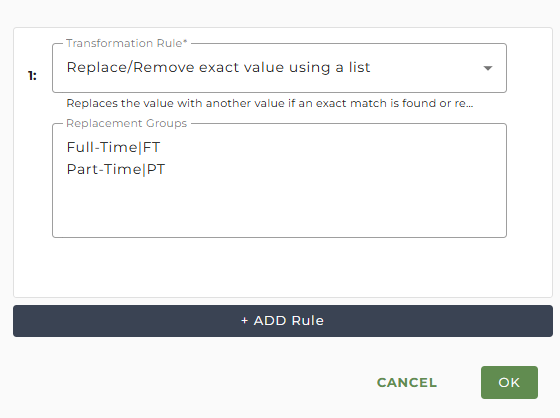
If the value in payroll does not match the Corebridge Financial values mentioned above, you will need to add a replace rule. Click ADD Rule and select the 'Replace/Remove exact value using a list' rule.
In the Replacement Groups field, enter in the value coming out of payroll on the left, a pipe character, and then the Corebridge Financial value on the right. Click OK to save the override.
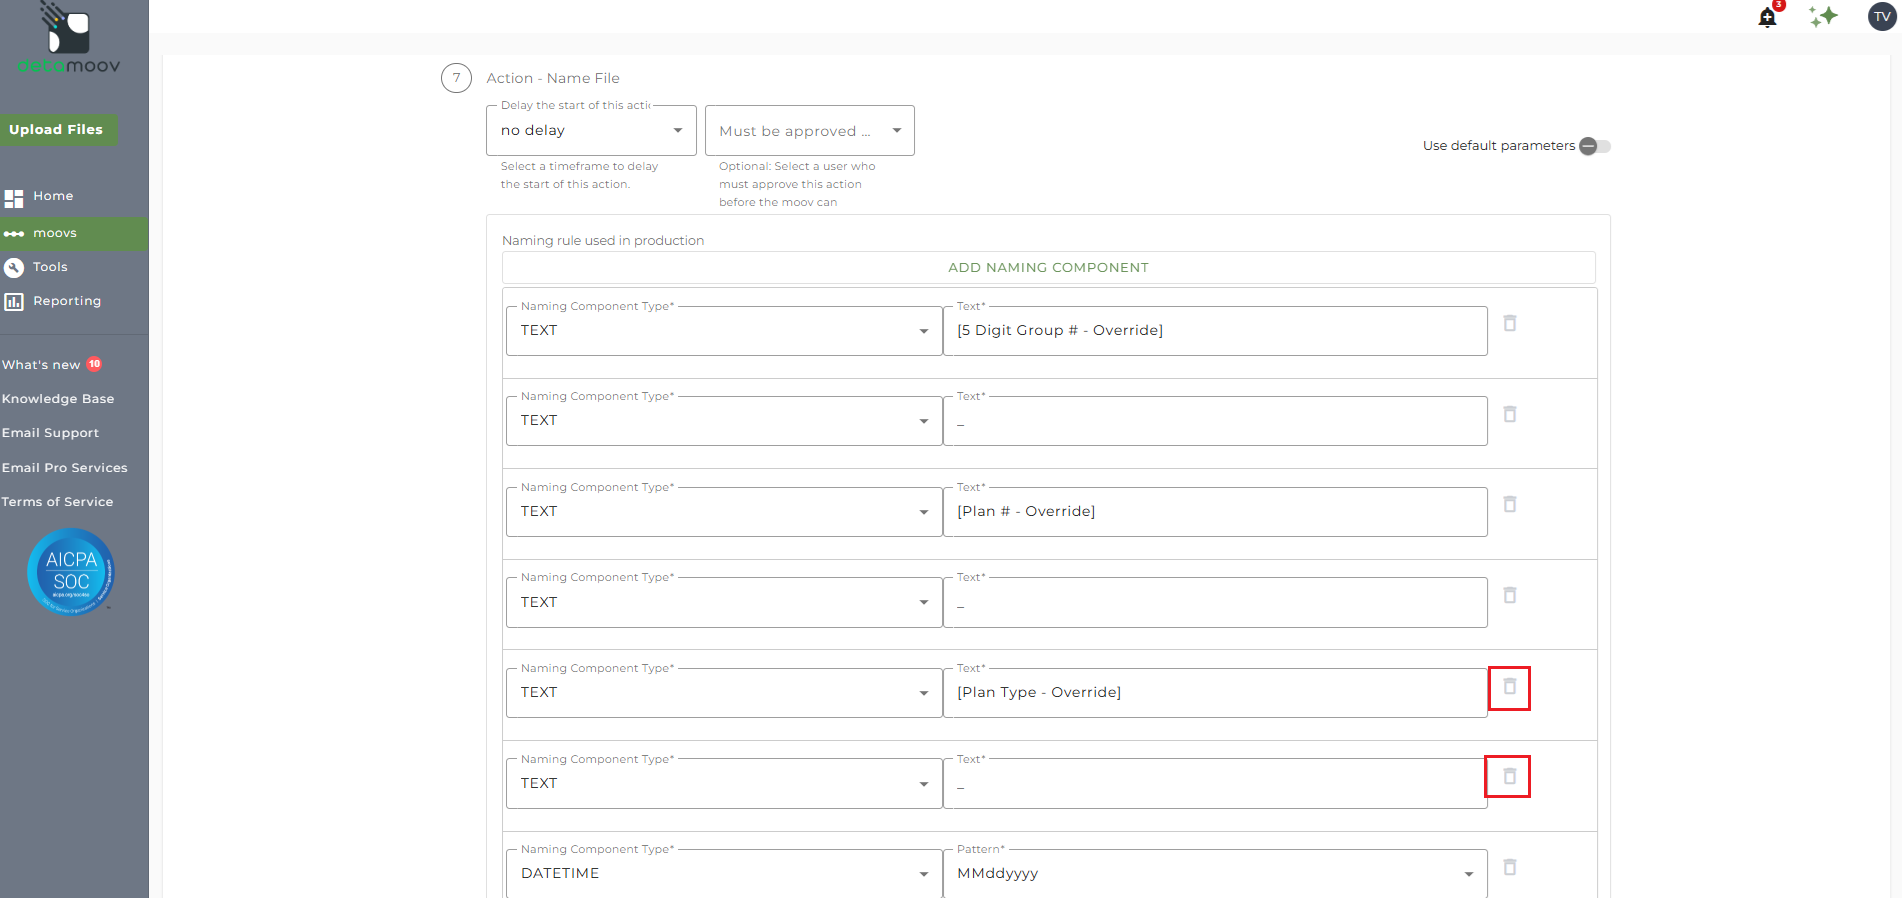
An override is required to ensure that the file name sent to Corebridge Financial is correct and relates to your client's plan. The required naming convention will be provided to you by Corebridge Financial and will be similar to the following:
[5 digit Group#]_[Plan #]_[Plan Type]_MMDDYYYYHHMMSSFFF.csv.pgp
To override the Name File step, locate the Action - Name File step and toggle the "Use default parameters" off. Then replace the "Override" text fields with the values provided by Corebridge Financial.
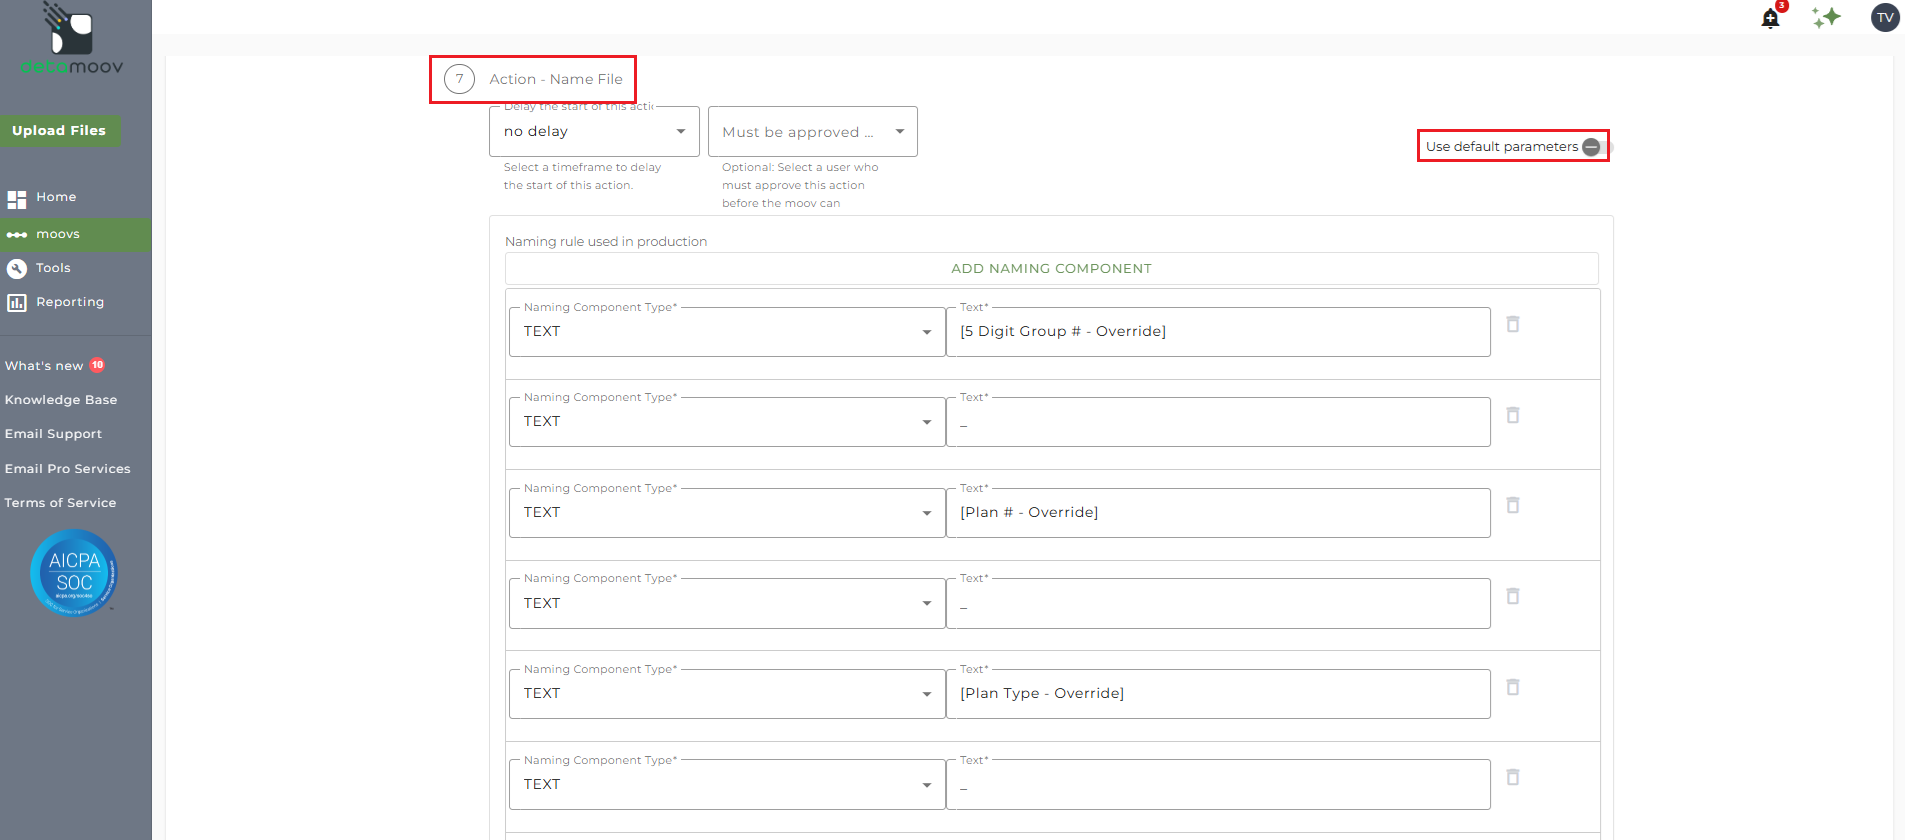
If your client's file name does not have a Plan Type, delete the "[Plan Type - Override]' component and the underscore component below it.
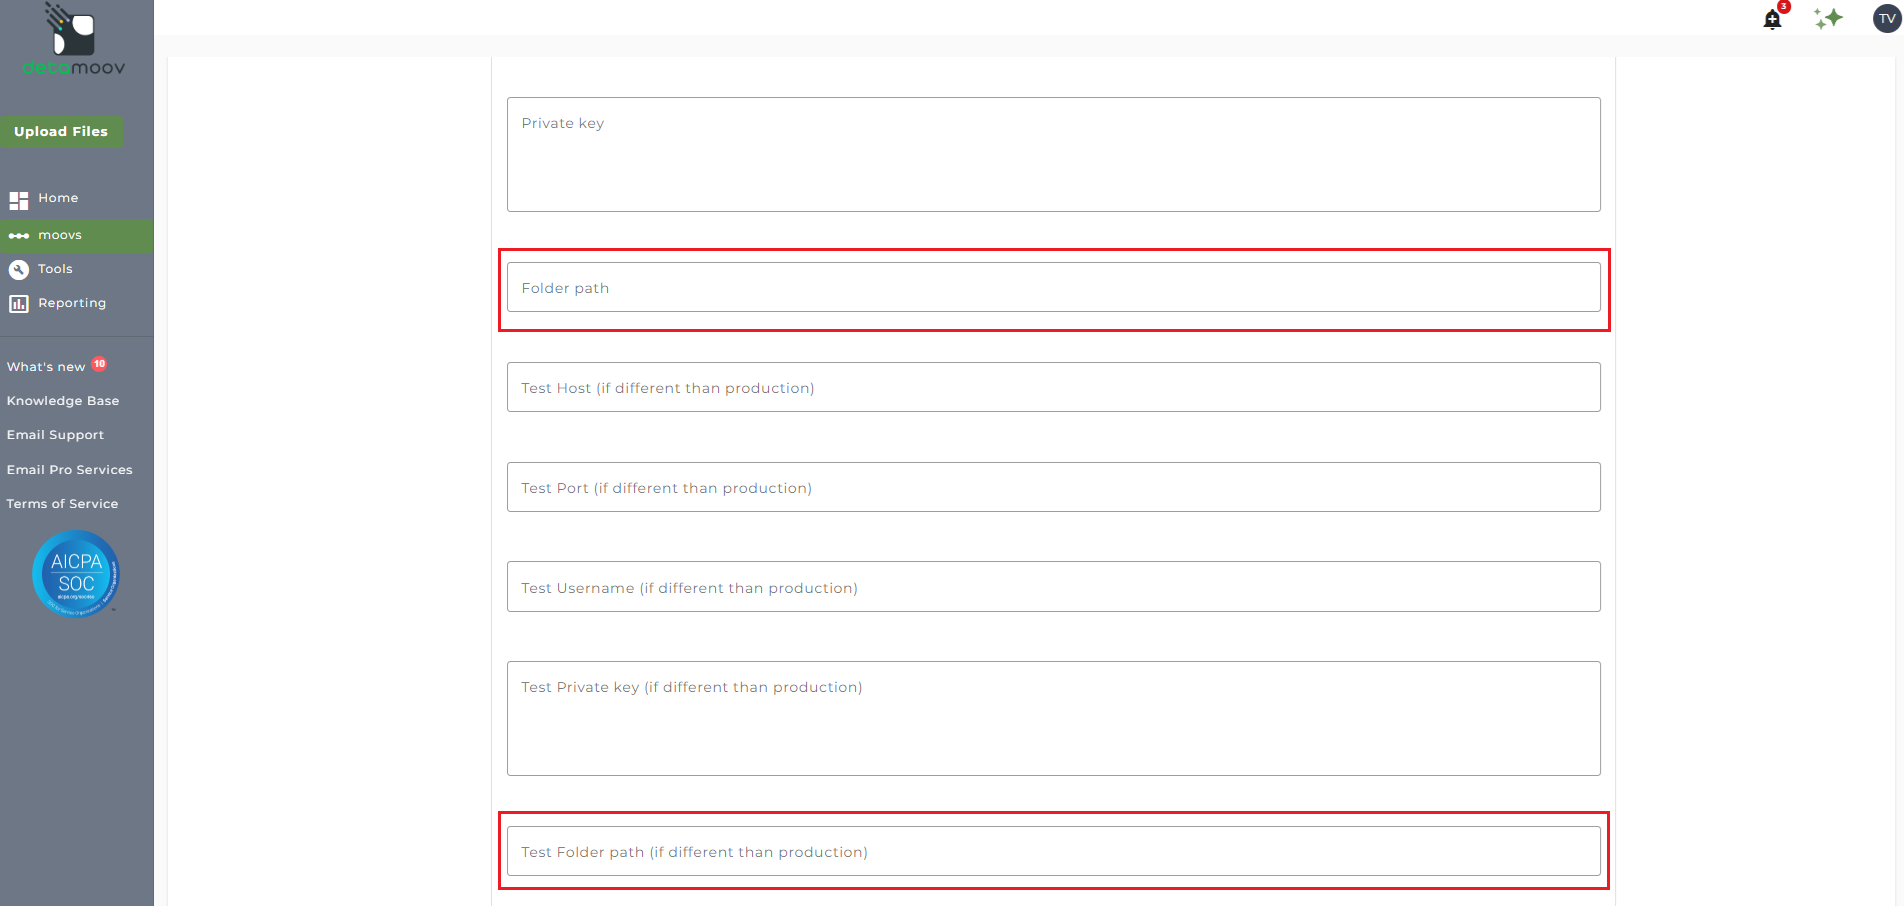
The Corebridge Financial SFTP directory where files are delivered are unique to your client's plan. Please contact Corebridge Financial to obtain the Test and Production directories for your client's plan. The directory should start with "/to_corebridge".
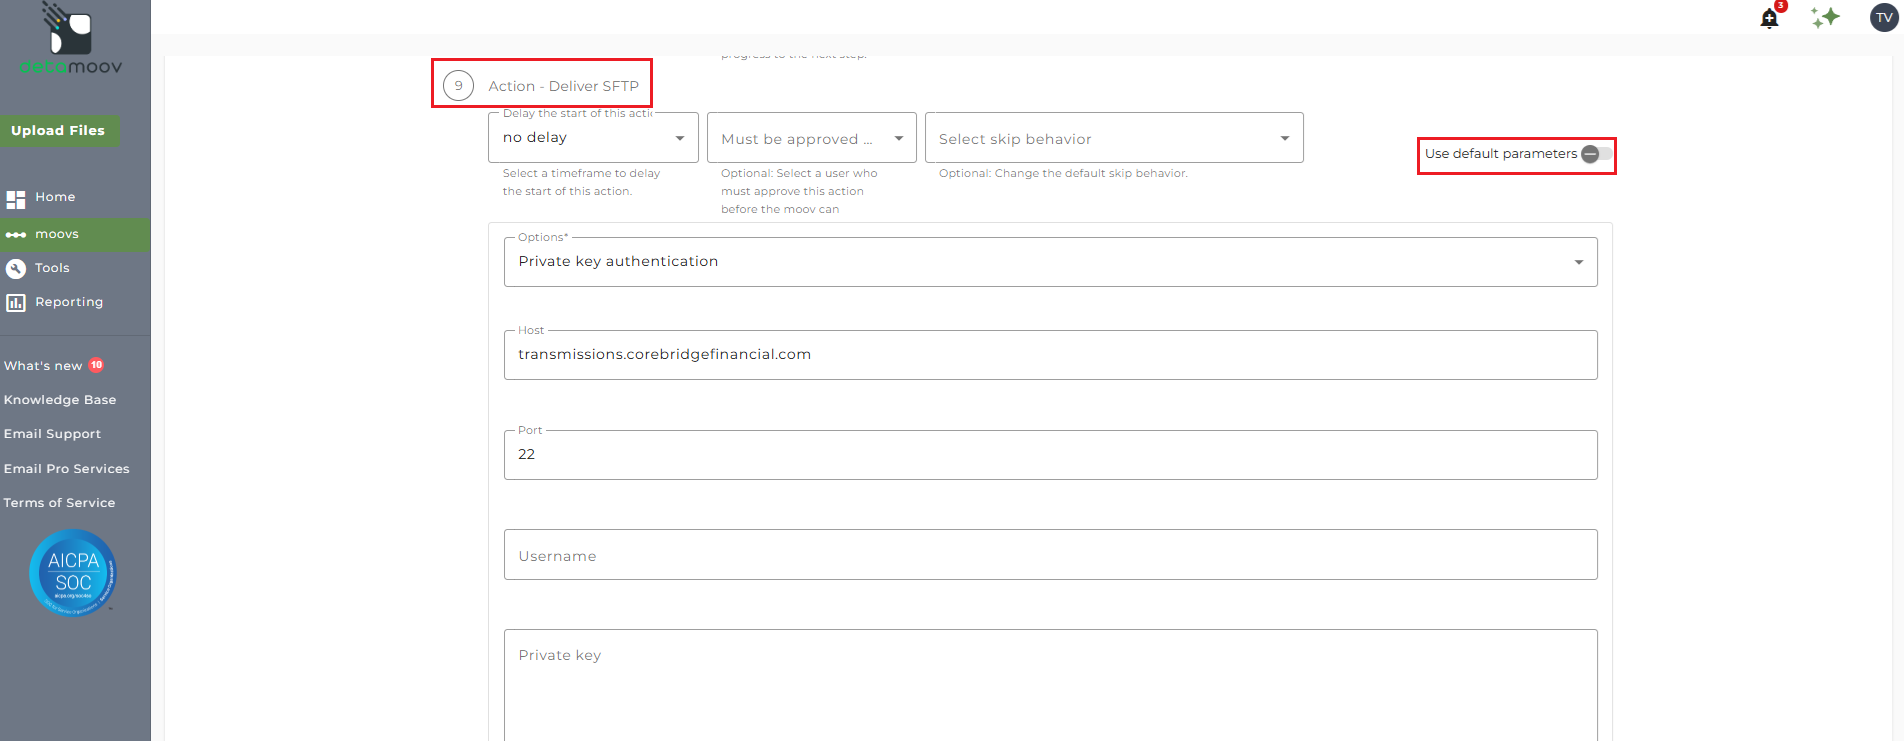
To override the Deliver SFTP step, locate the Action - Deliver SFTP step and toggle the "Use default parameters" off.
Then provide the plan specific folder path for production files in the "Folder path" field, and the test file folder path in the "Test Folder path" field. No other field should be removed or modified.
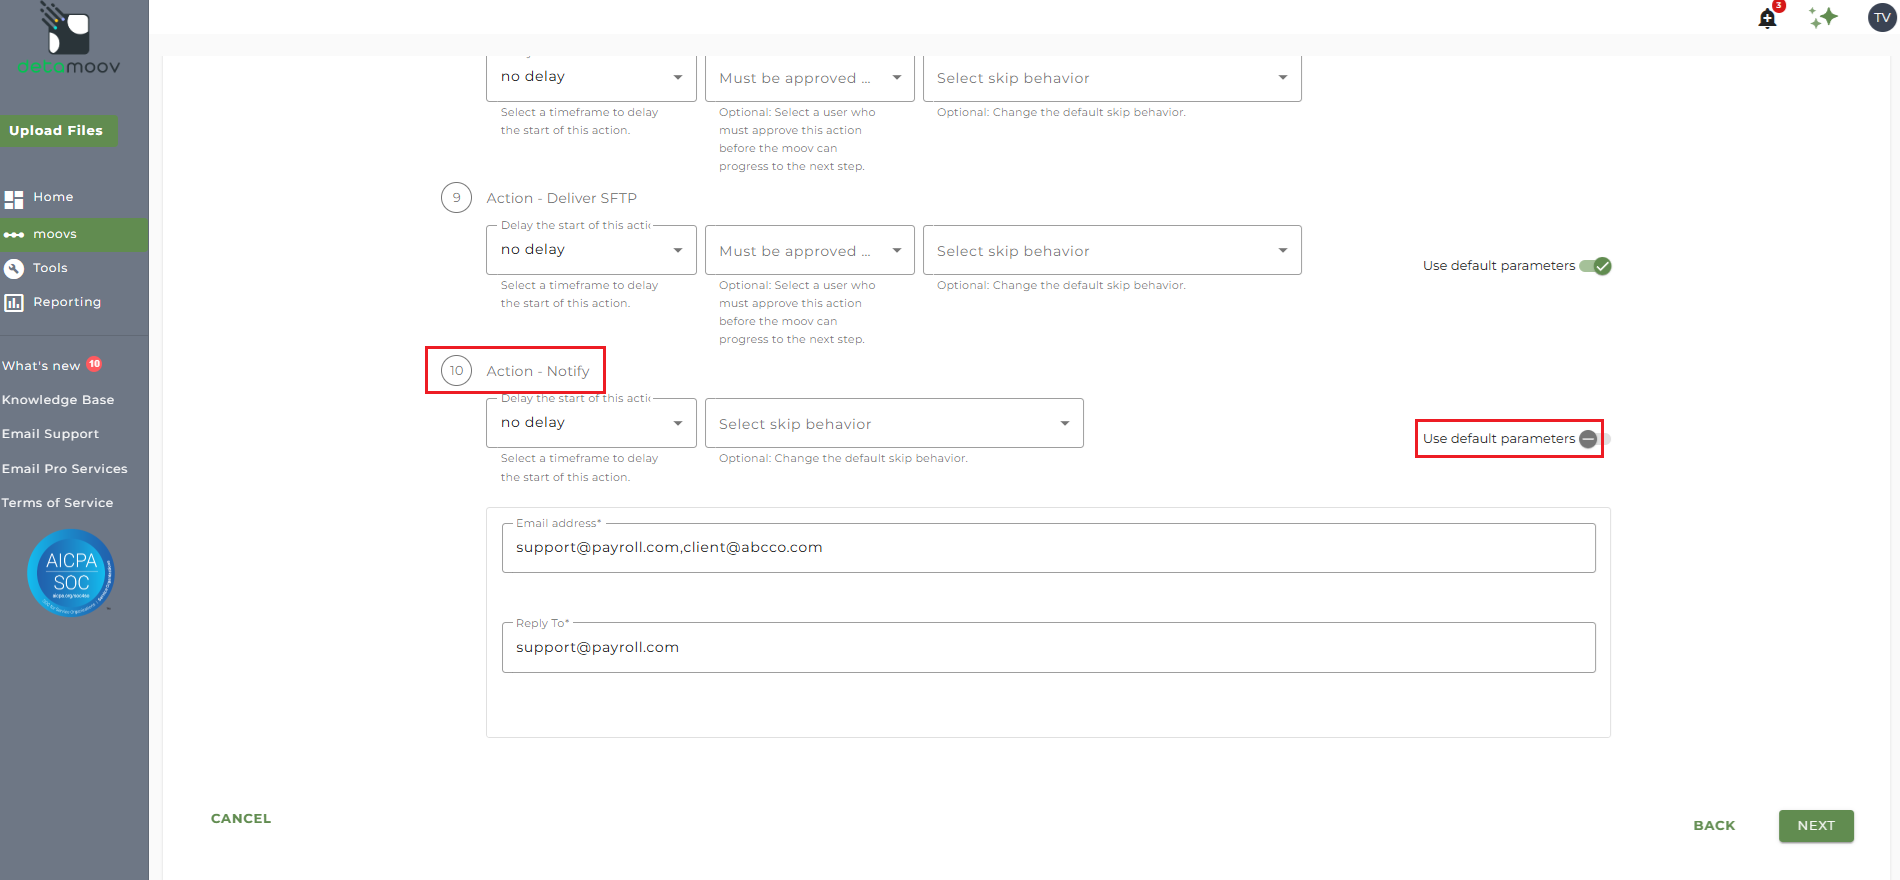
At the beginning of this article you configured the notification step for the moov to send a notification once the moov had completed. You also have the ability to configure the notification step for each client configuration if you wish to add or remove email addresses per client.
To override the notification step, locate the Action - Notify step and toggle the "Use default parameters" off and enter/remove email addresses from Email Address and Reply To fields. If you would like to enter multiple email addresses, separate them with a comma.
To complete the configuration for your client, click the Next button at the bottom of the page and then the Save button on the moov summary page.

