
This article describes how to configure a client for the Standard 401k to Pentegra moov definition. Each client configuration will vary based on their plan specification and will need to be configured accordingly.
If you have not already done so, please add the Standard 401k to Pentegra moov to your account by following these steps.
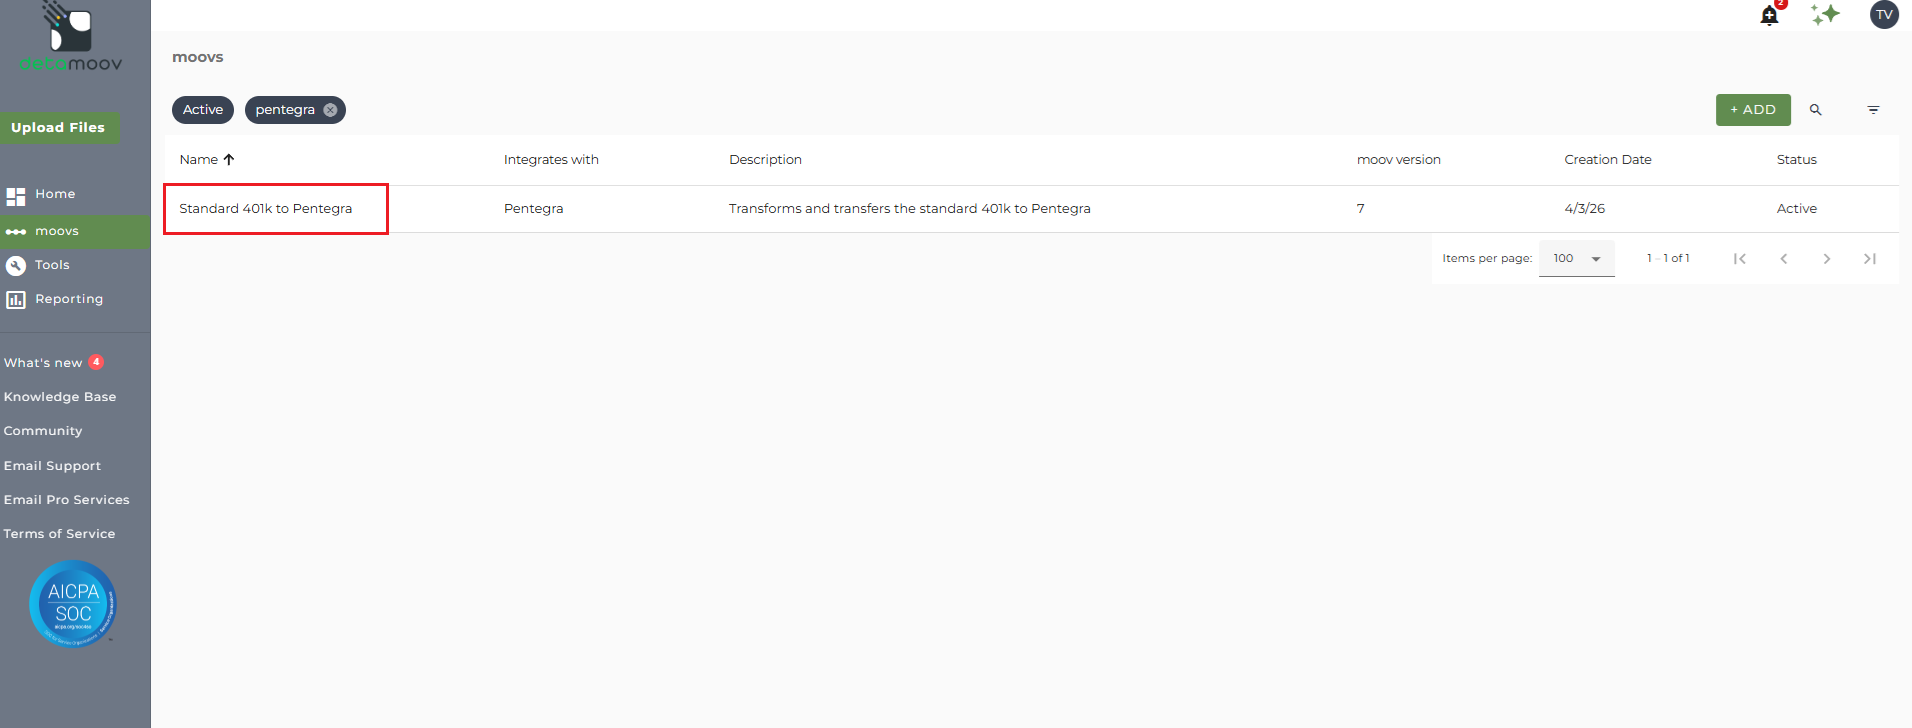
Once the Standard 401k to Pentegra moov has been added to your account, access the moovs section on the left side menu and click on the Standard 401k to Pentegra moov.
The Standard 401k to Pentegra moov provides a notification for when the moov is complete. The notification can be sent to any email address you wish and can also be configured to send to multiple email addresses.
To edit the notification step, click on the cog icon under the Action - Notify step on the left. Then toggle the "Use default parameters" off and enter in the email addresses you would like to receive the notification. If you would like to enter multiple email addresses, separate them with a comma. A Reply to email is also required in the event that a recipient of the notification replies to the email.
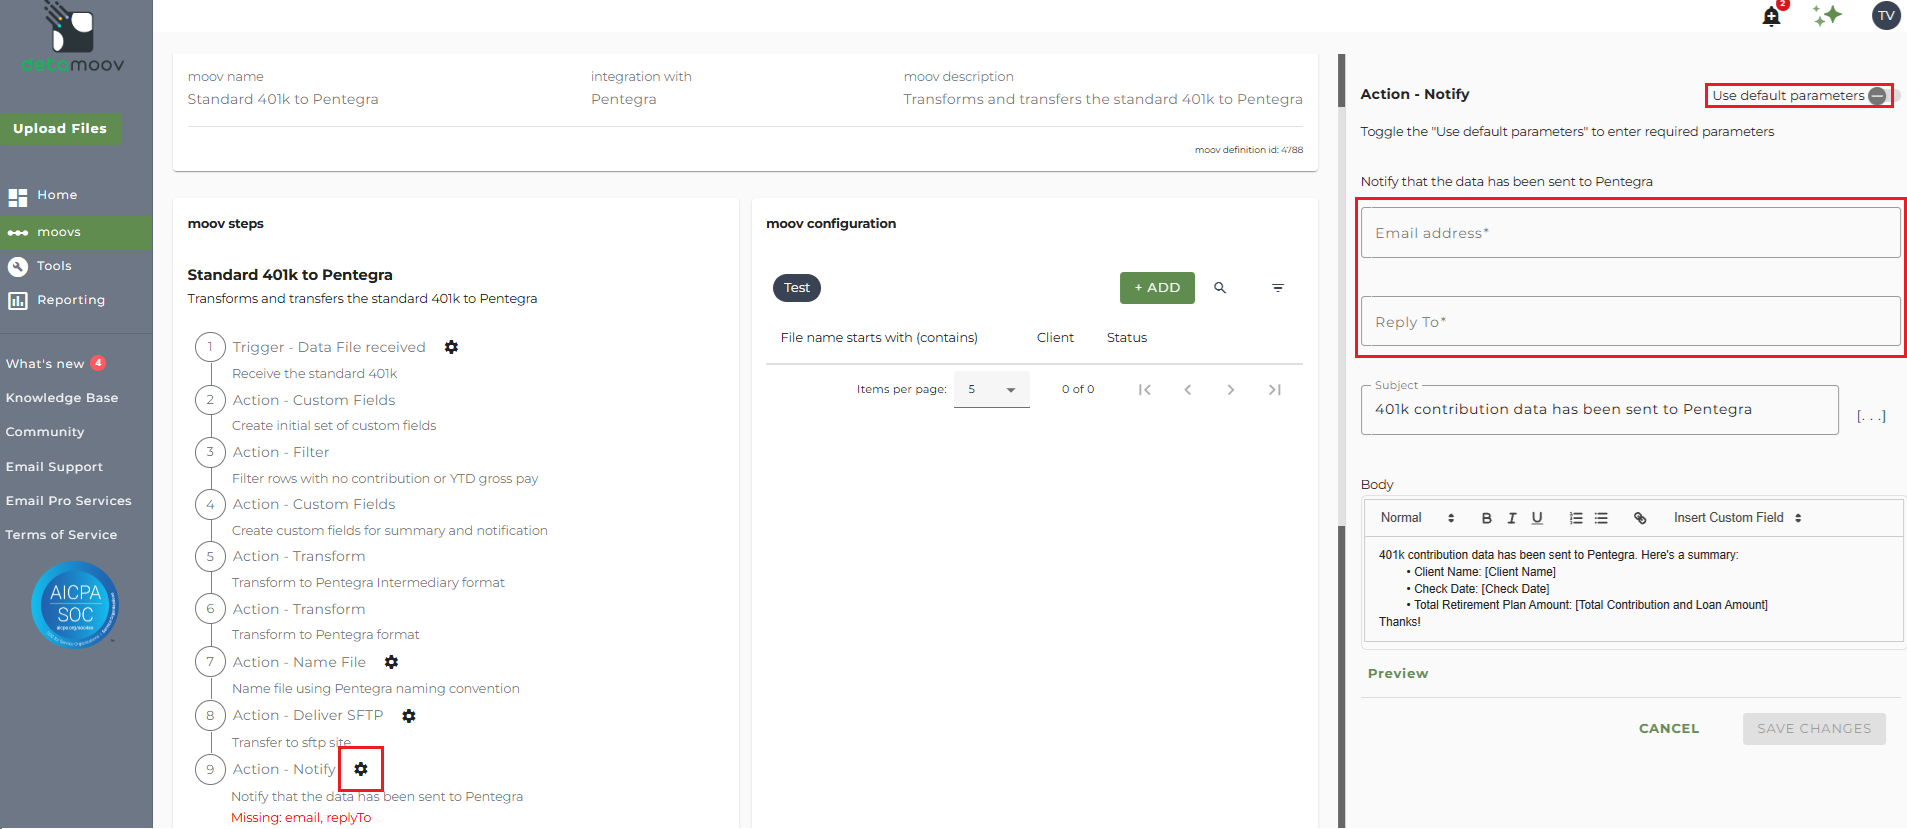
Note: these settings apply to any client configuration you set up for this specific moov. You also have the ability to configure the notification step for each client configuration if you wish to add or remove email addresses per client.
To save your parameters click on the Save Changes button.
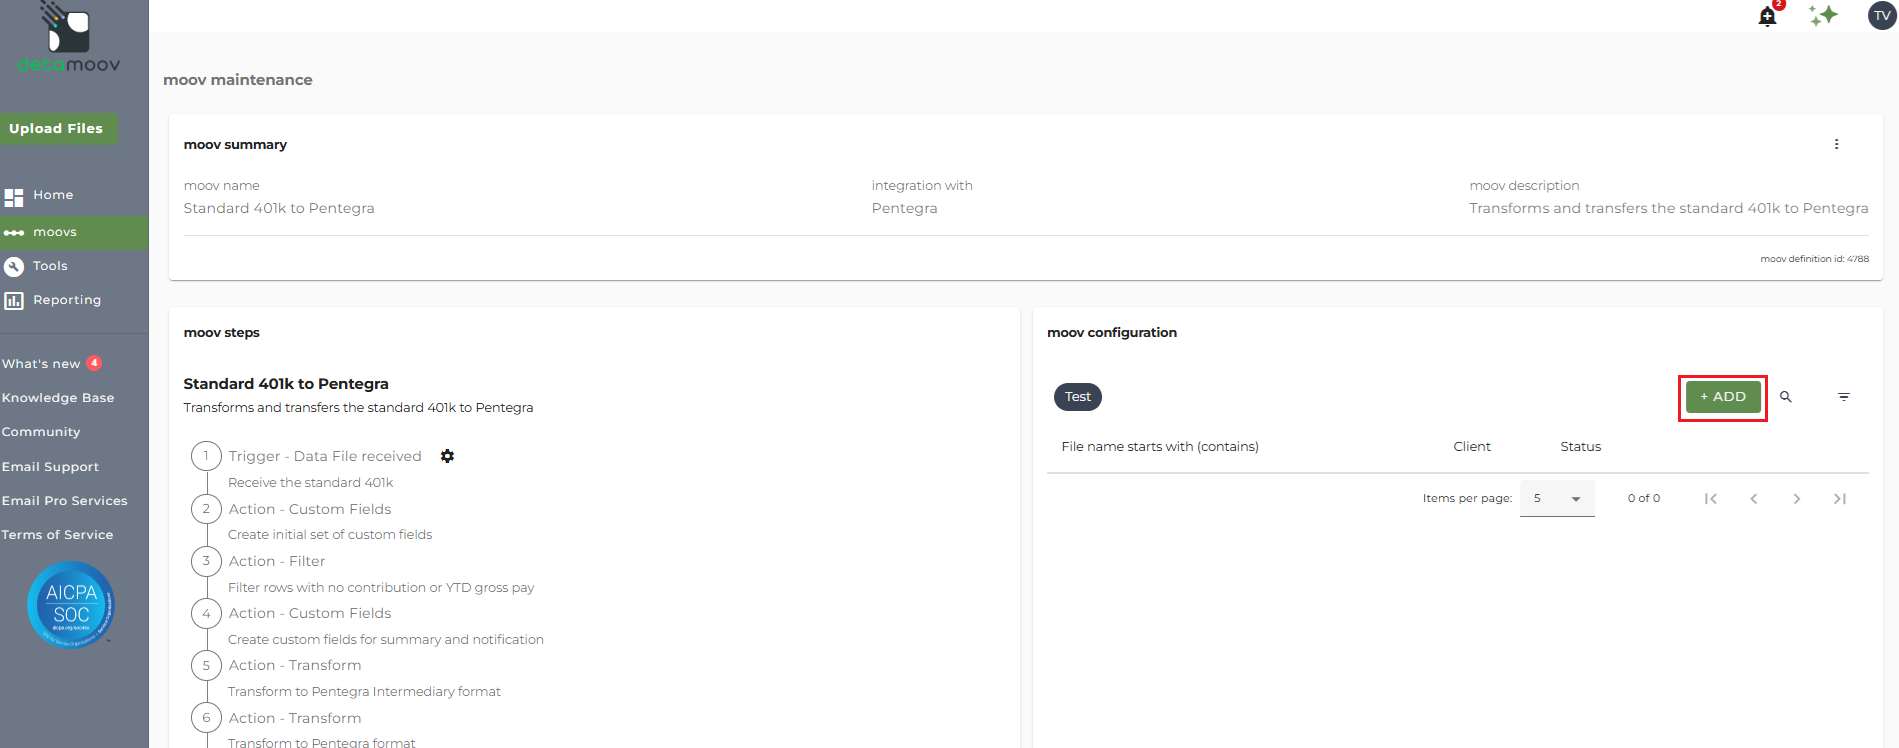
In the moov configuration section, click the Add button to add a new client to send retirement data to Pentegra.
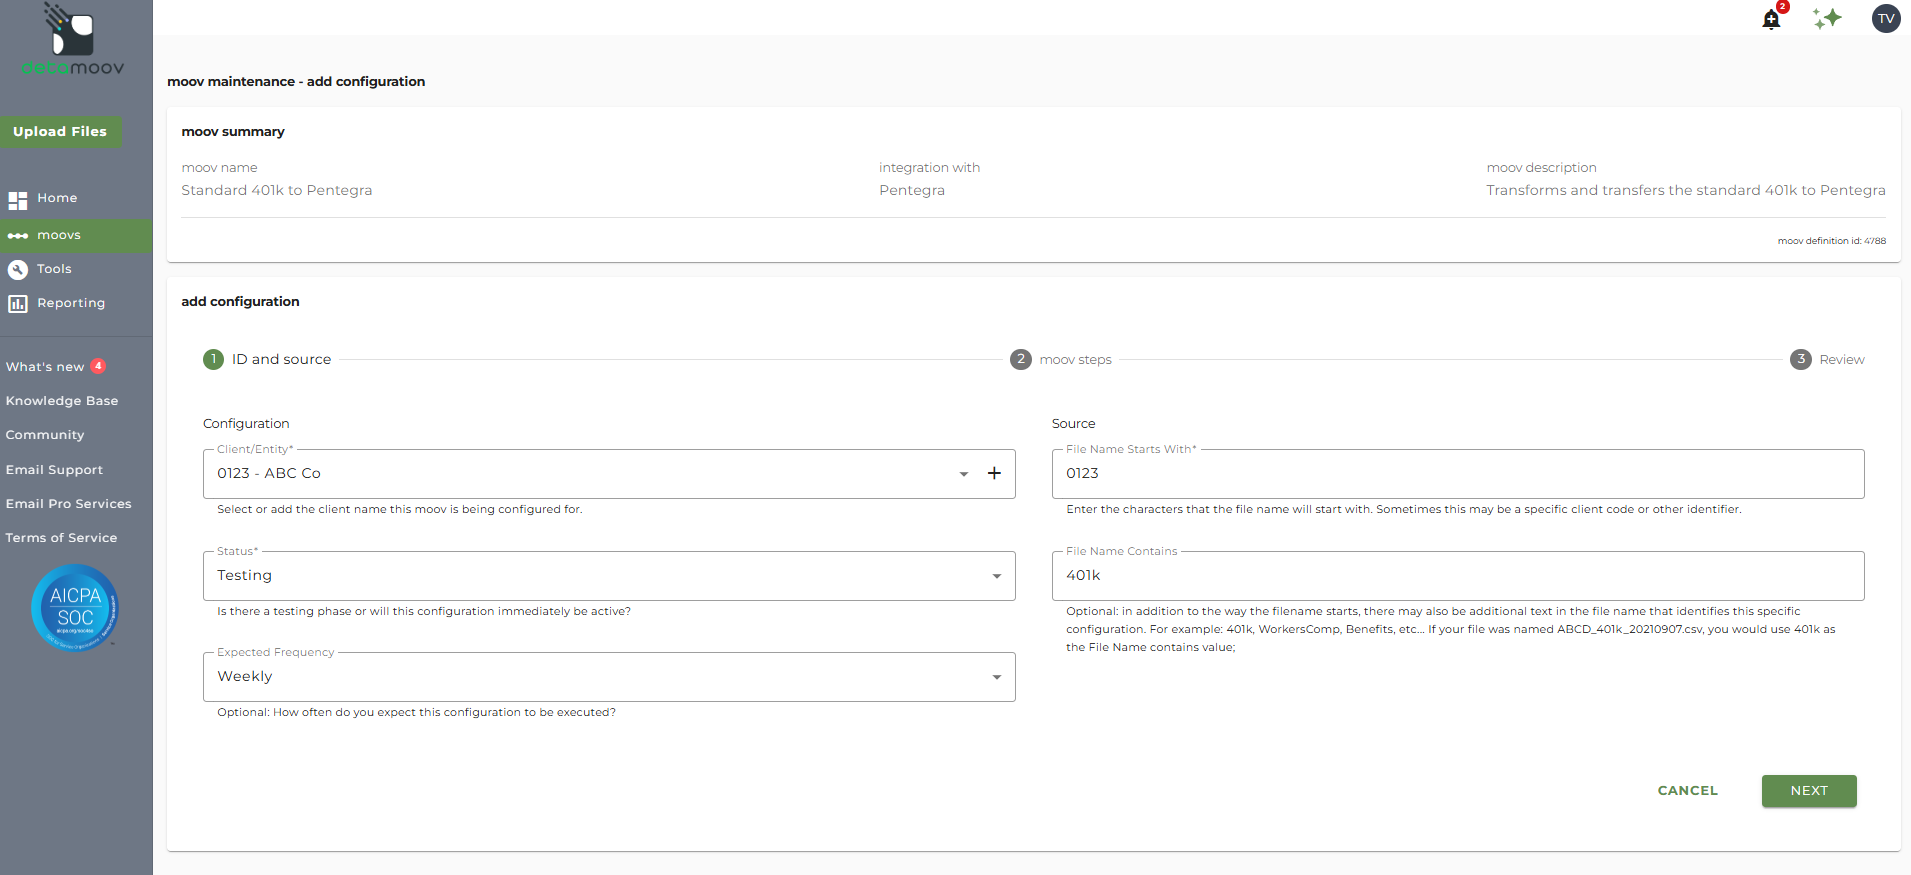
Client/Entity - either select an existing client or click the + sign to create a new client.
Status - the status field is important when configuring a new integration with Pentegra as it provides the correct SFTP directory used to send to Pentregra while in their testing phase. This field should be set to 'Testing' until the testing phase has been completed.
Expected Frequency - the client's payroll frequency
File Name Starts With - typically the client or company code within your payroll platform. The value entered into this field is important as the file you send to detamoov must start with this value.
File Name Contains - optional value that is included in the file name
For more information on the Pentegra file specifications detamoov uses to transform the Standard 401k extract file, please visit the Standard 401k to Pentegra help page.
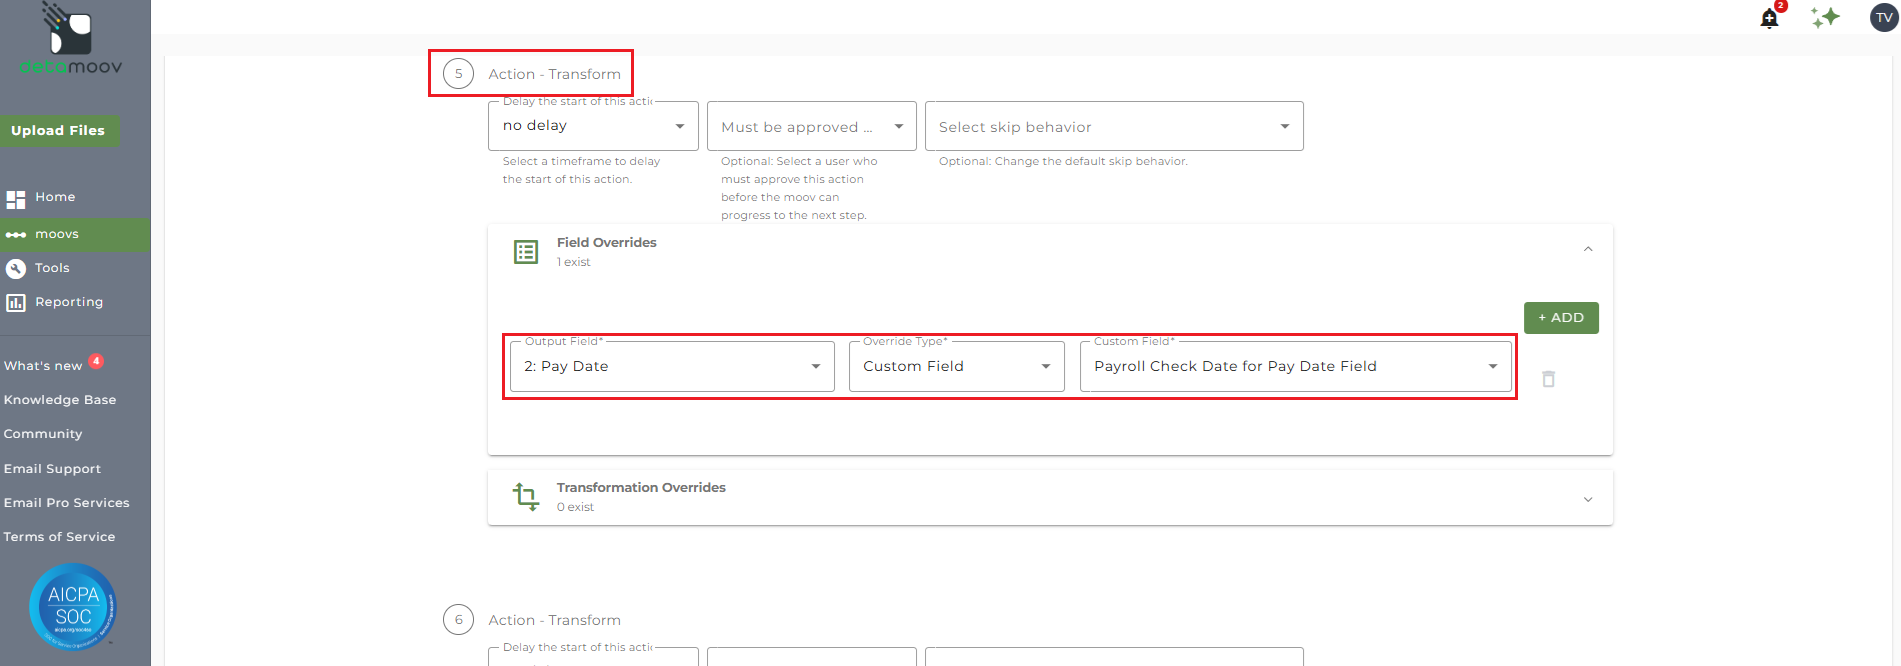
If you are a UKG Ready user and an employee was not paid in the current pay period, a field override is needed to provide the Pay Date. detamoov has provided custom fields that take the existing dates from the source file and allow you to apply them to the missing fields.
To provide the override custom fields, locate the Action - Transform step, click the Field Overrides panel, and click the Add button. Then select the appropriate field from the Output Field dropdown, change the Override Type to Custom Field, and then select the Custom field from the dropdown menu as shown below:
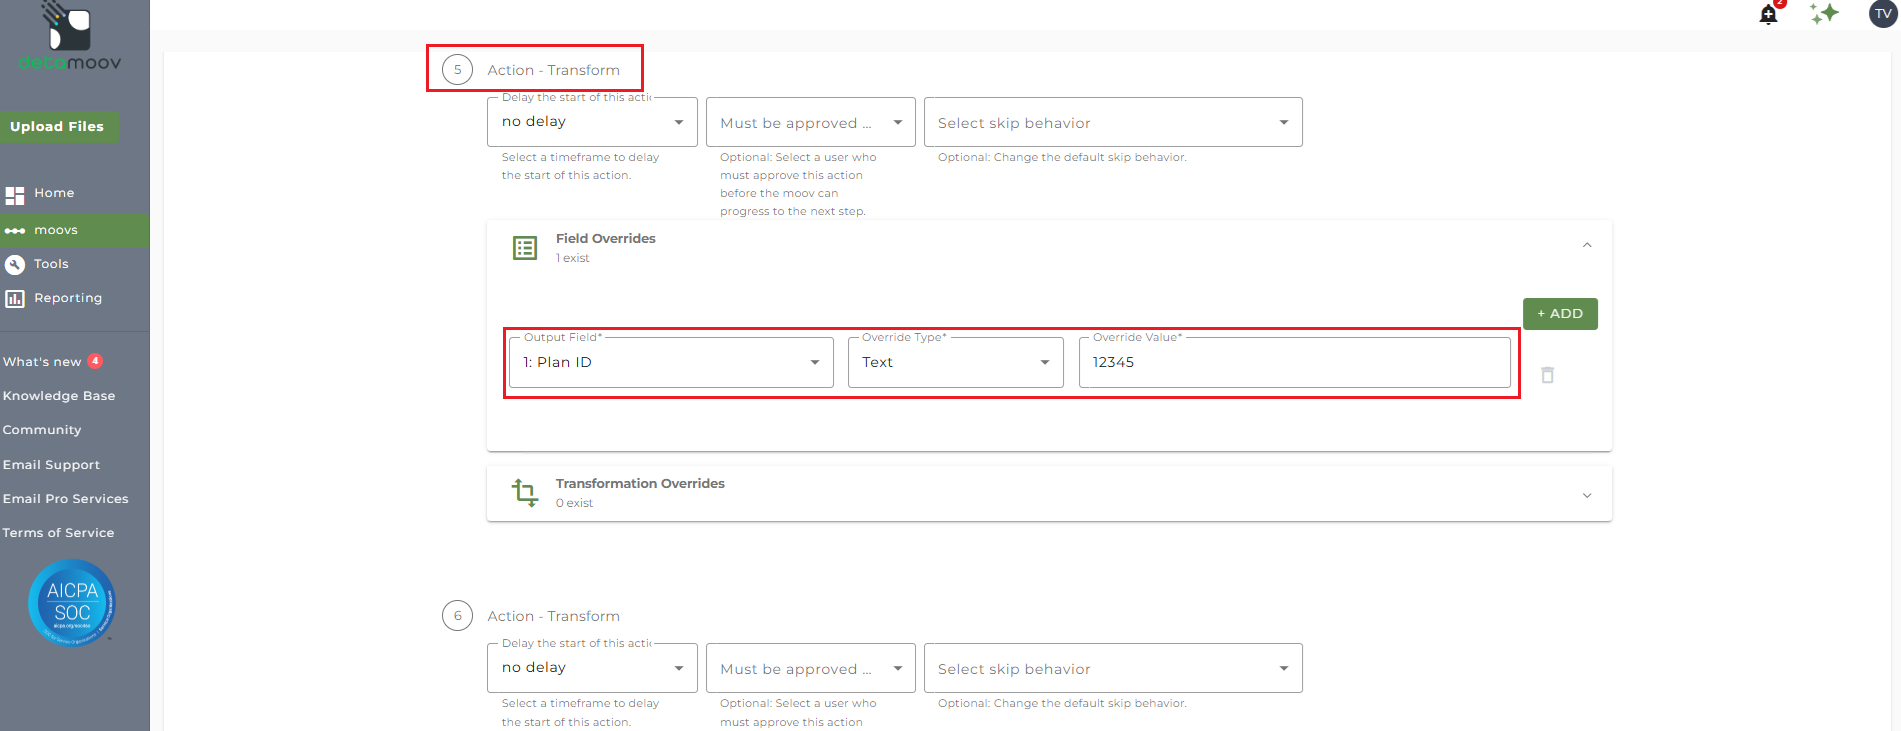
Plan ID
If you do not store the Pentegra Plan ID in payroll, a field override is required. To add a field override, locate the Action - Transform step, expand the Field Overrides panel and click the Add button. Then select the appropriate Output field, set the Override Type to Text and enter the Override Value.
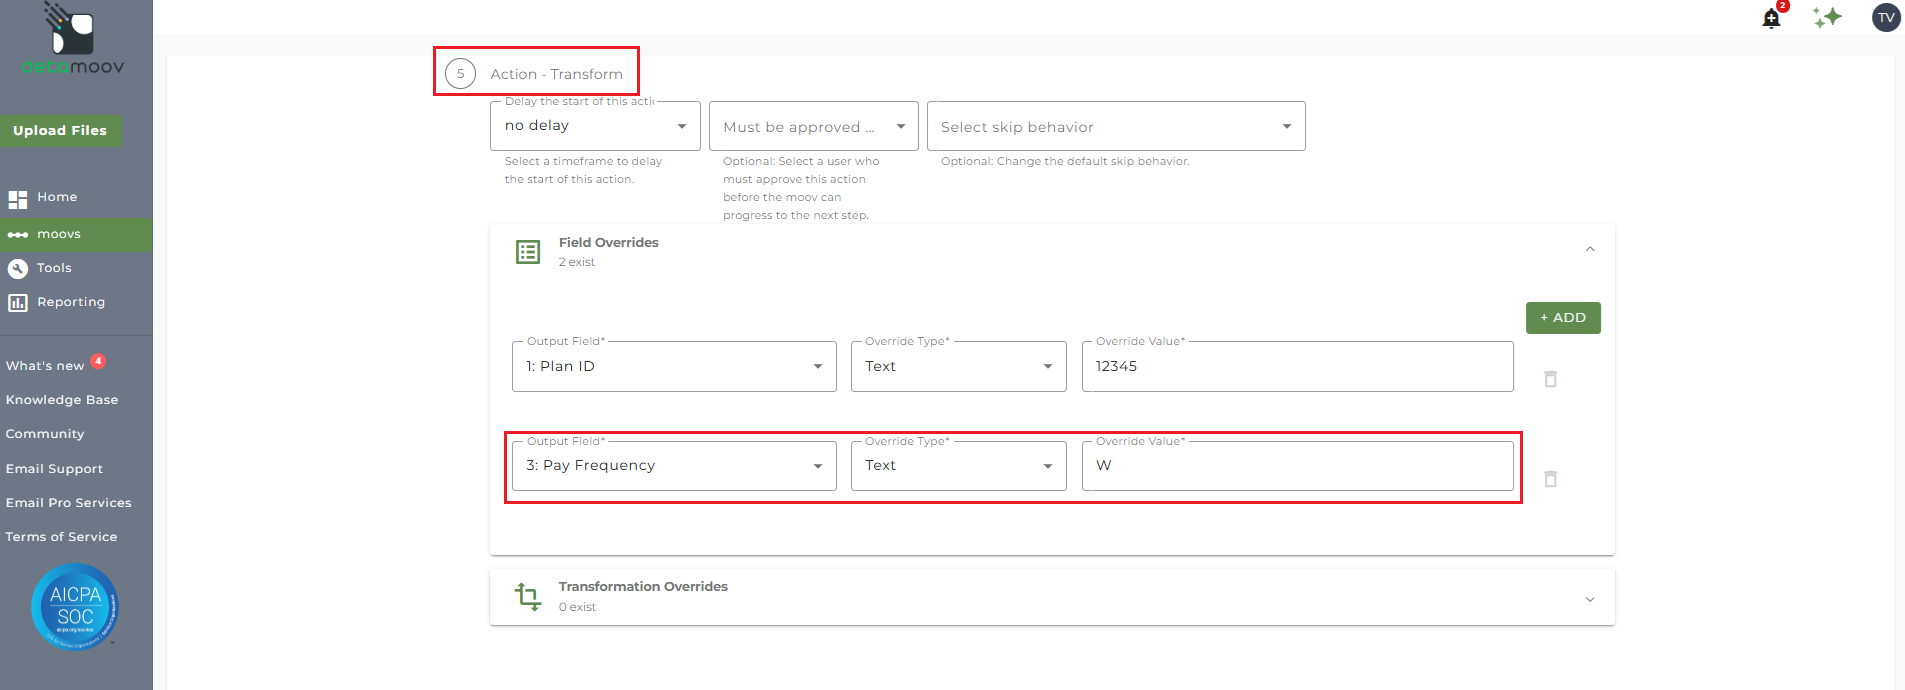
Pay Frequency
A pay frequency is required for each employee sent to Pentegra using a field override. To add a Field Override, locate the Action - Transform step, expand the Field Overrides panel and click the Add button. Then select the appropriate Output field, set the Override Type to Text and enter the Override Value using the following Pentregra values:
2 = Semi-Annual
Q = Quarterly
M = Monthly
S = Semi-Monthly
B = Biweekly
W = Weekly
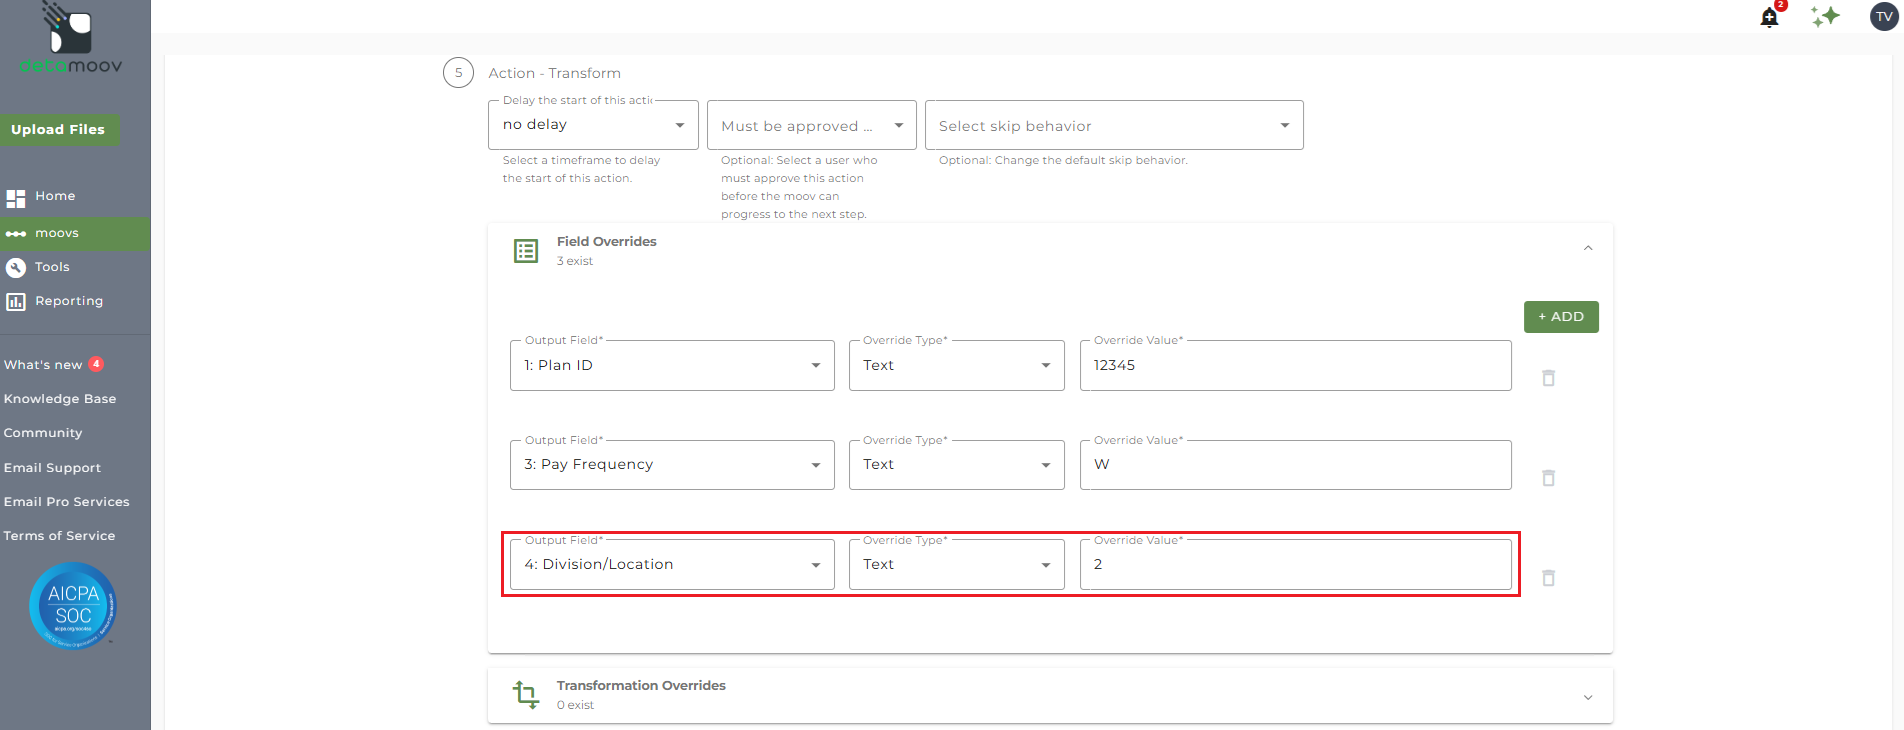
Division/Location
Divisional plans must be sent to Pentegra in separate files and the Division/Location value can be included using a field override. Skip this section if your client's plan is not divisional.
To add a Field Override, locate the Action - Transform step, expand the Field Overrides panel and click the Add button. Then select the appropriate Output field, set the Override Type to Text and enter the Override Value.
Employee Type
Pentregra requires that an Employee Type value is provided for employees excluded from all contributions or excluded from employer contributions. This value can be mapped to a Reserved field in the Standard 401k extract and a Transformation Override can be used to map this value to the Pentegra required values:
U = Excluded from all contributions
O = Excluded from ER contributions
Blank = Not Excluded
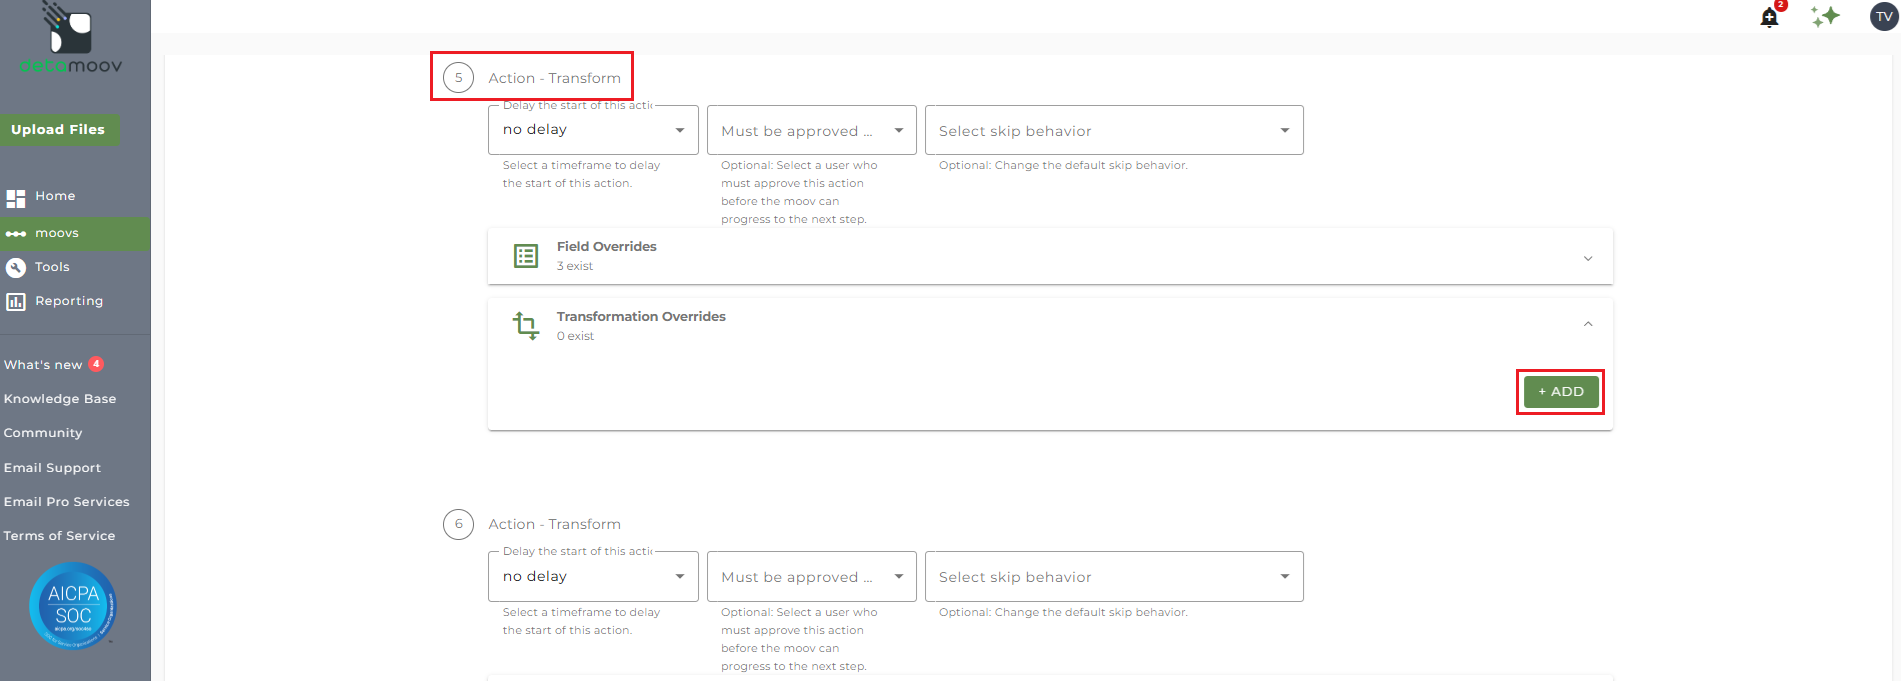
To add a Transformation Override, locate the Action - Transform step, expand the Transformation Overrides panel and click the Add button.
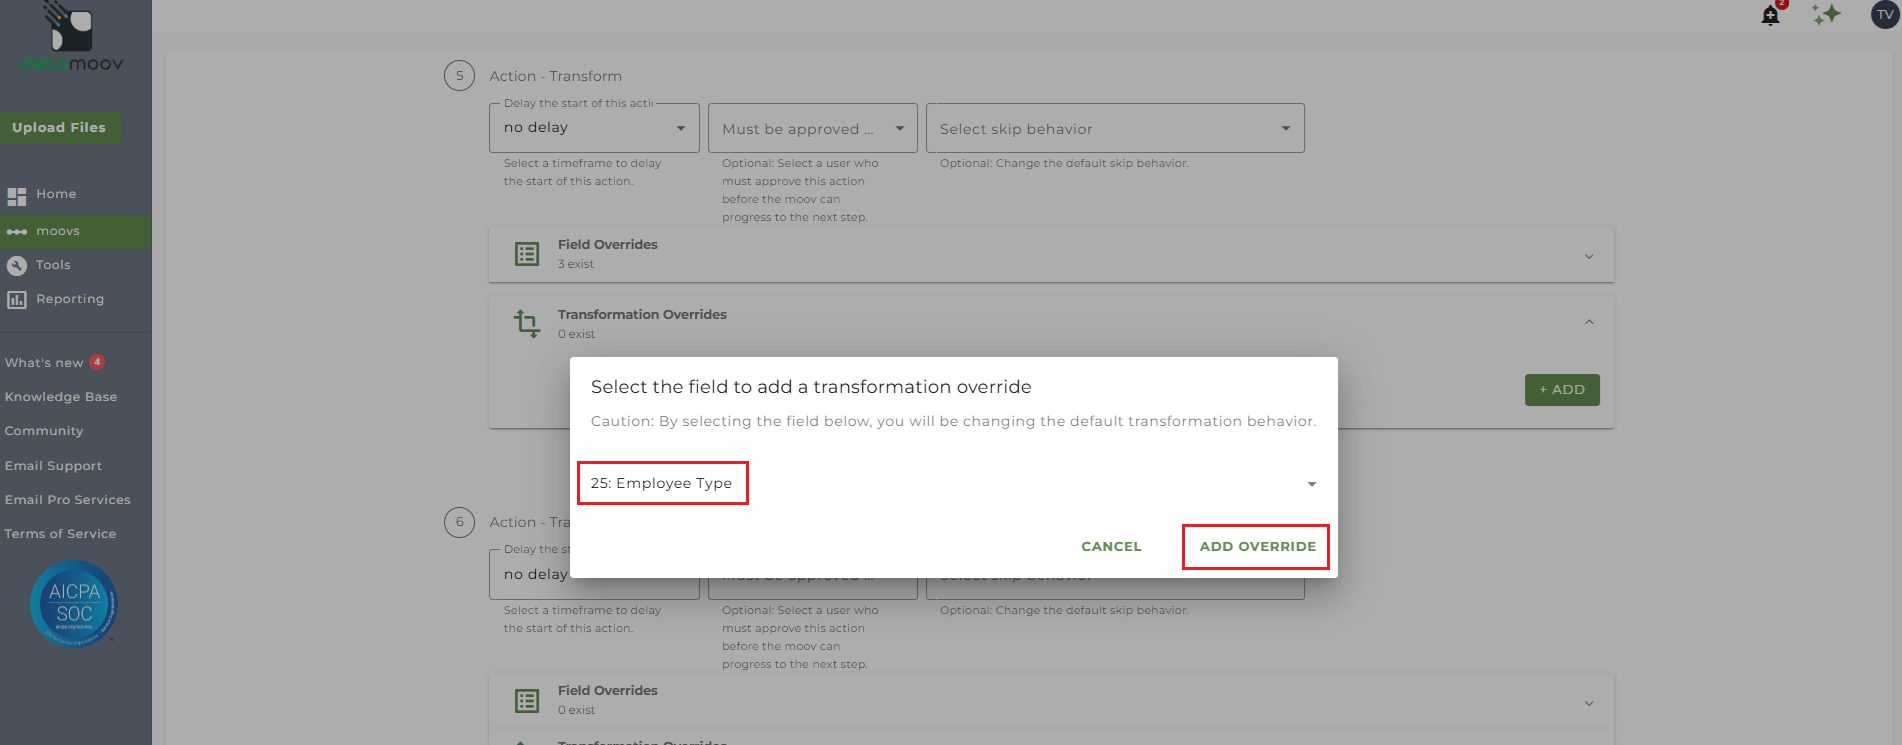
Select field 25: Employee Type and click Add Override.
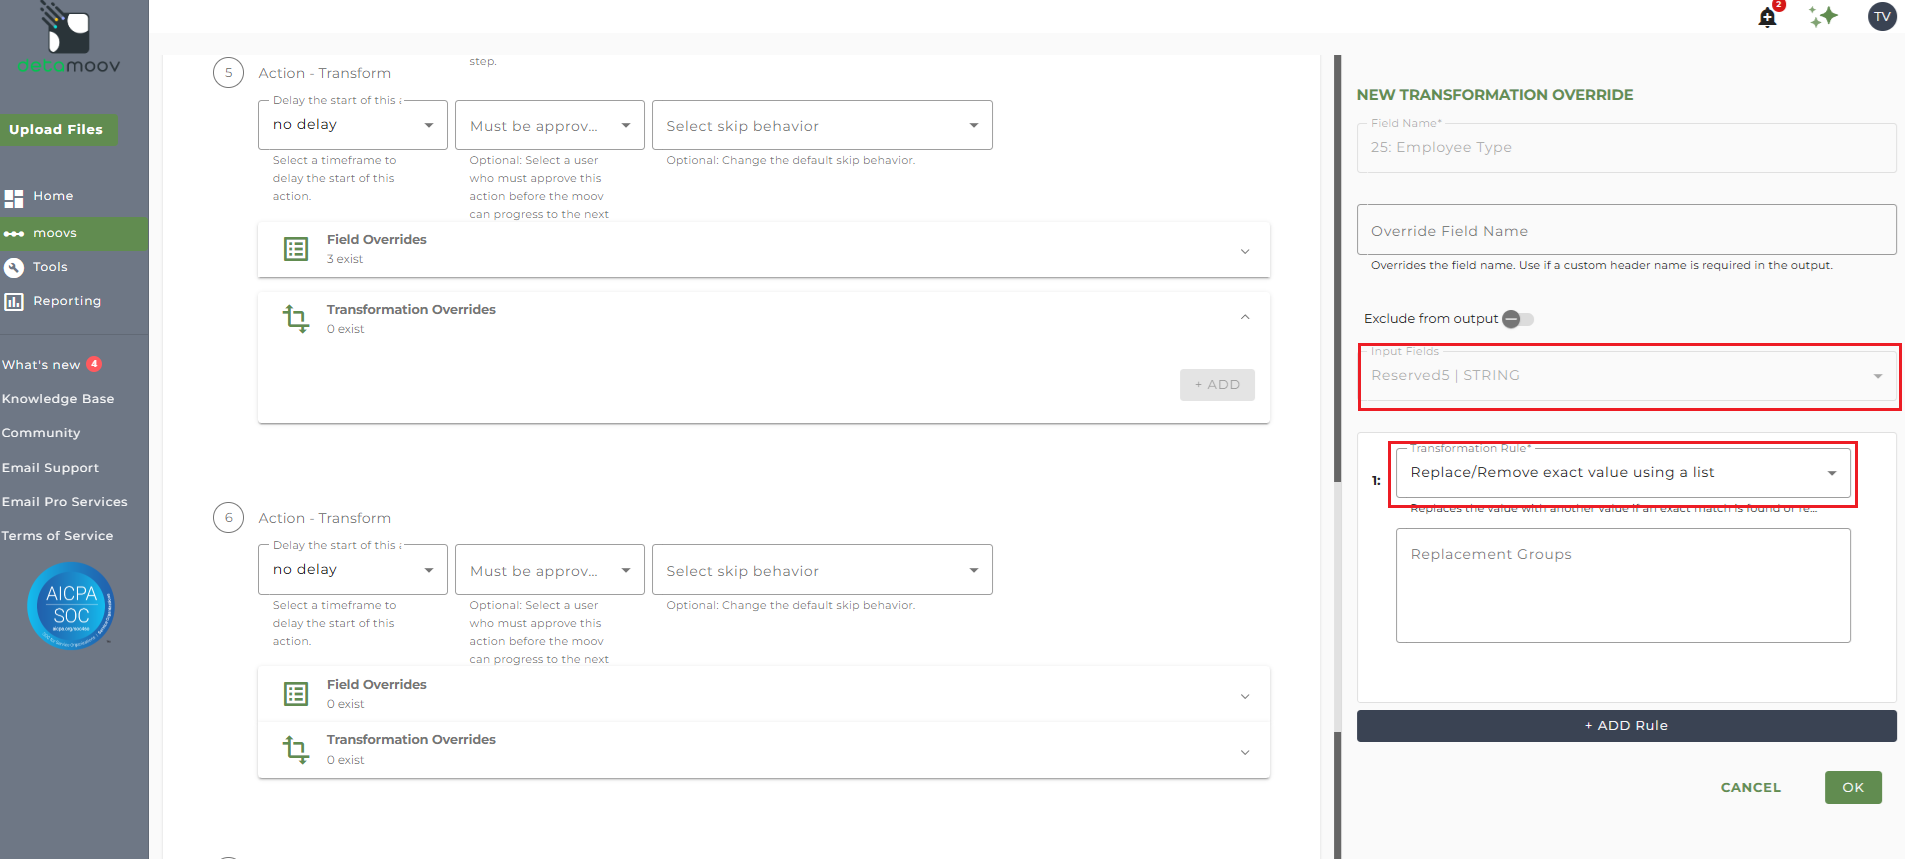
Select the Reserved field from the Input Fields dropdown menu where you have the Employee Type mapped and click the Add Rule button.
For example, say we have the following values mapped to the Reserved5 field from payroll for each employee:
1 = Excluded
2 = Employer Excluded
3 = Not Excluded
Select the 'Replace/Remove exact values using a list'.
Create a Replacement Group for each of the payroll-to-Pentegra mappings. In our example, we would provide the payroll value, a pipe-separator, and the associated Pentegra value.
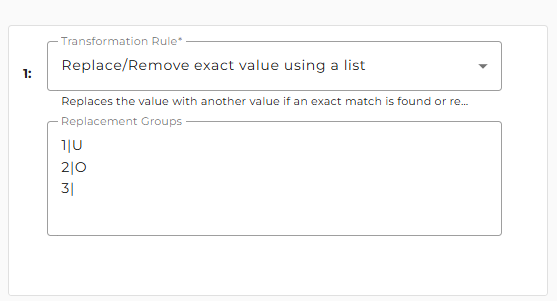
These replacement values will replace the payroll value with the associated Pentegra value for Employee Type.
Employee Type Date
If an employee is either excluded from all contributions or from employer contributions, their Hire Date must be provided in the Employee Type Date field.
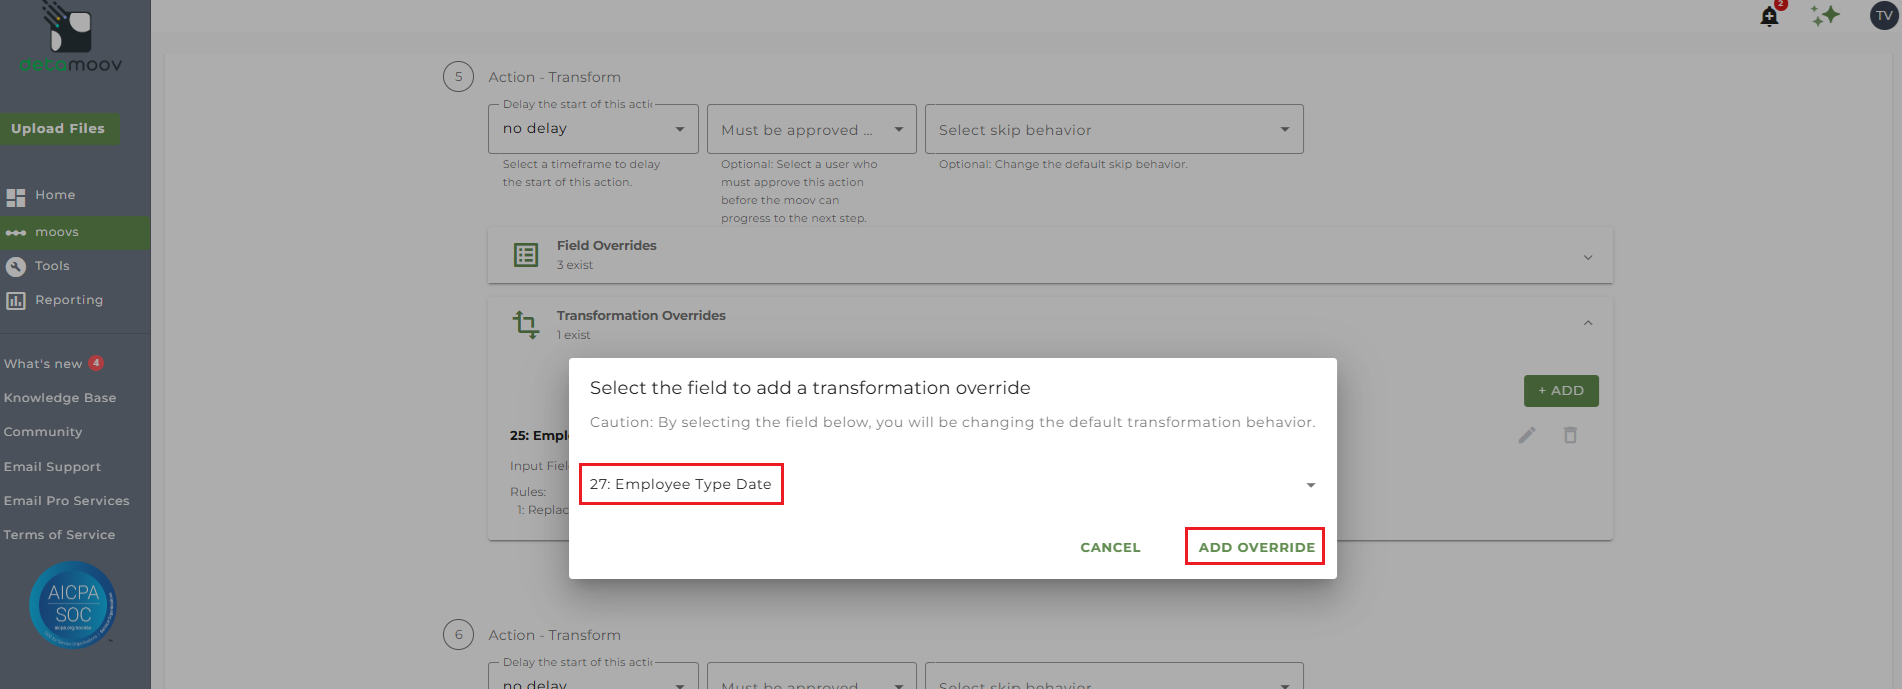
To add a Transformation Override, locate the Action - Transform step, expand the Transformation Overrides panel and click the Add button.
Select field 27: Employee Type Date and click Add Override.
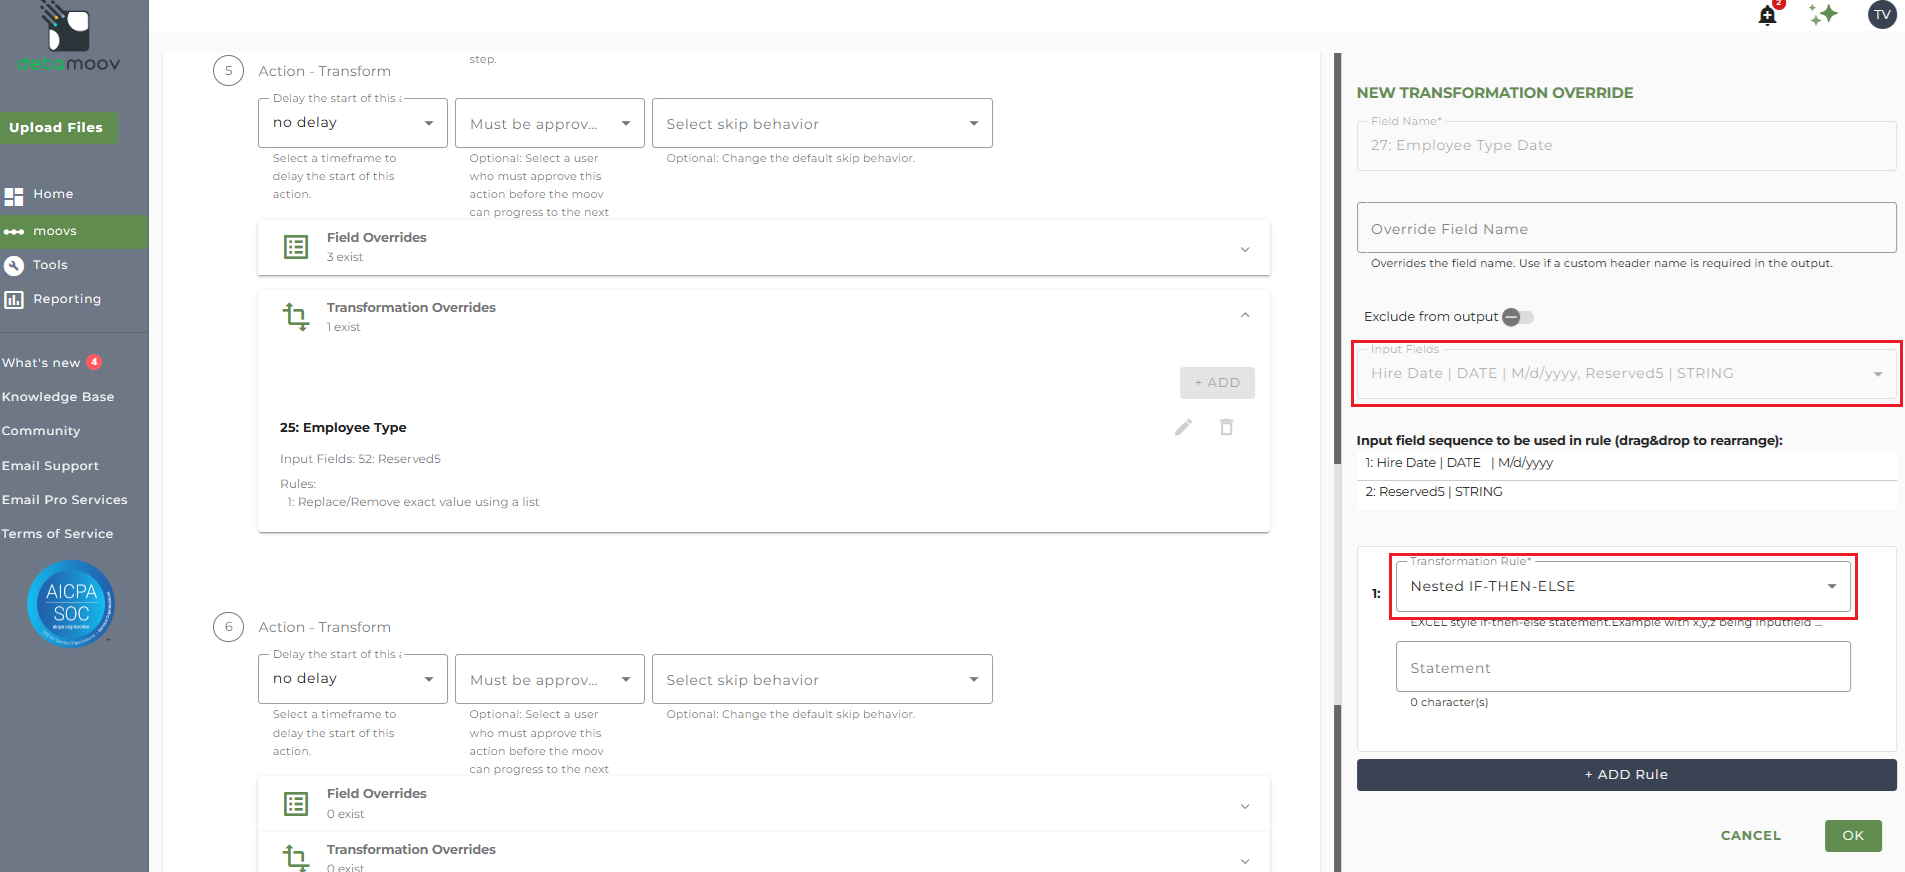
Select the Hire Date field AND the Reserved field where you have the Employee Type mapped from the Input Fields dropdown menu.
Click the Add Rule button and and the 'Nested IF-THEN-ELSE' rule.
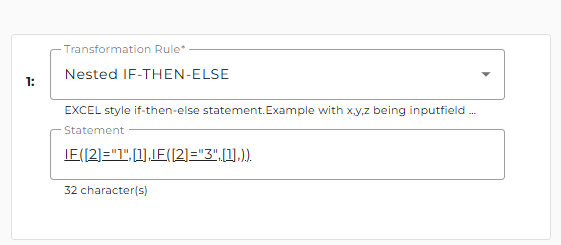
To ensure that the Hire Date is passed if an employee is excluded from contributions, write the Nested IF-THEN-ELSE statement. In our example, we need to pass the Hire Date if the Employee Type is either 1 or 2 (from the payroll Reserved field mapping).
The statement would be:
IF([2]="1",[1],IF([2]="3",[1],))
This statement reads: "If Employee Type is 1, return Hire Date. Else-If Employee Type is 2, return Hire Date. Else, return an empty string".
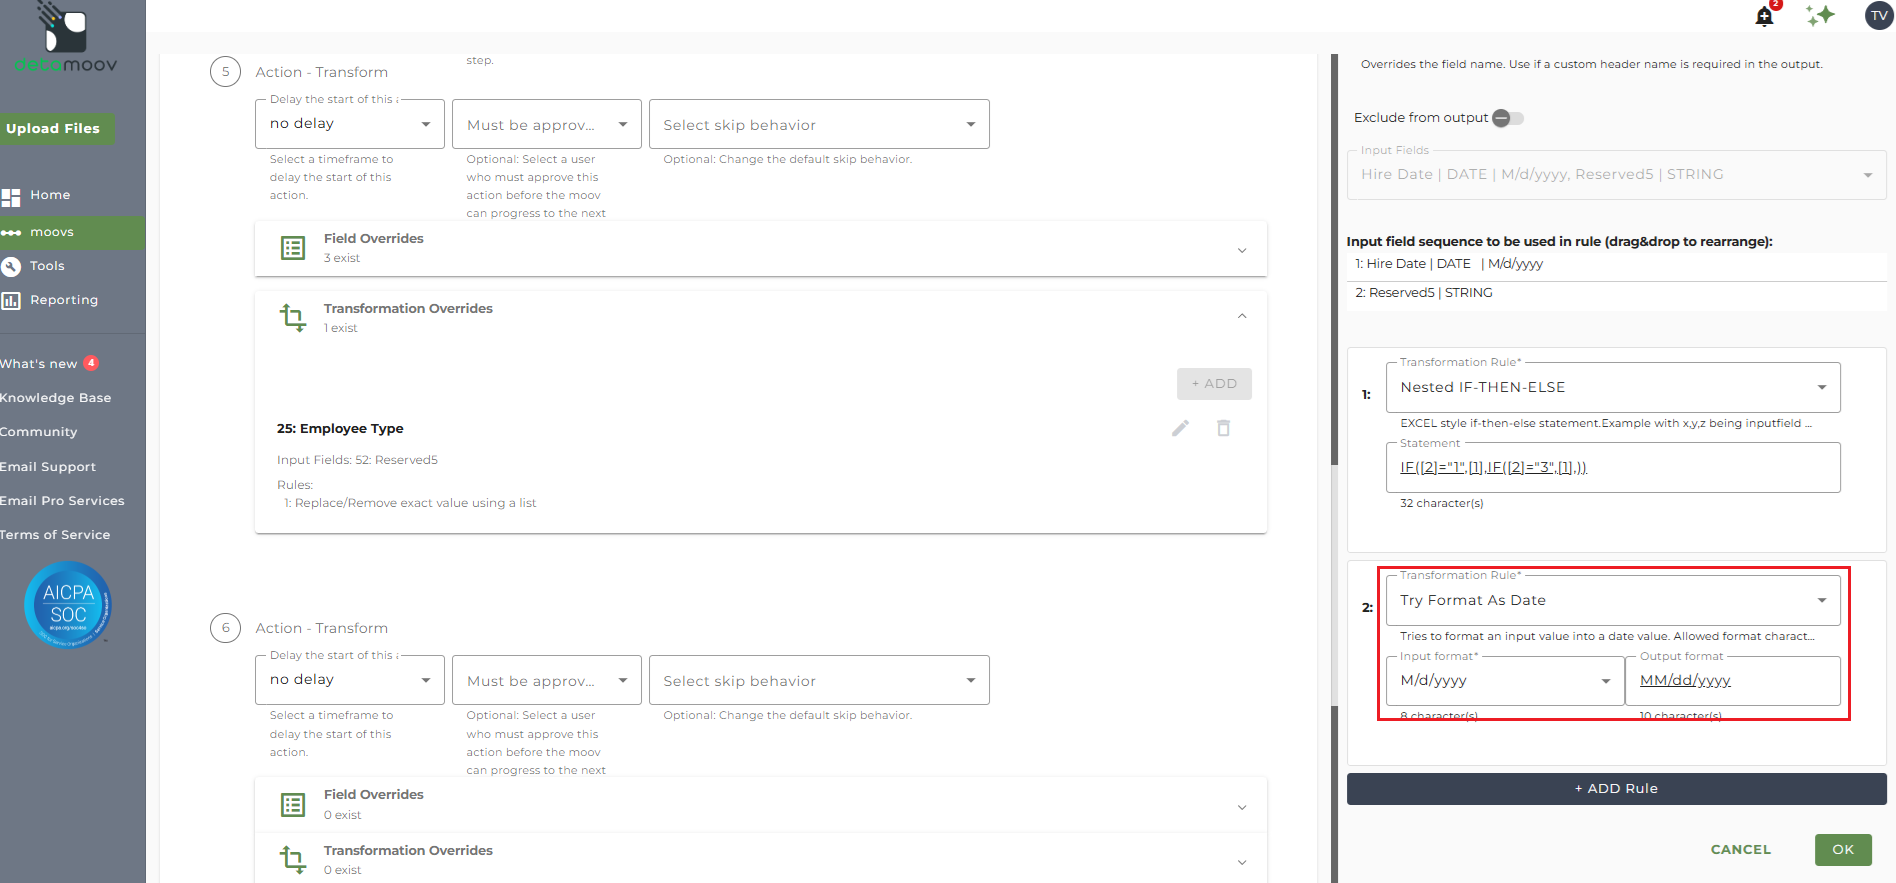
Add the Statement and click Add Rule.
Select the Try Format As Date rule.
In the Input format field, select the Hire Date pattern. In our example, this would be M/d/yyyy.
In the Output format field, enter in Pentegra's required format of MM/dd/yyyy and click OK.
Employee Sub-Type
The Employee Sub-Type field is preferred and should be provided if available. A mapping to the Standard 401k Reserved field and a Transformation Override is needed to map an employee's Sub-Type to the Pentegra values:
F = Full Time
P = Part Time
Blank if unknown
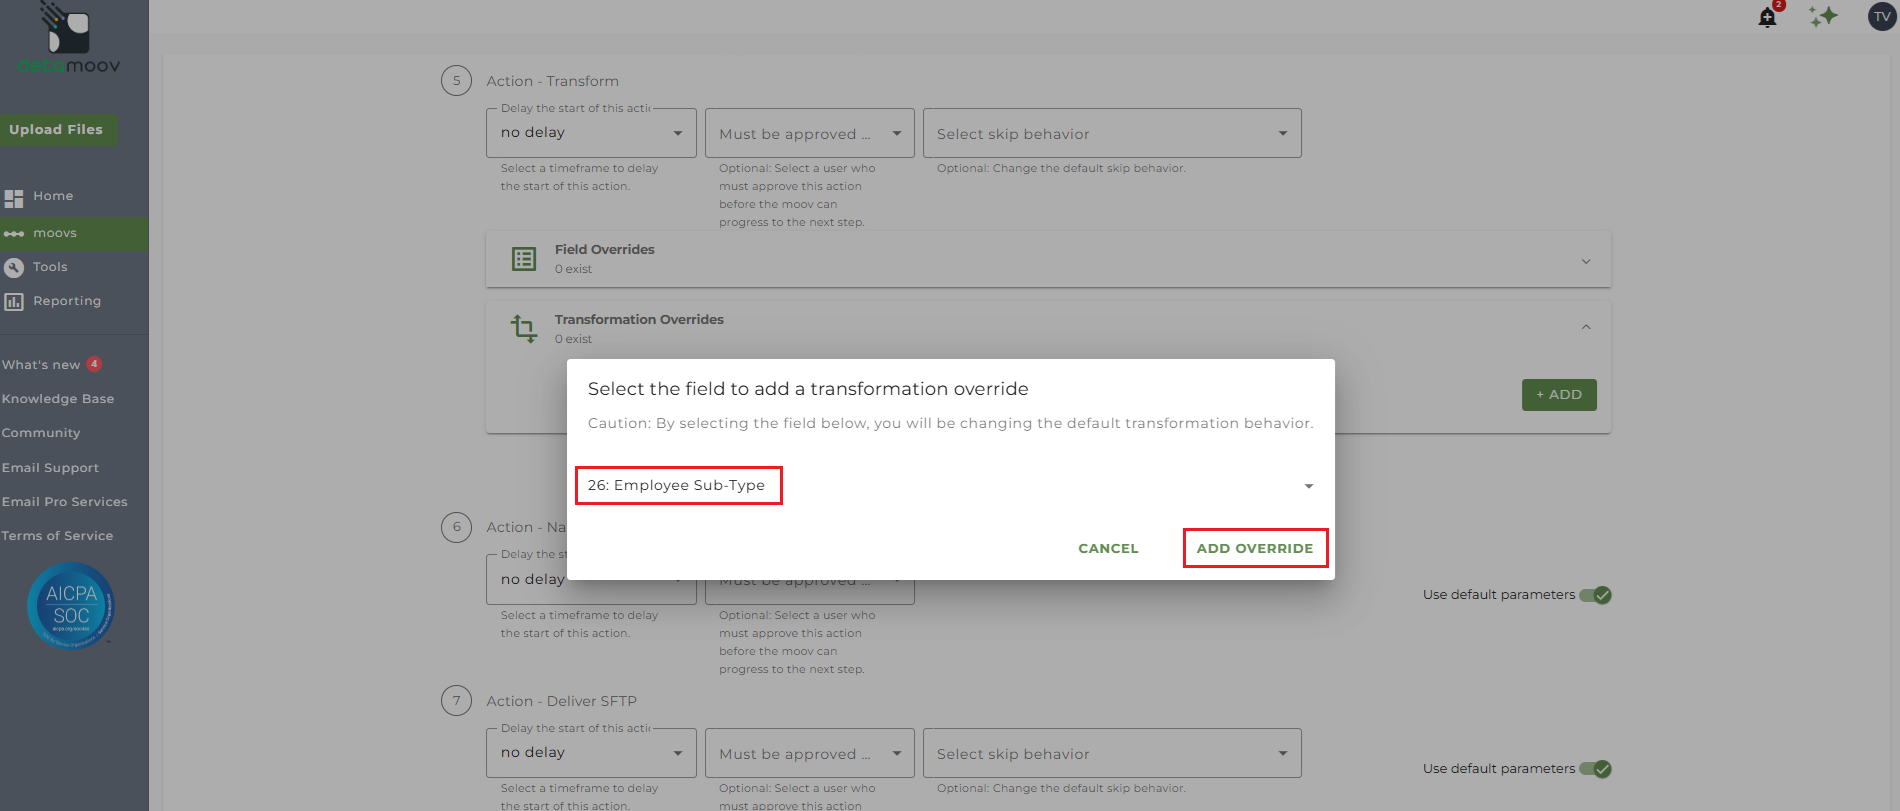
To add a Transformation Override, locate the Action - Transform step, expand the Transformation Overrides panel and click the Add button.
Select field 26: Employee Sub-Type and click Add Override.
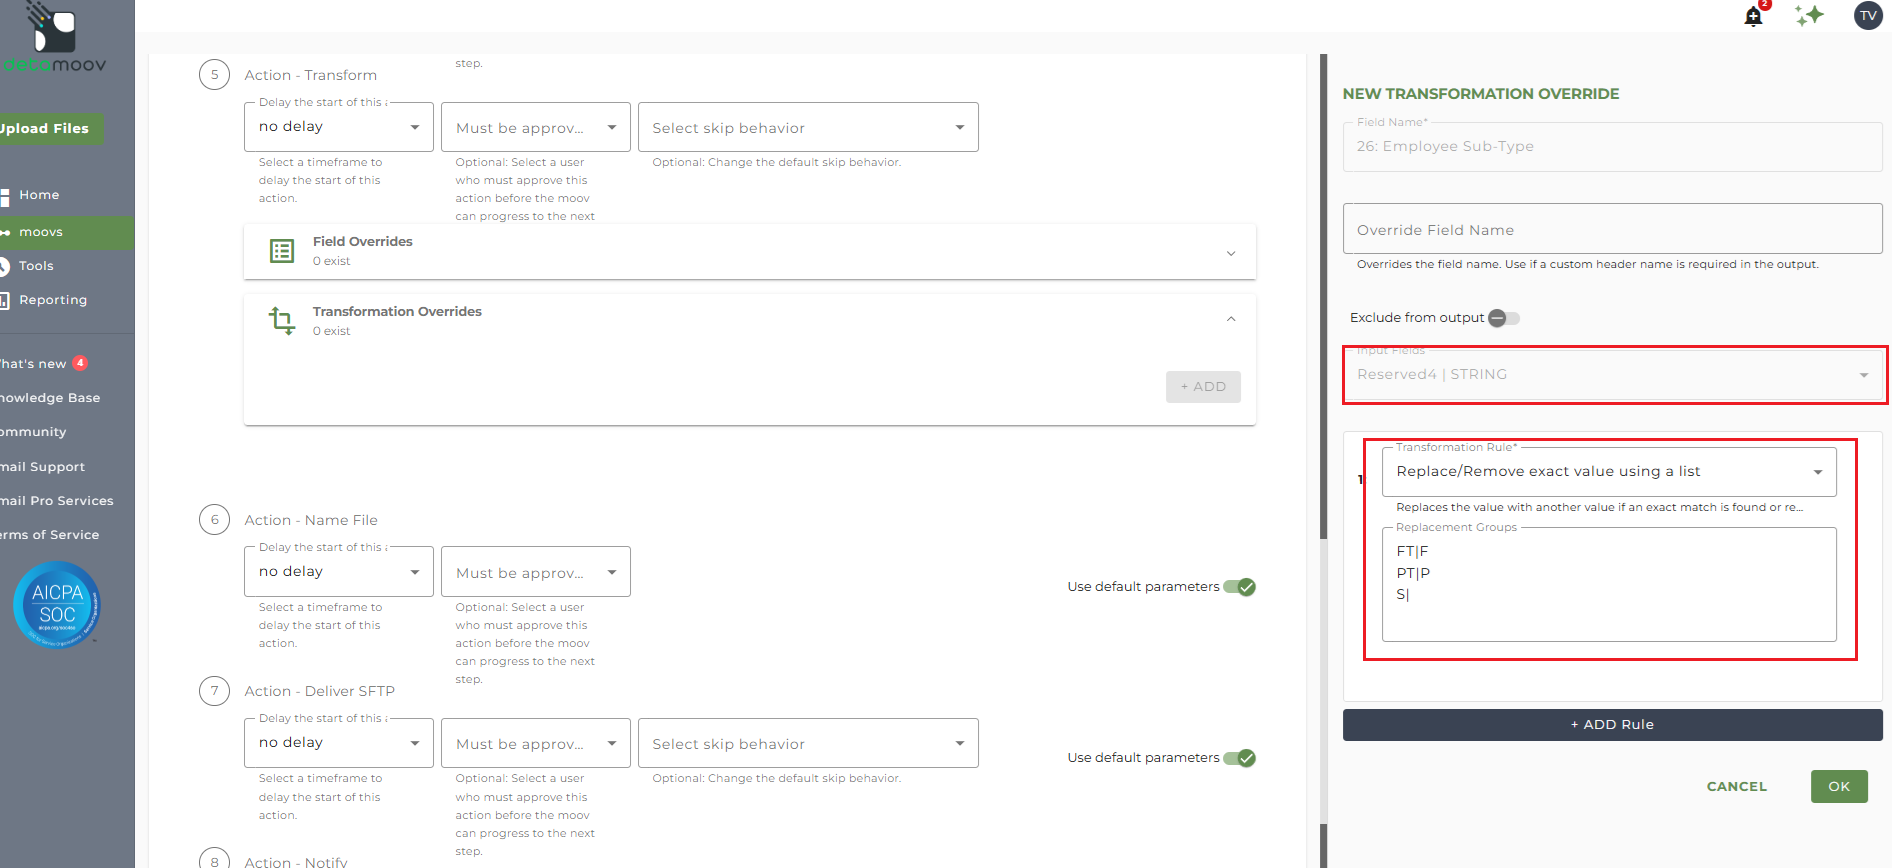
Select the Reserved field from the Input Fields dropdown menu where you have the Employee Type mapped from payroll.
Click Add Rule and select the 'Replace/Remove exact values using a list' rule.
Create a Replacement Group for each of the payroll-to-Pentegra mappings.
Click OK to add the override.
Excluded Compensation
The employee Excluded Compensation is required and must be provided for each employee. A mapping to the Standard 401k Reserved field and a Transformation Override is needed to ensure the correct values are sent to Pentegra.
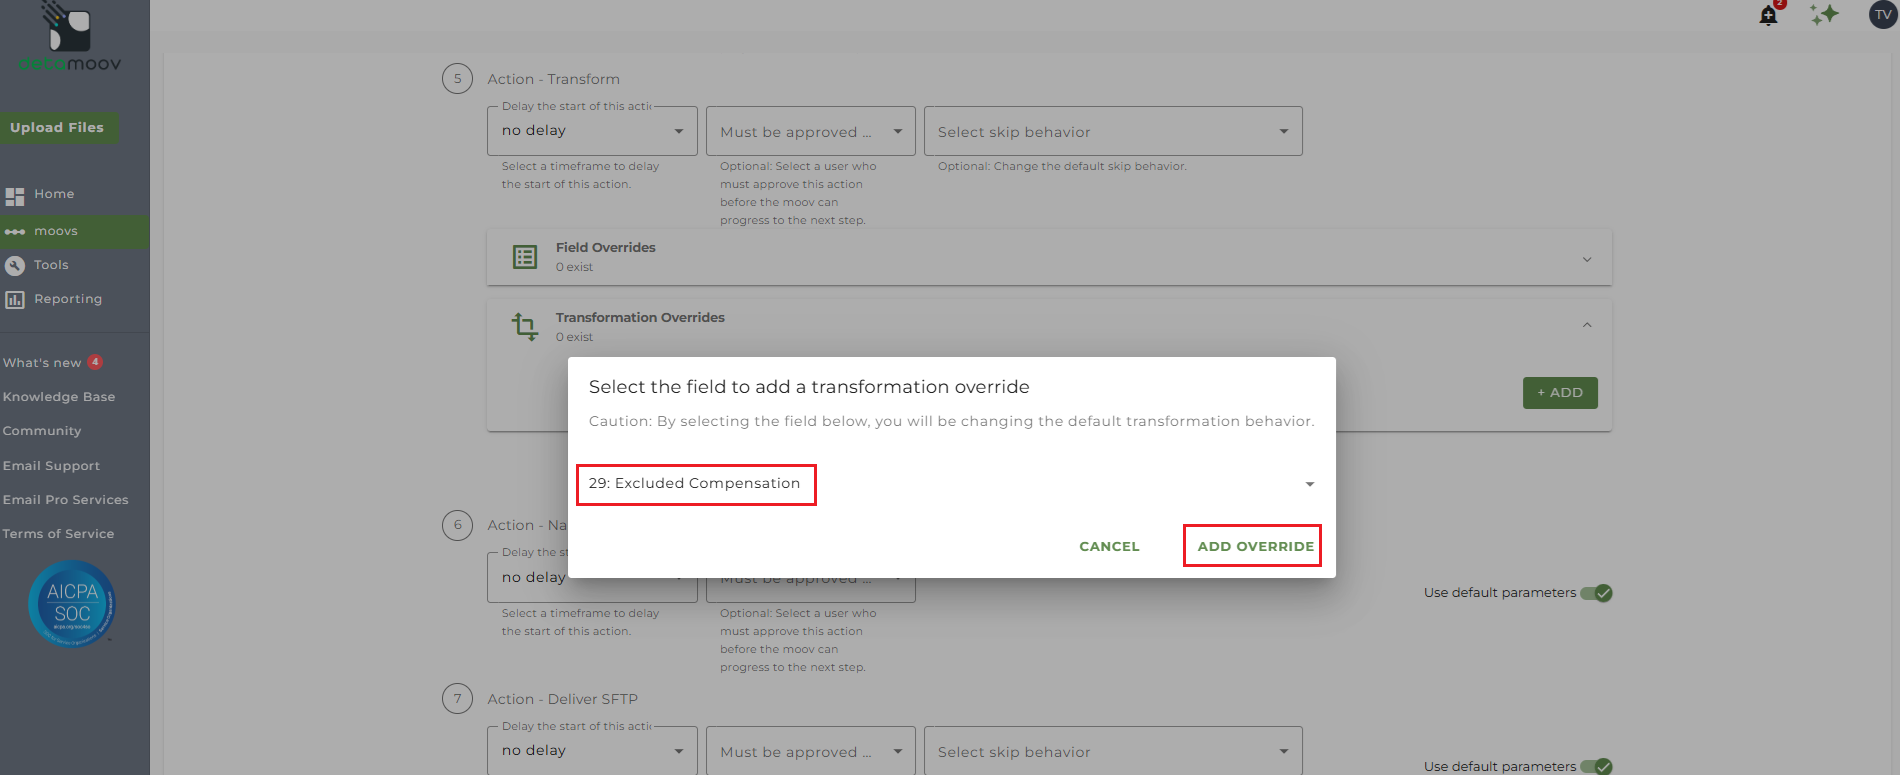
To add a Transformation Override, locate the Action - Transform step, expand the Transformation Overrides panel and click the Add button.
Select field 29: Excluded Compensation and click Add Override.
Hover over the 'Default Value' Transformation Rule and click the Trashcan icon.
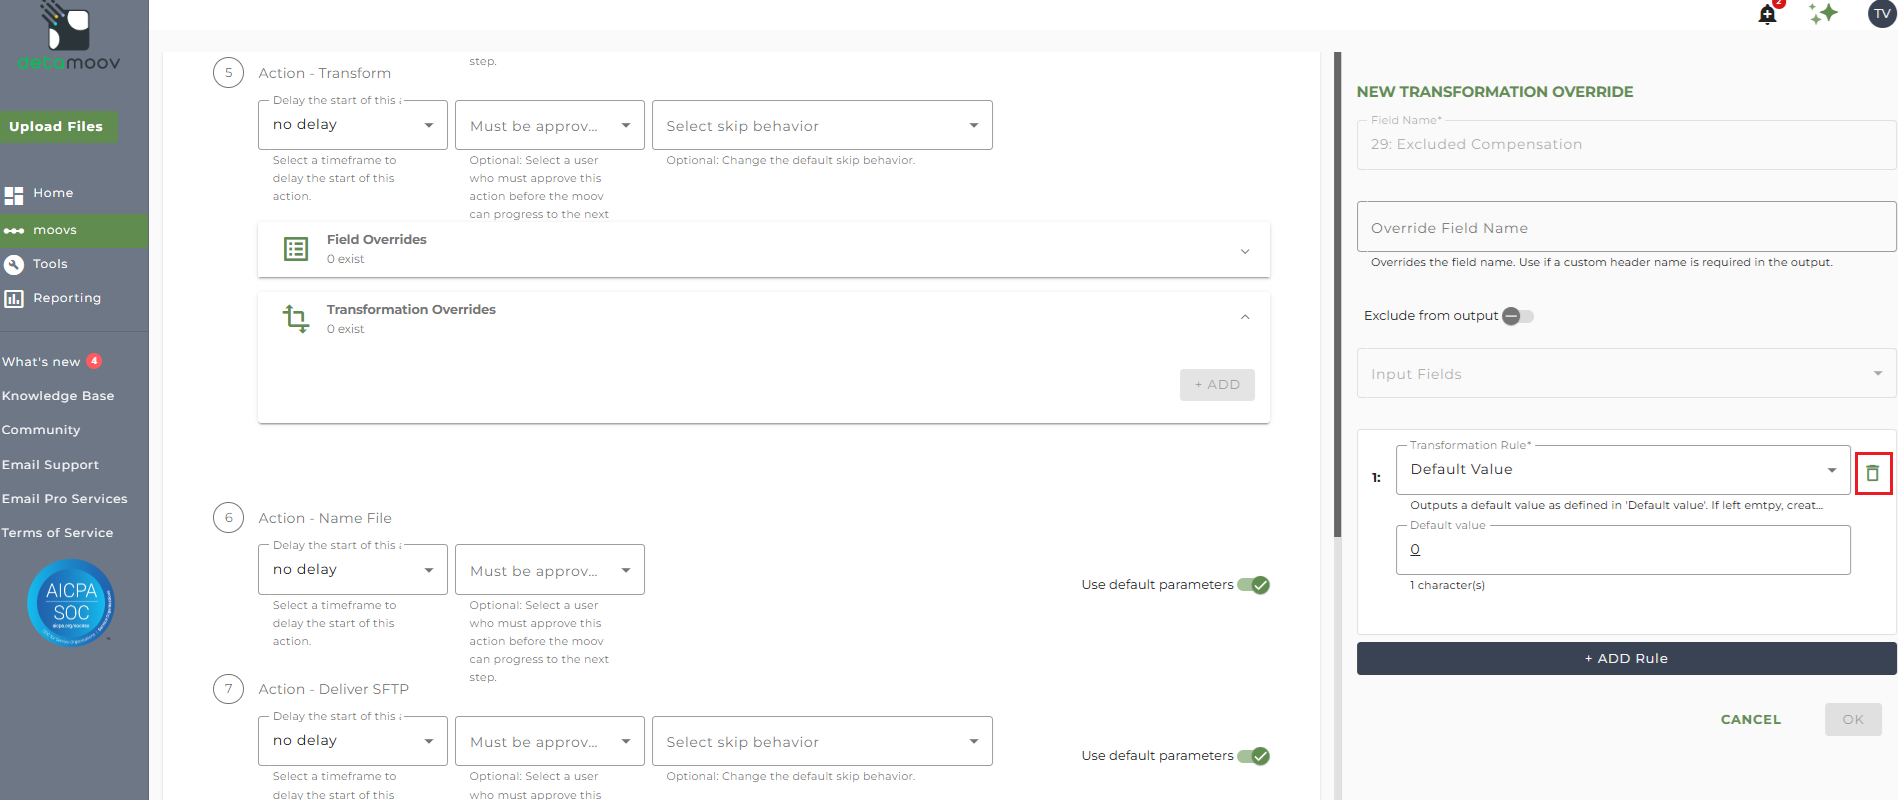
Select the Reserved field from the Input Fields dropdown menu where you have the Excluded Compensation mapped from payroll.
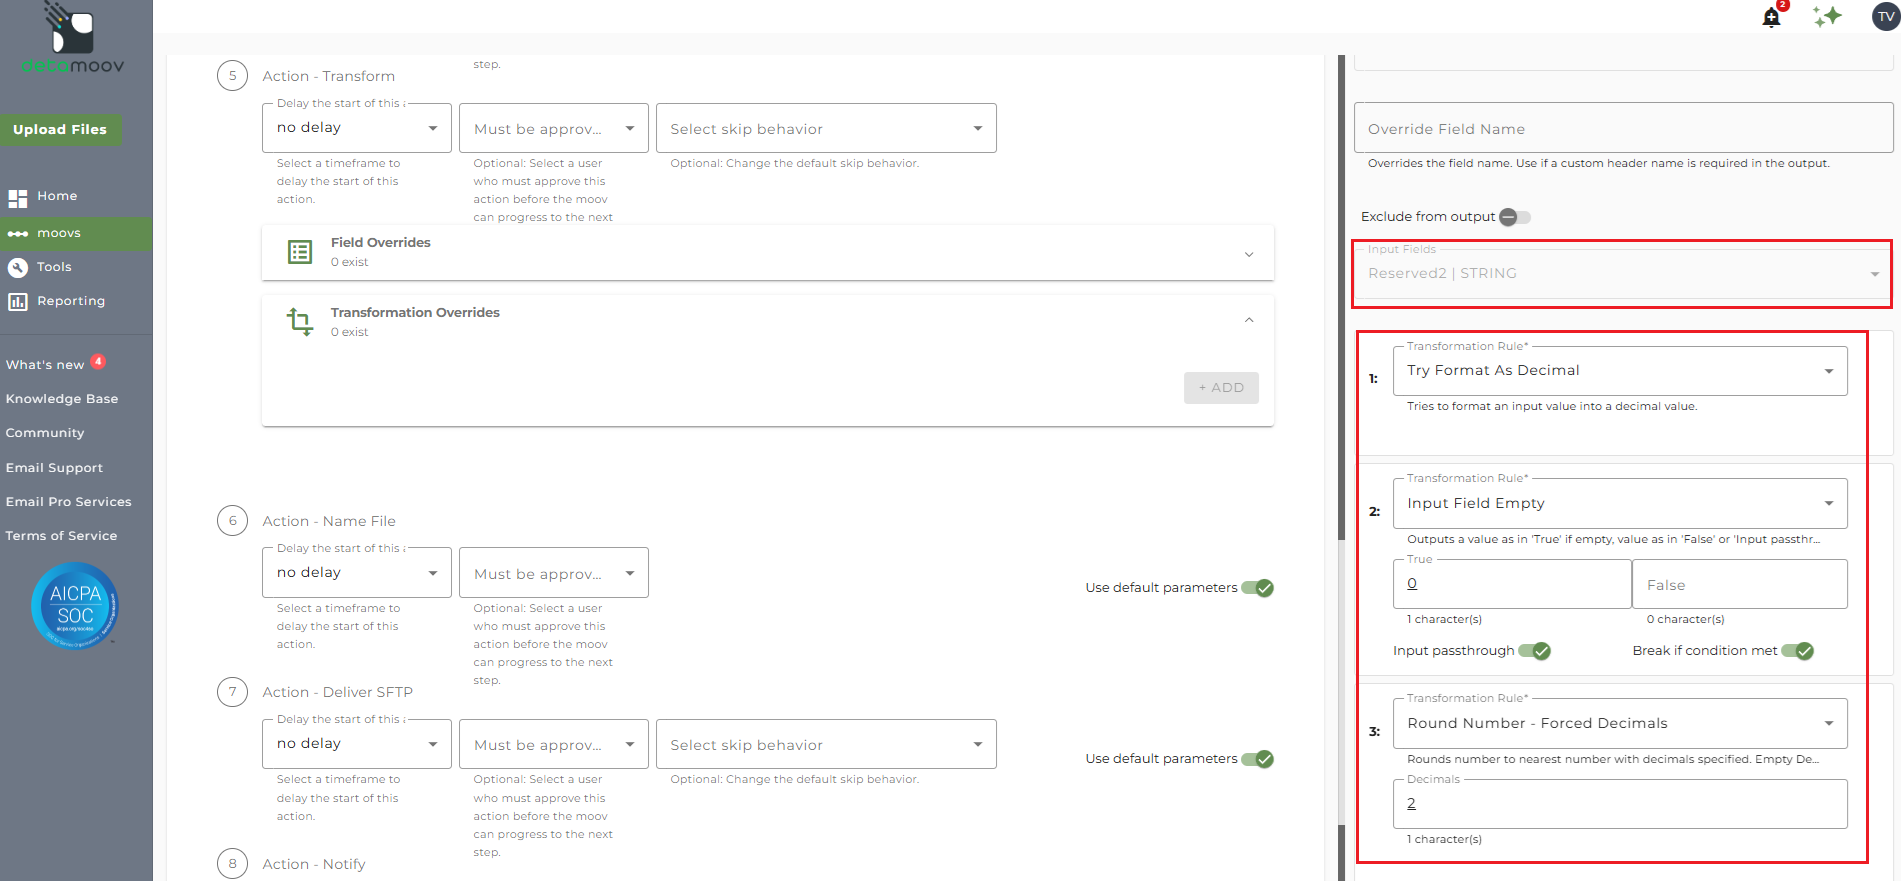
Click Add Rule and select the 'Try Format as Decimal' rule.
Click Add Rule and select the 'Input Field Empty' rule. In the True field, enter 0. Toggle ON 'input passthrough' and 'break if condition met'.
Click Add Rule and select 'Round Number - Force Decimals'. In the Decimals field, enter 2.
Click OK to add the override.
Annual Salary
The Annual Salary field is preferred and should be provided if available. A mapping to the Standard 401k Reserved field and a Transformation Override is needed to pass an employee's Annual Salary to Pentegra.
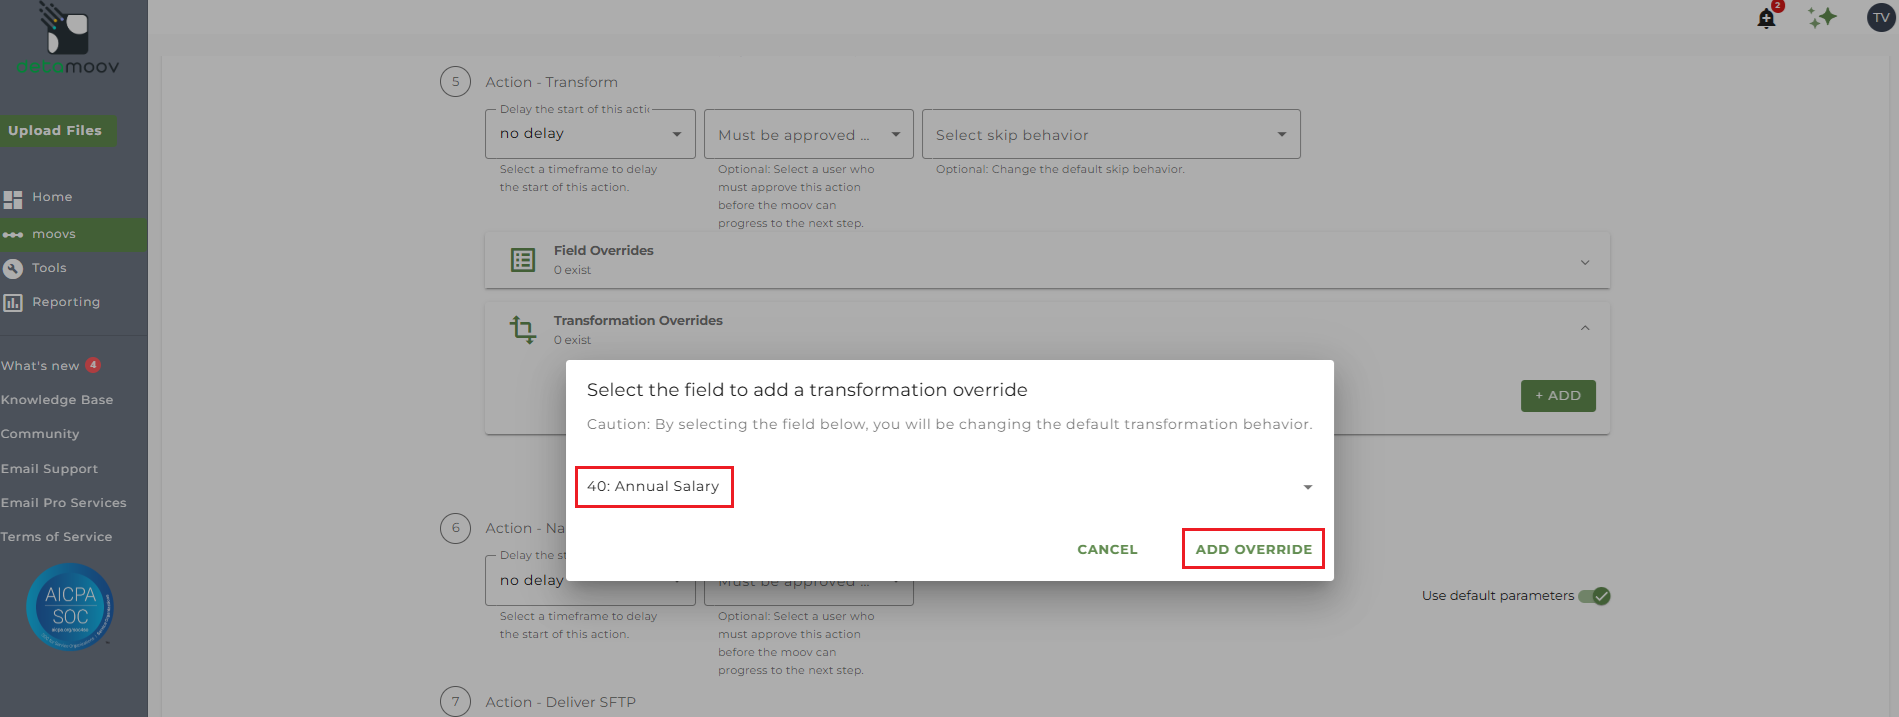
To add a Transformation Override, locate the Action - Transform step, expand the Transformation Overrides panel and click the Add button.
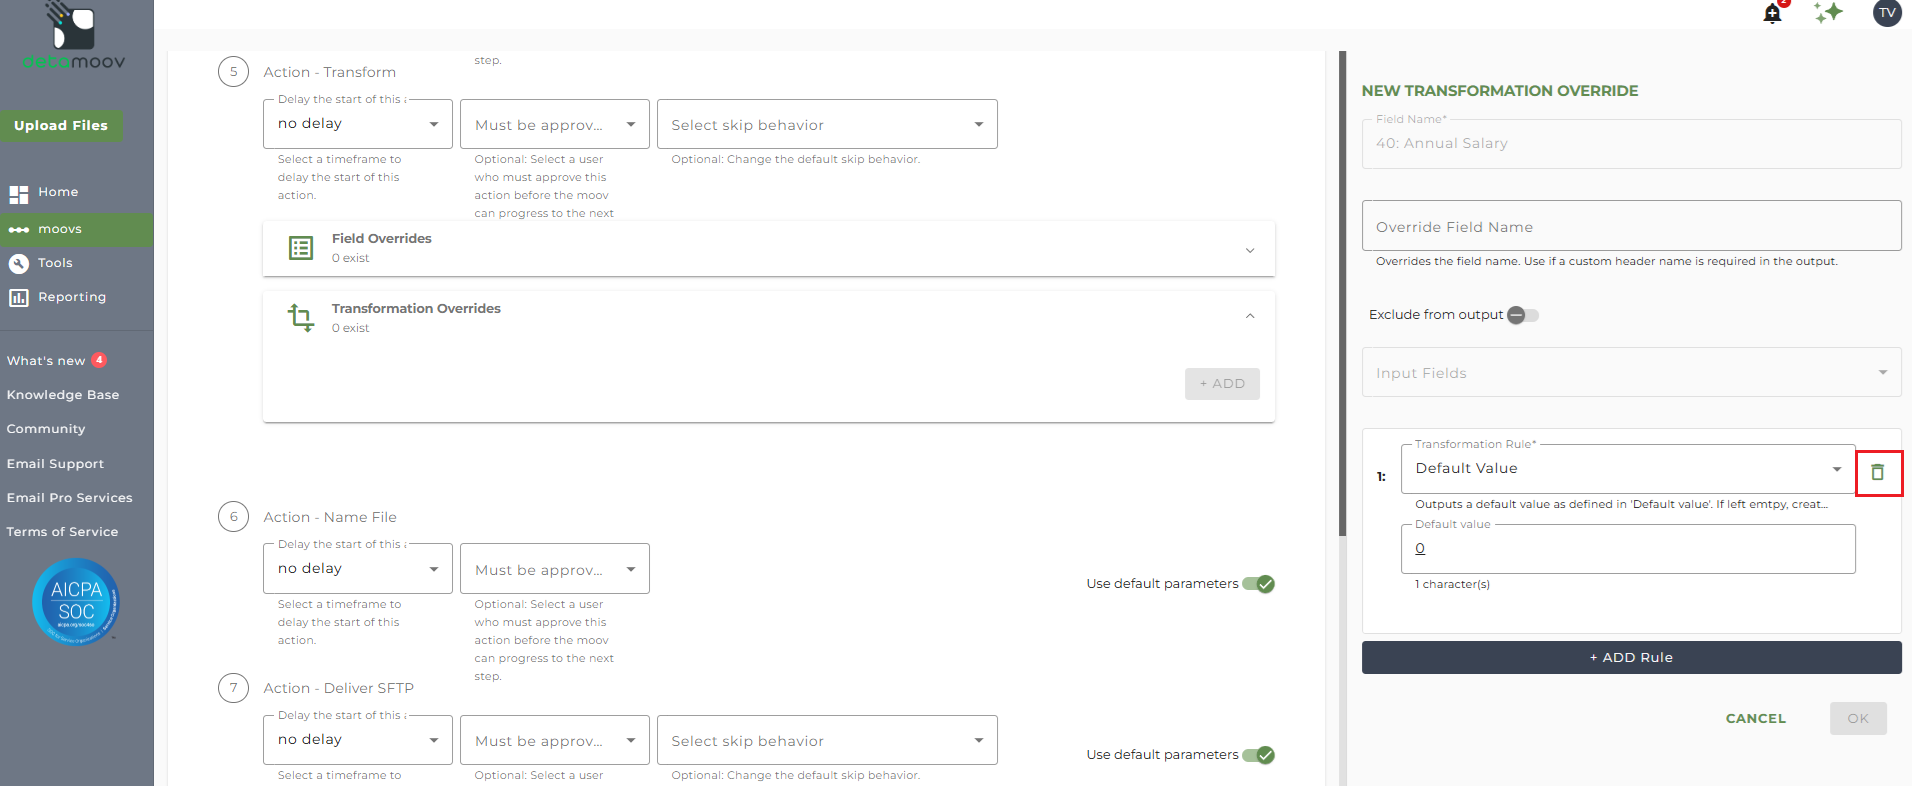
Select field 40: Annual Salary and click Add Override.
Hover over the 'Default Value' Transformation Rule and click the Trashcan icon.
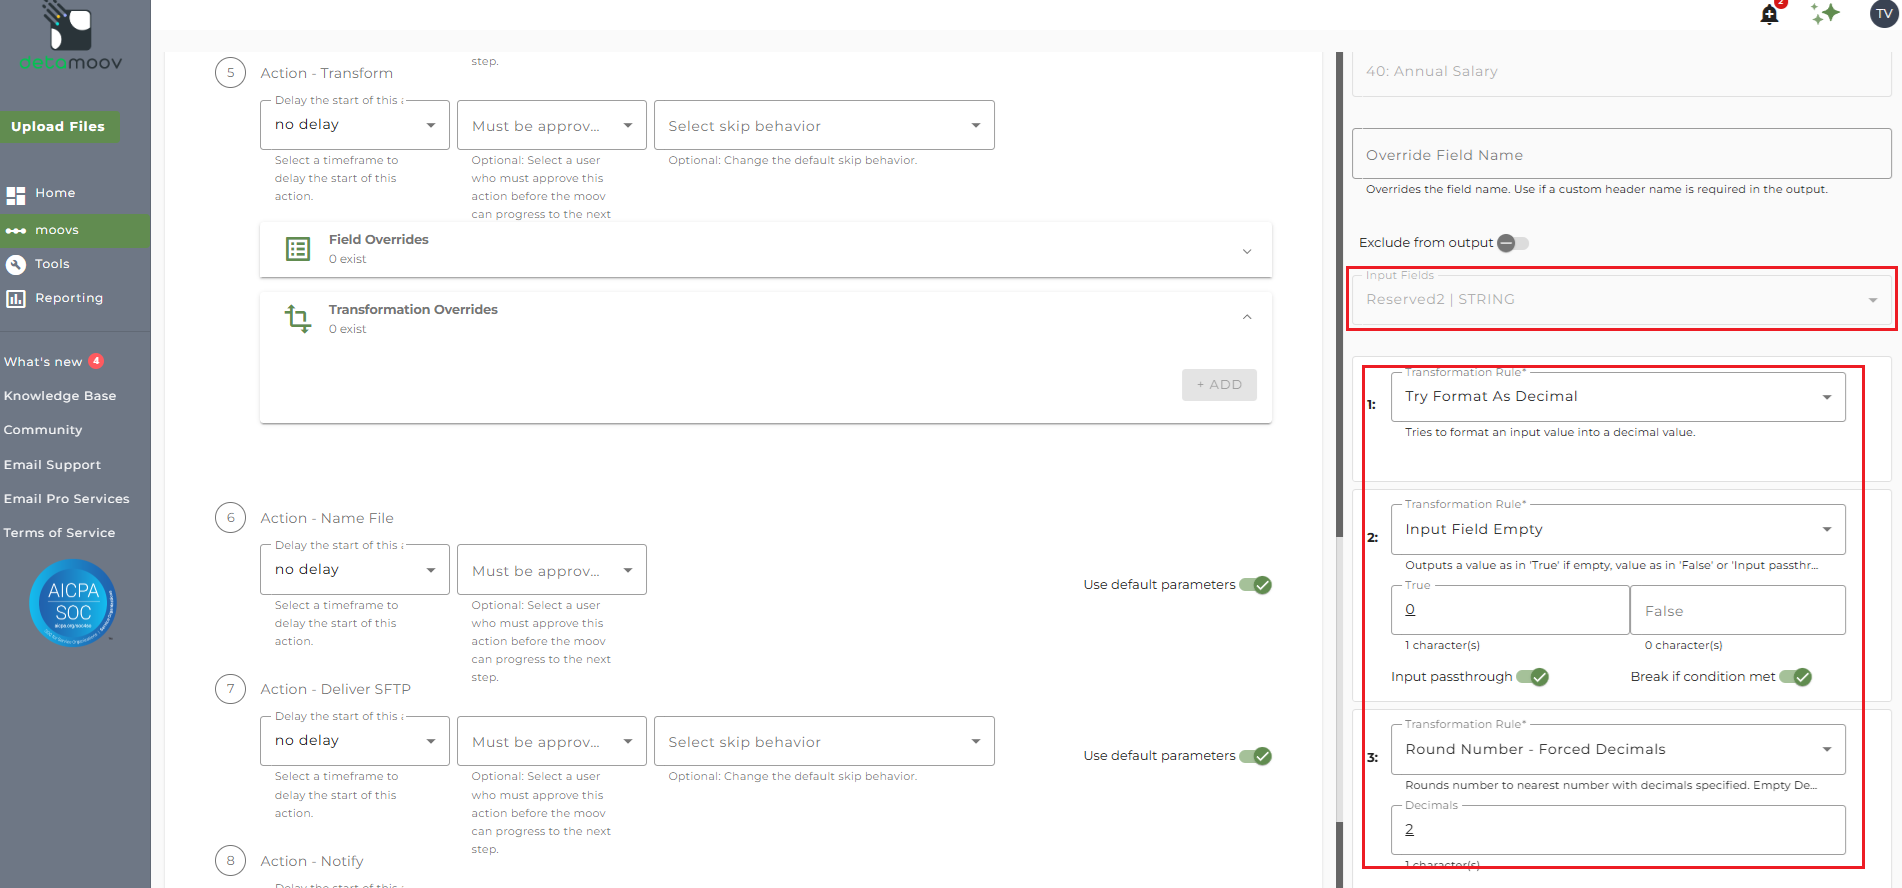
Select the Reserved field from the Input Fields dropdown menu where you have the Annual Salary mapped from payroll.
Click Add Rule and select the 'Try Format as Decimal' rule.
Click Add Rule and select the 'Input Field Empty' rule. In the True field, enter 0. Toggle ON 'input passthrough' and 'break if condition met'.
Click Add Rule and select 'Round Number - Force Decimals'. In the Decimals field, enter 2.
Click OK to add the override.
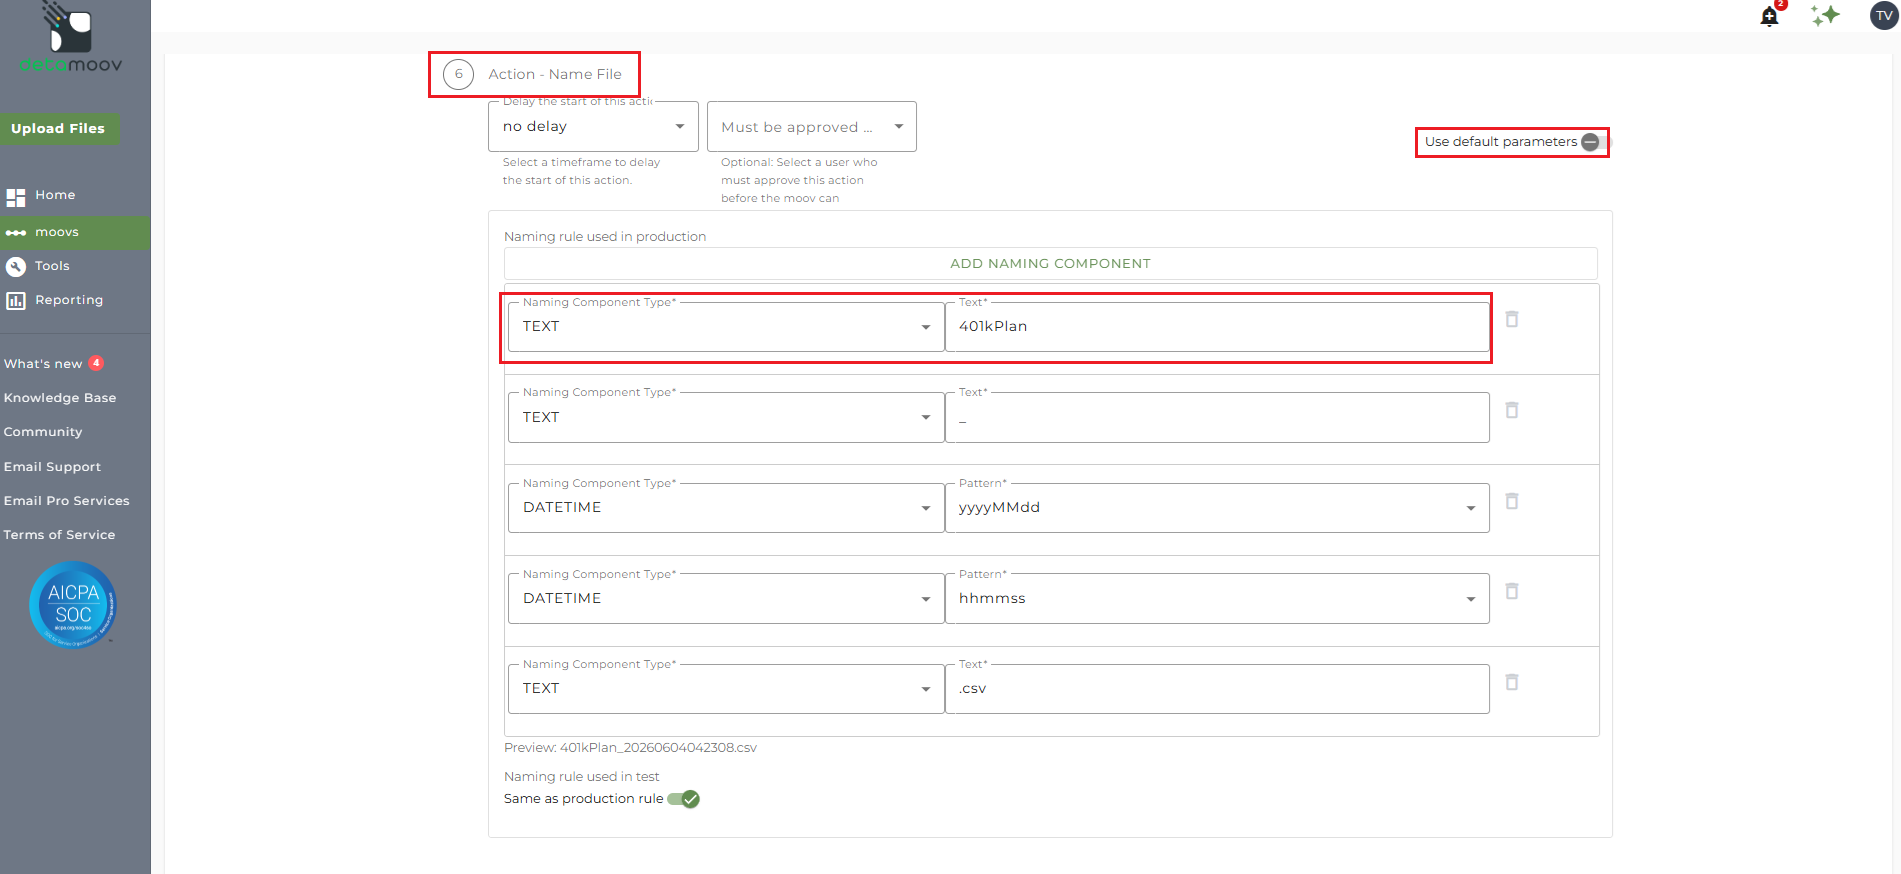
Pentegra requires the file name to start with the Plan Name. Contact Pentegra if you do not have this value.
Locate the Action - Name File step and toggle the 'use default parameters' option OFF. Then replace the text "[Plan Name - Override]" with your client's Pentegra Plan Name.
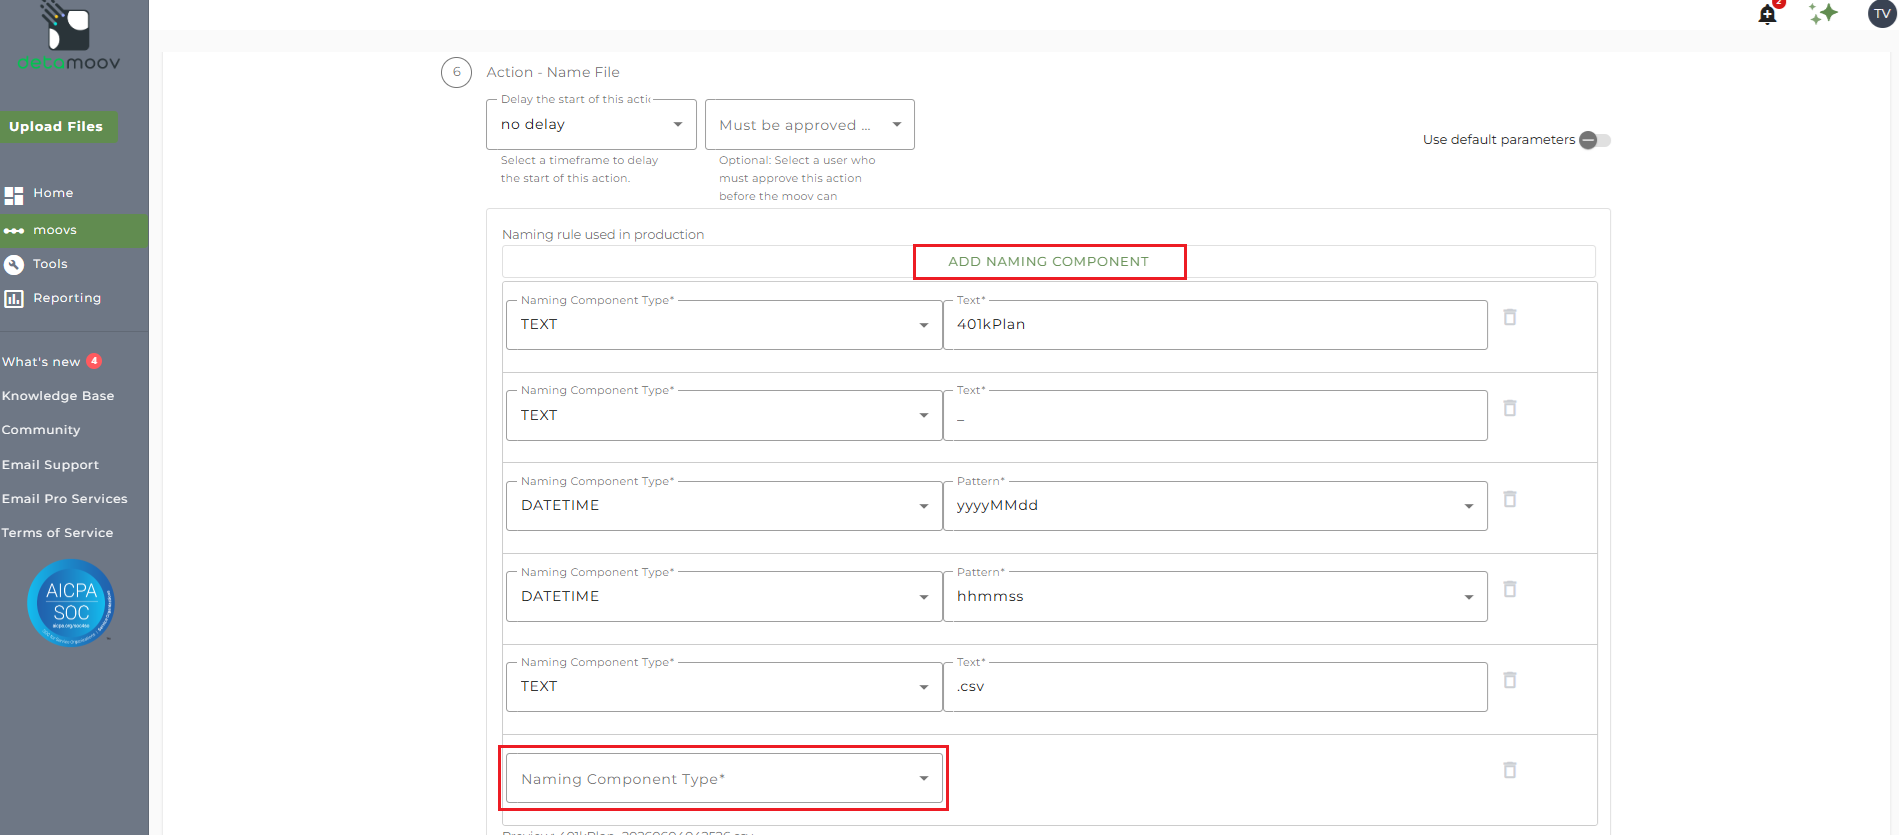
Multi-Divisional Plan Name
If multi-divisional plan, include a new naming component between the HHMMSS and the .csv component. Provide the Pay Frequency value in this field.
Click the ADD NAMING COMPONENT button at the top of the naming fields. This will add a new naming component to the end of the file name.
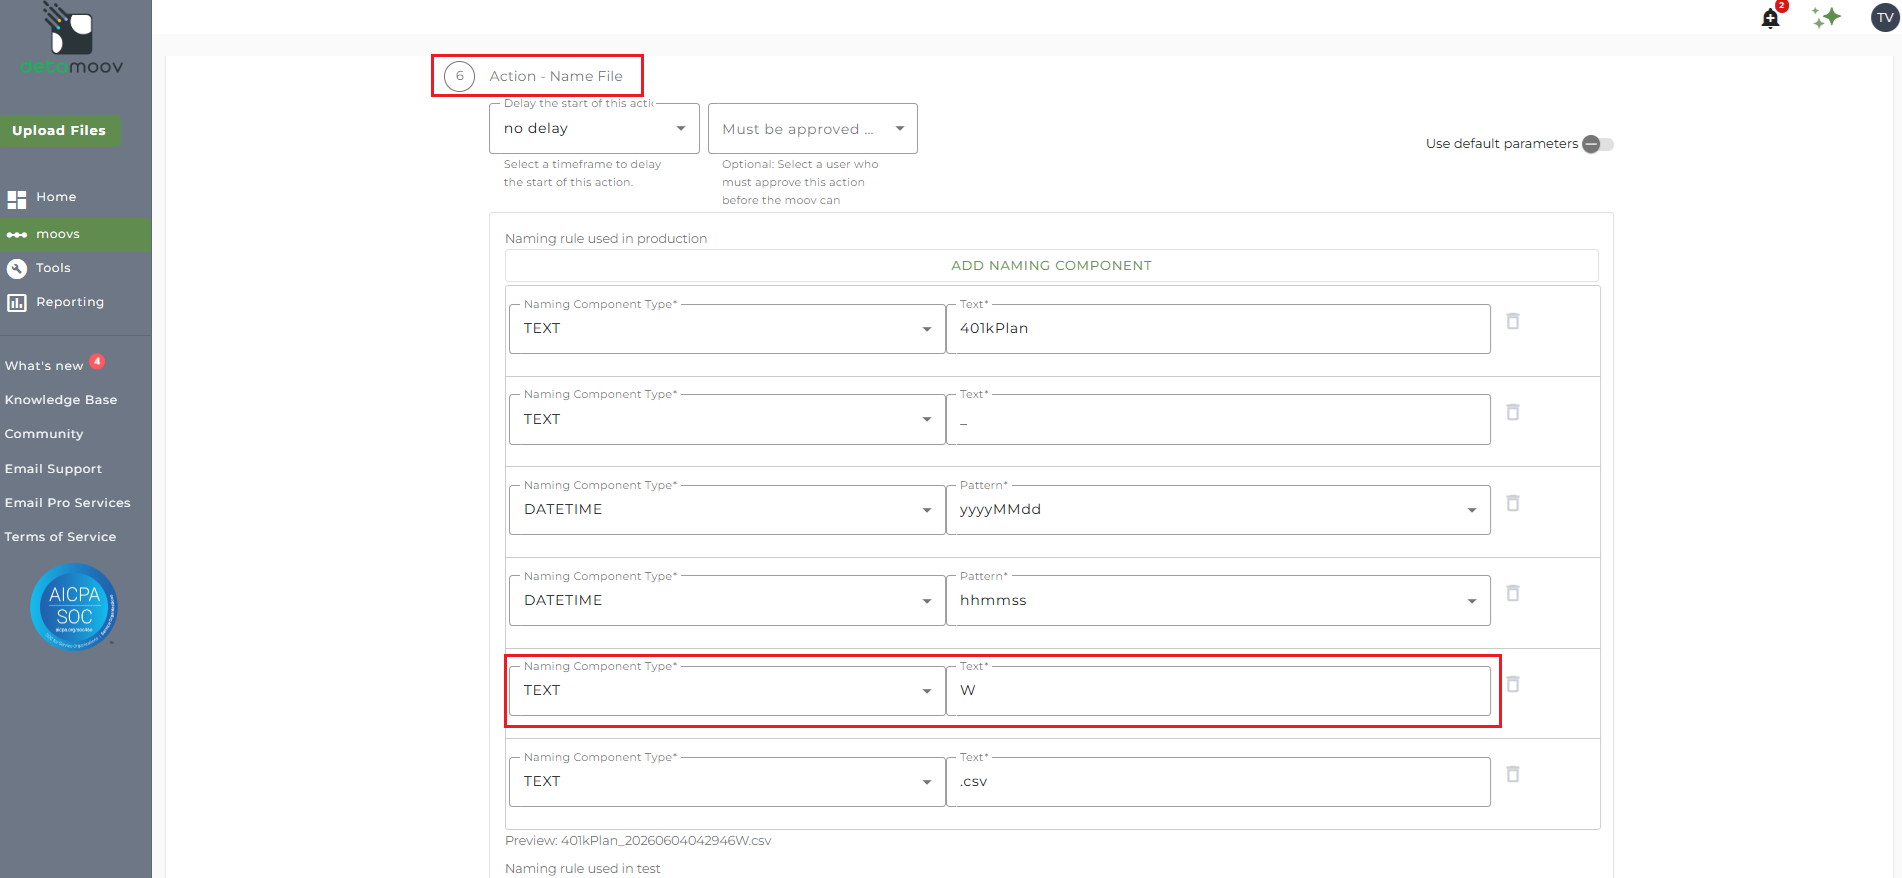
Drag and drop the new naming component between the DATETIME hhmms and the TEXT .csv. Select TEXT from the Naming Component Type dropdown and enter the Pay Frequency value for the division.
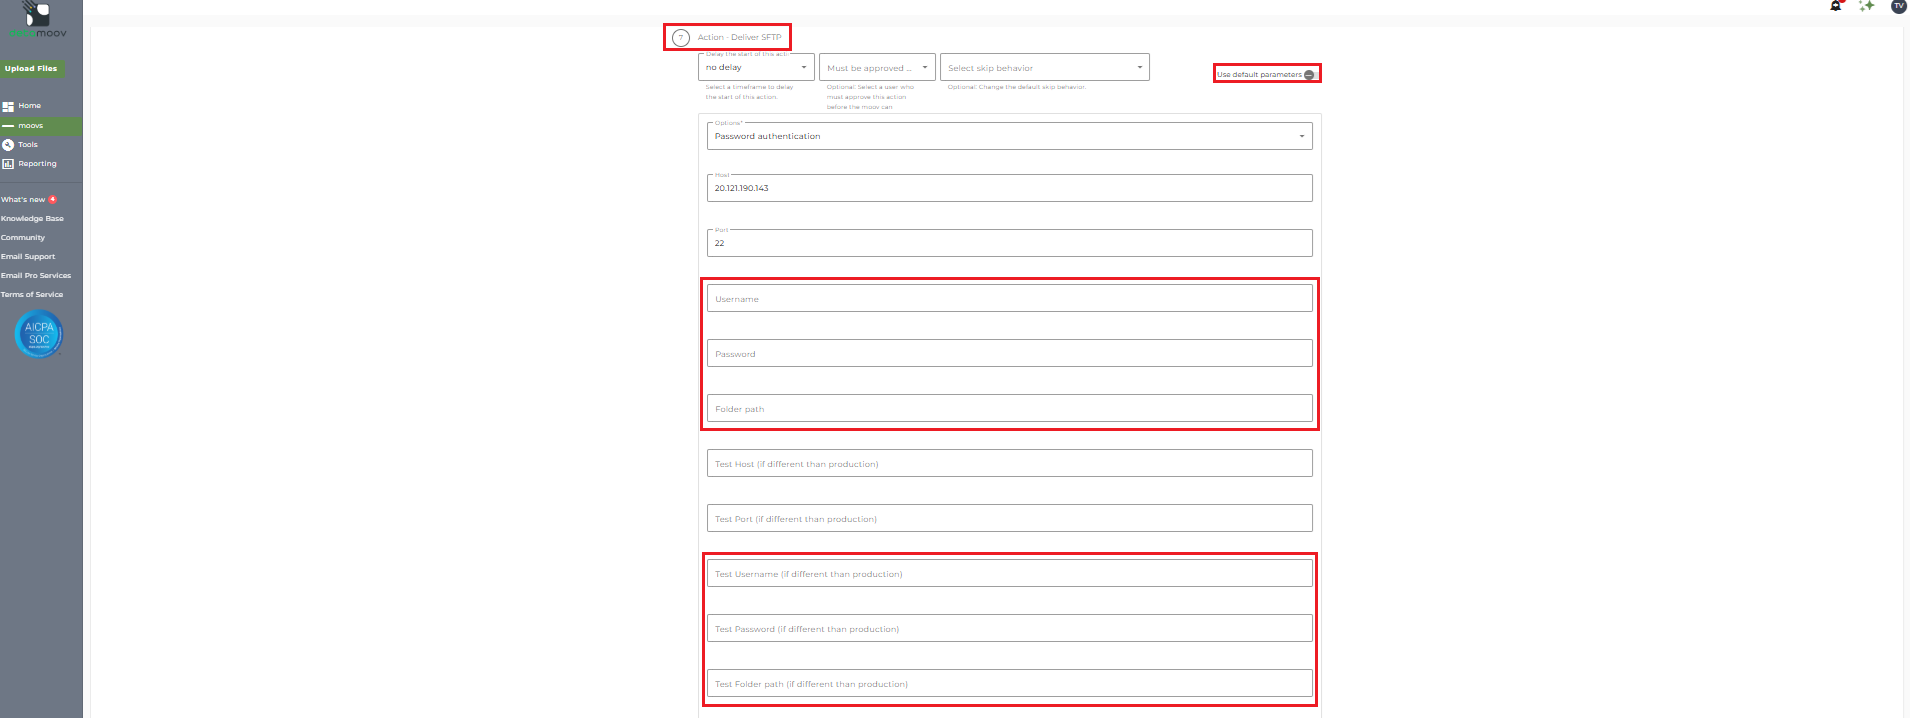
Pentegra SFTP credentials are plan-specific and must be provided on the configuration. Contact Pentegra to obtain your client's credentials.
Locate the Action - Deliver SFTP step and toggle the 'use default parameters' option OFF. Then provide the following credentials:
Username
Password
Production Path
Test Username
Test Password
Test Path
At the beginning of this article you configured the notification step for the moov to send a notification once the moov had completed. You also have the ability to configure the notification step for each client configuration if you wish to add or remove email addresses per client.
To override the notification step, locate the Action - Notify step and toggle the "Use default parameters" off and enter/remove email addresses from Email Address and Reply To fields. If you would like to enter multiple email addresses, separate them with a comma.

To complete the configuration for your client, click the Next button at the bottom of the page and then the Save button on the moov summary page.

