

This article describes how to configure a client for the PrismHCM Premier Integration. Before you can integrate a Premier Service, you will need to have the PrismHCM Premier Integration set up on your account. Please reach out to detamoov Support if you this has not been setup on your account.
To integrate with a Premier Service you will need to first make sure you have 'added a moov definition to your account'.
After adding a moov definition, click moovs on the left side menu and select the moov you want to configure with the premier integration.
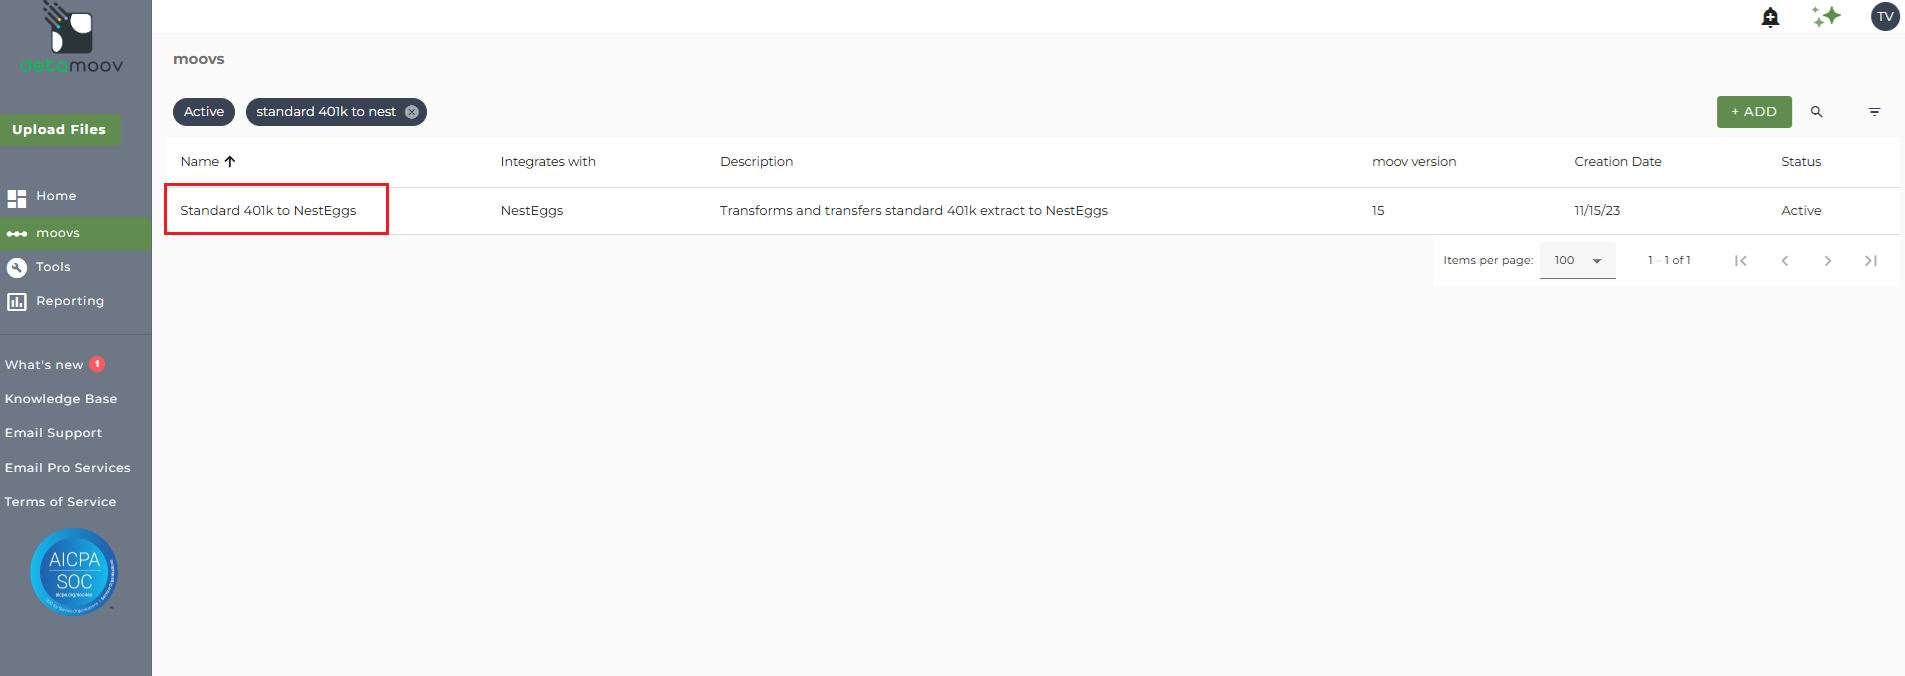
Configuring a Premier Service Integration
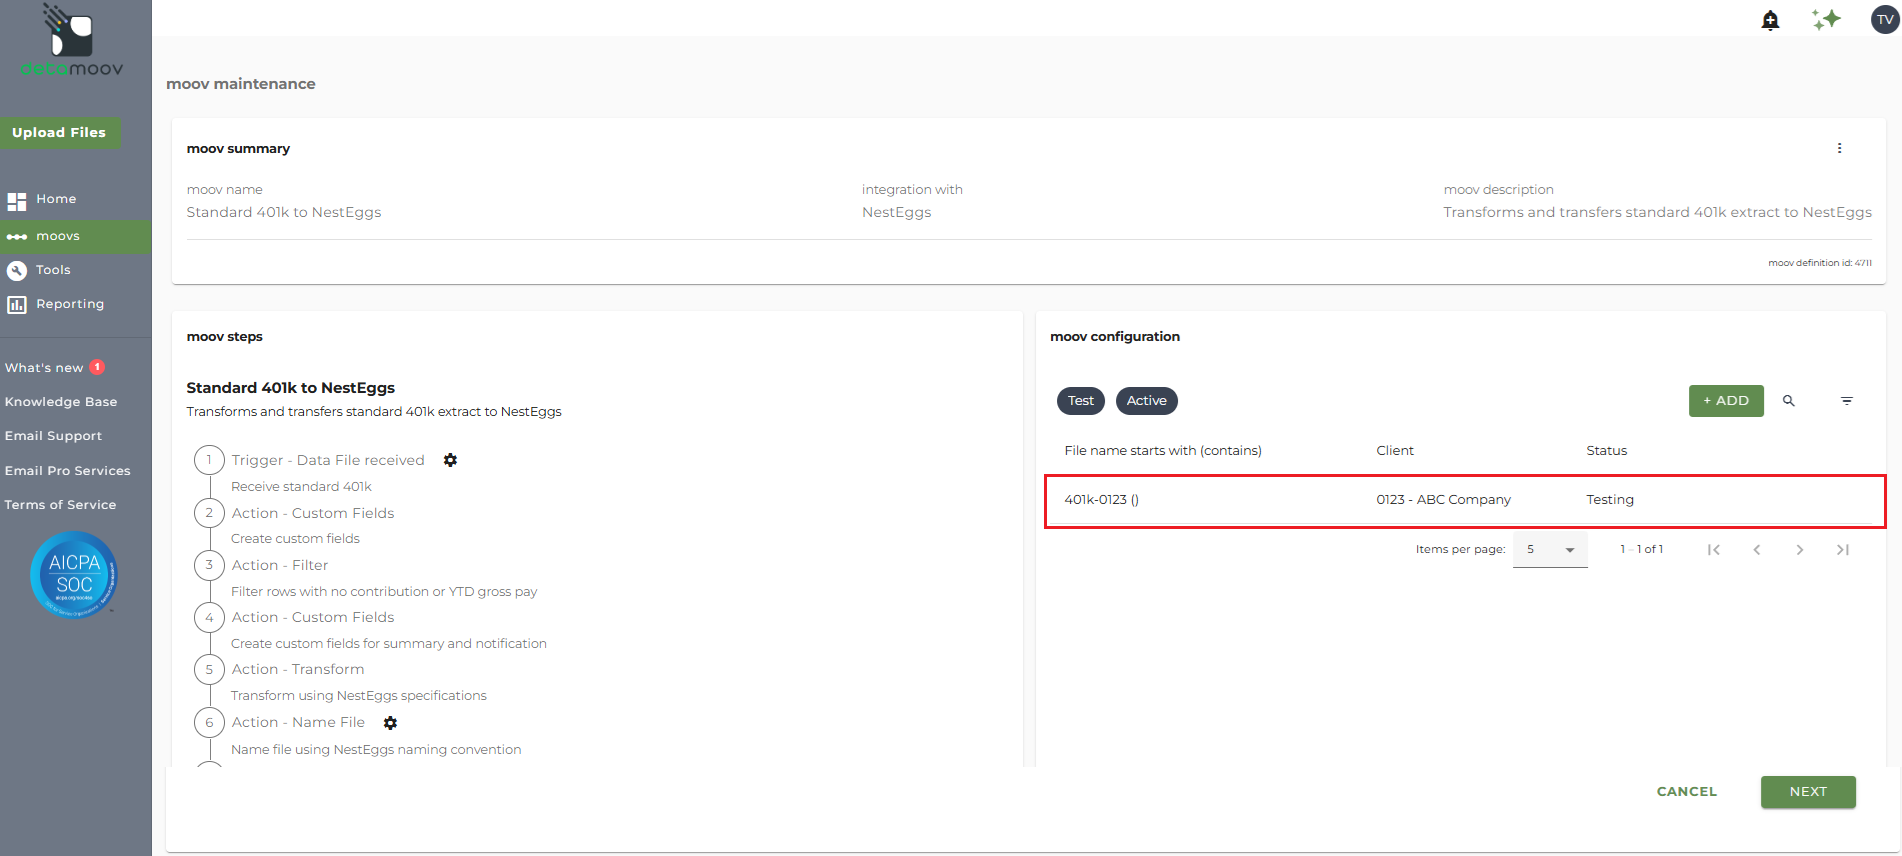
Select an existing moov configuration for your client, or create a new configuration, under the moov configuration section on the right hand side.
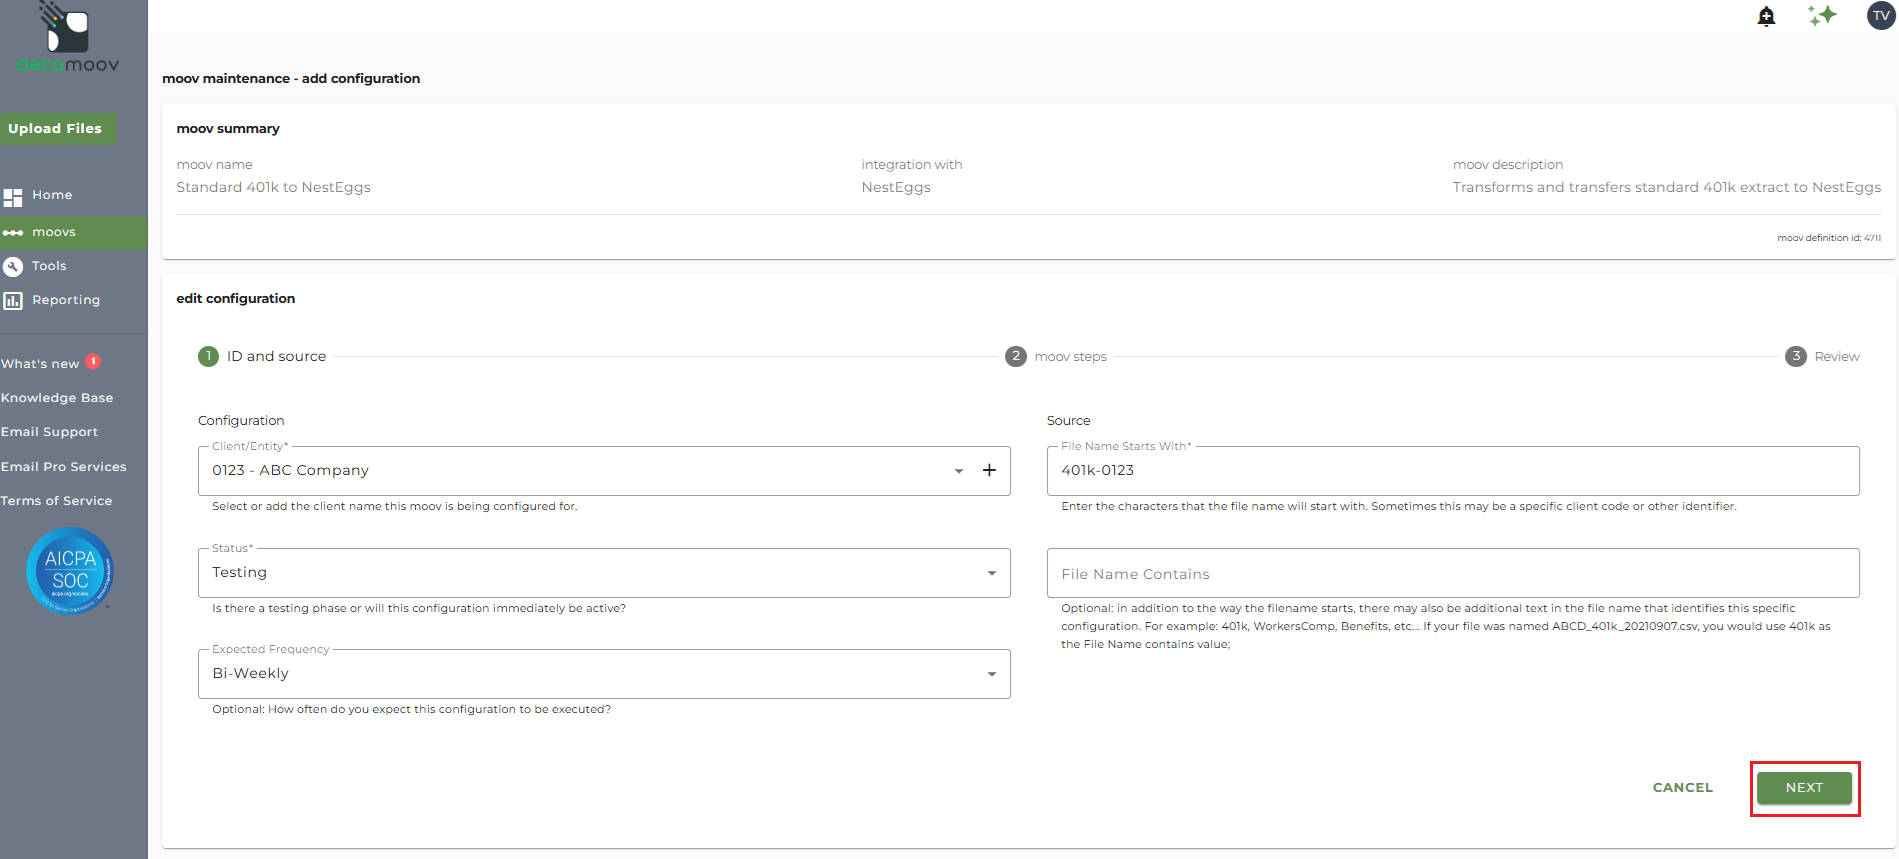
On the ID and source section click Next in the lower right hand side of the screen.
On the moov steps section, under 1 Trigger - Data File received, expand the PrismHCM API panel and then click the ADD button.
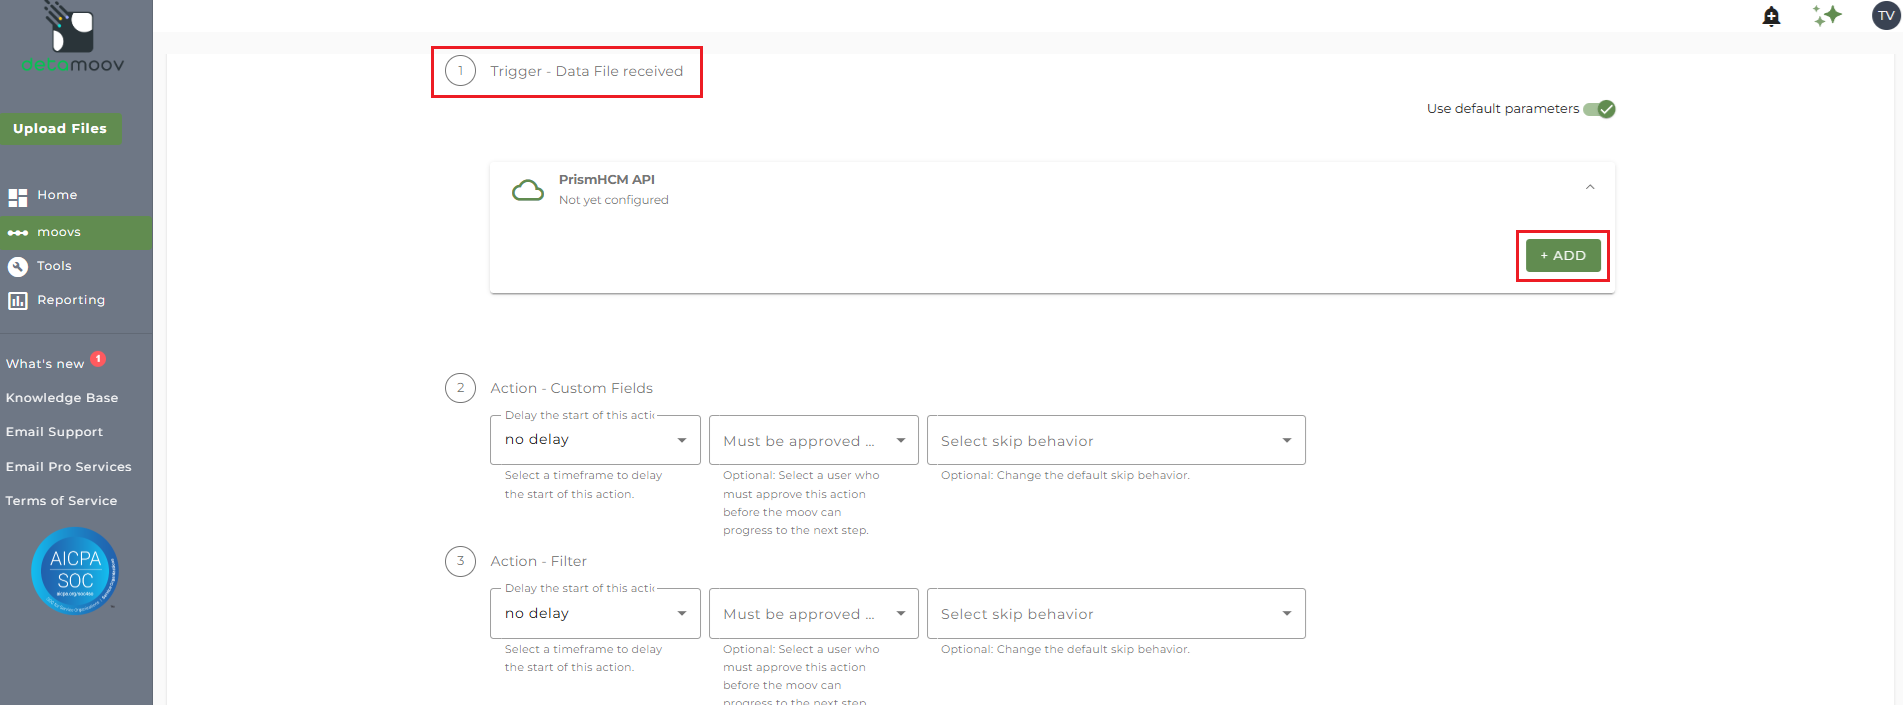
Note: If you do not see this option then the Premier Service has not been set up for your account. Please reach out to detamoov Support.
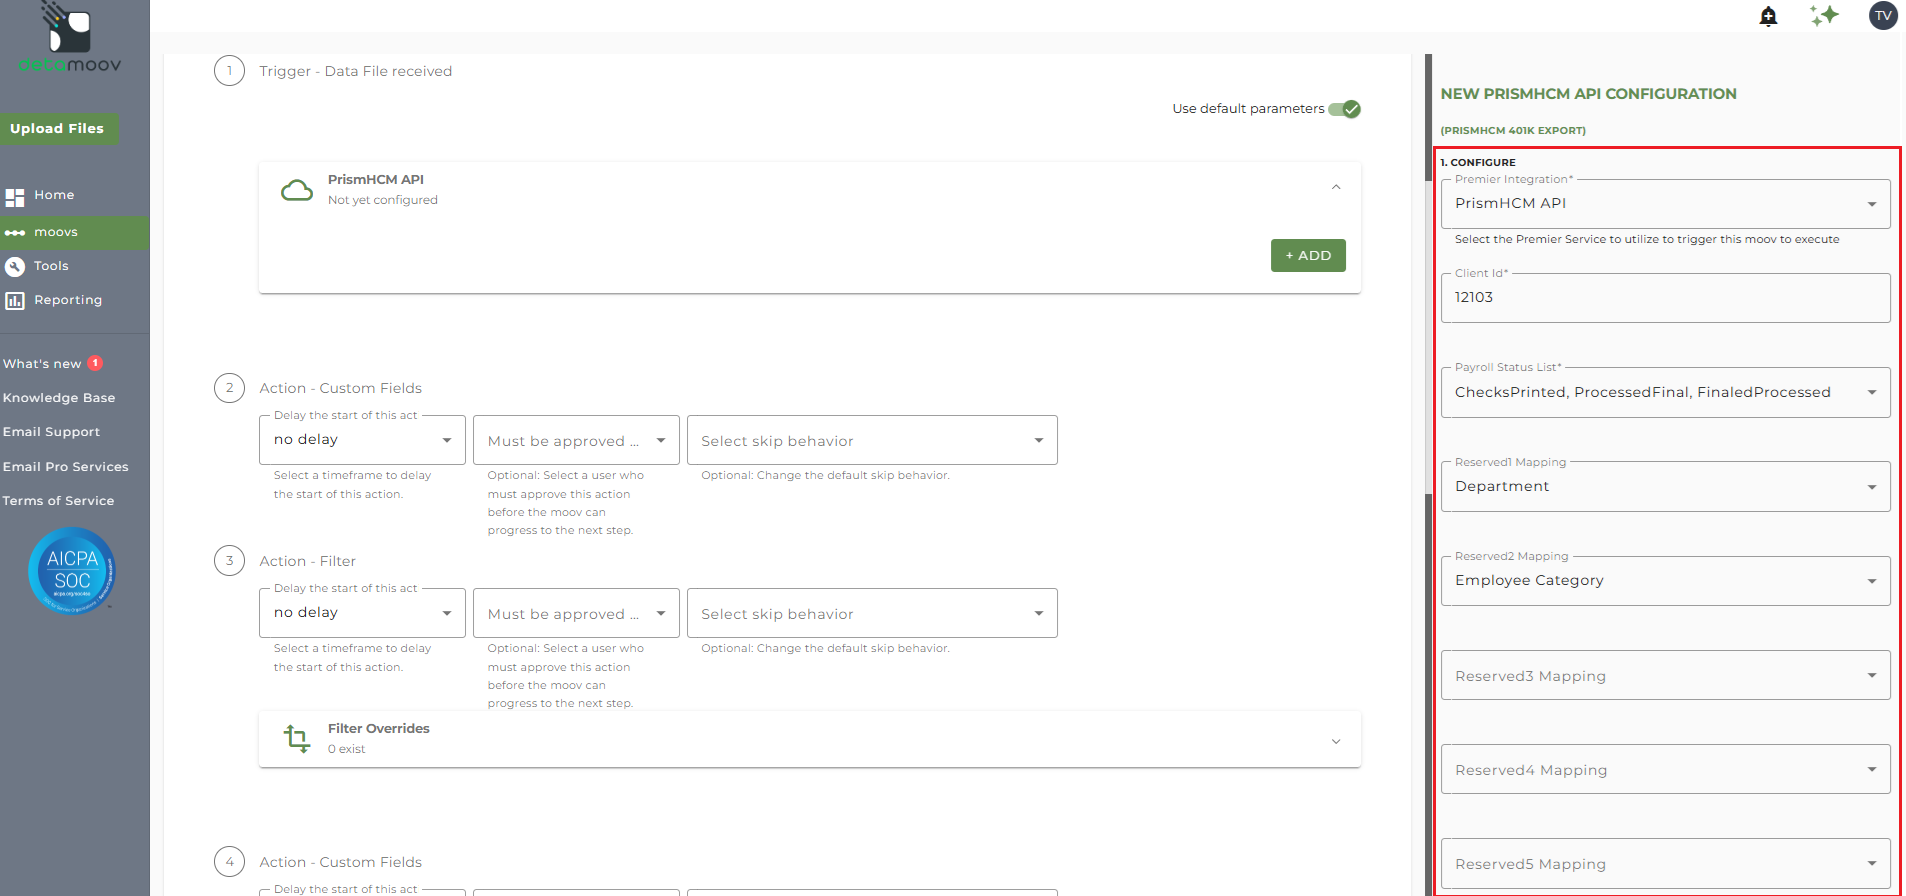
On the right side navigation that appears, select the name of the Premier Integration to configure for this moov. To set up the client for this Premier Service provide:
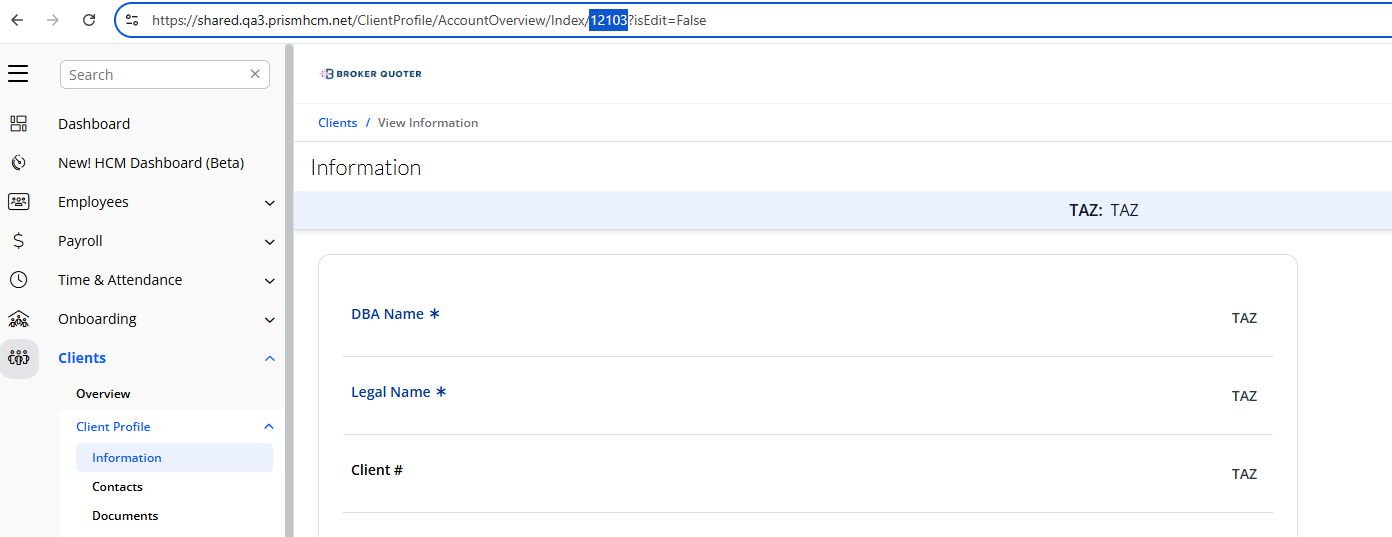
- Client ID - The PrismHCM Client ID. This value can be found in the Clients/Overview/View client url query string (see screenshot below). Please reach out to PrismHCM if you are unable to locate the Client ID value
- Payroll Status List - The status of the payrolls you would like detamoov to pull. ChecksPrinted is selected as a default and cannot be unselected
- Reserved fields 1-5 - These fields provide more flexibility in mapping certain data elements. For more information on how to use Reserved field mapping for PrismHCM, please view PrismHCM - Reserved Field Mapping
Scheduling a Premier Service Integration
A Premier service needs to be scheduled to run either every 'x' weeks, or on certain days of the month.
Every 'X' Weeks
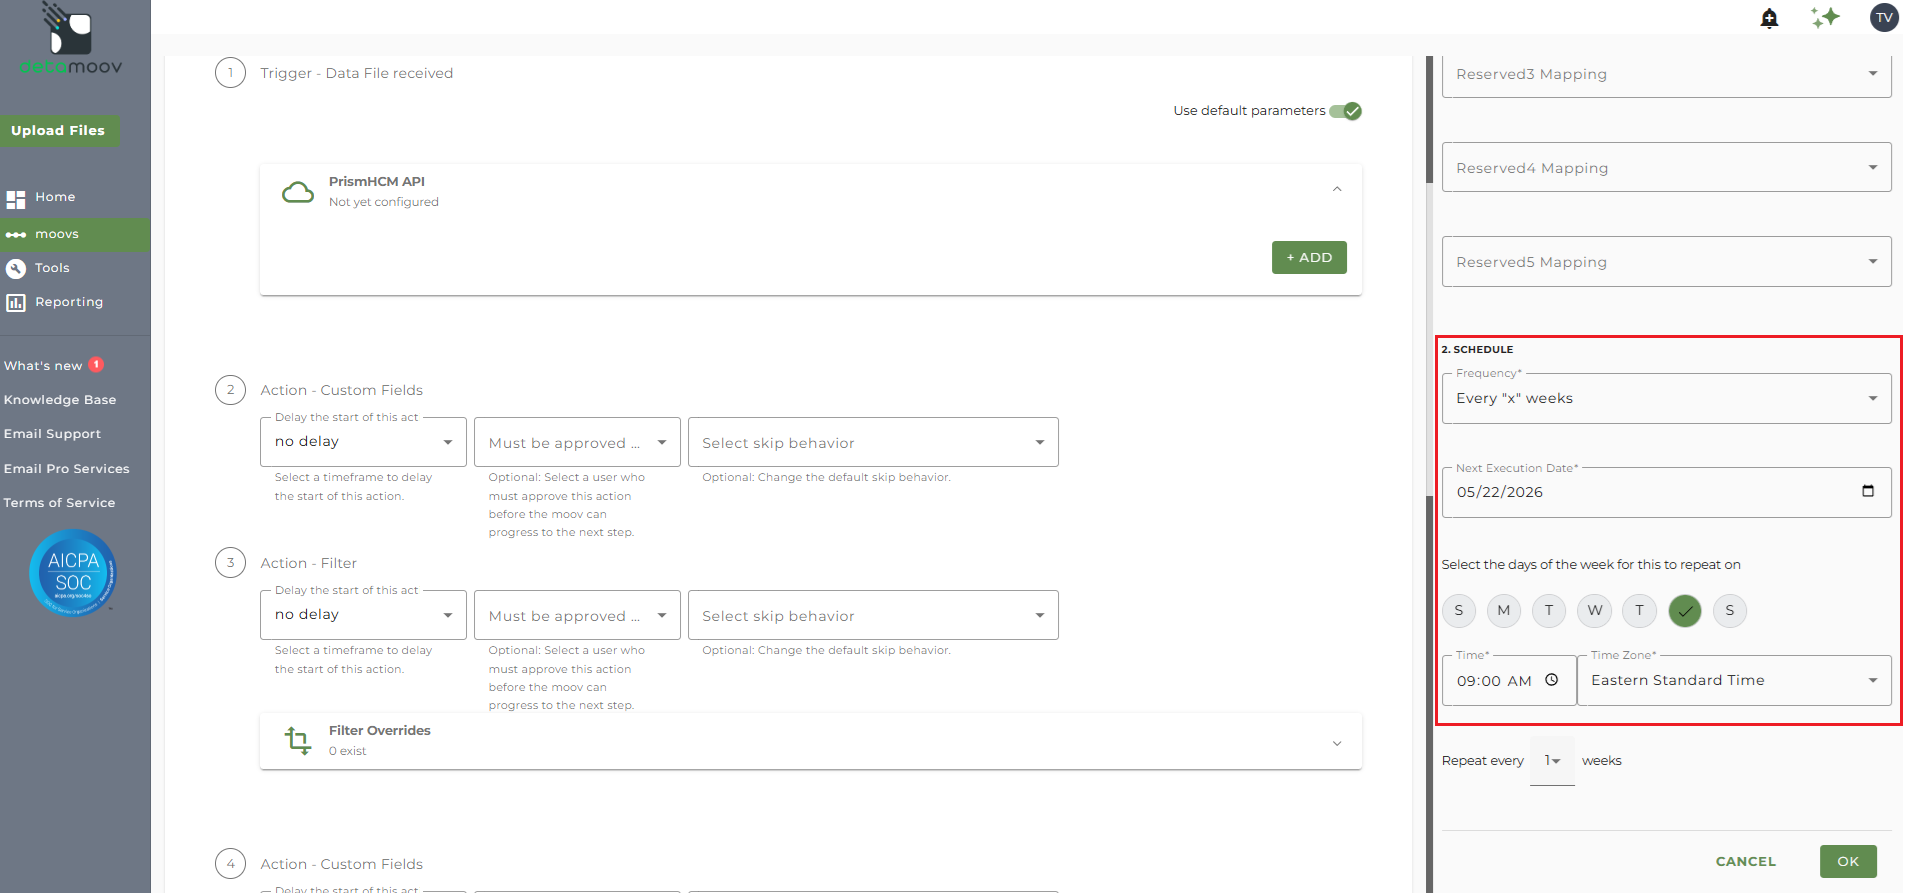
- Next Execution Date - the date that the integration will run next. Once a date is entered, that day of the week will be auto selected on the next step.
- Days of the week for the integration to repeat - days of the week the integration will executed.
- Time - the time that the integration will run on the days of the week for every 'x' weeks selected.
- Time Zone - the time zone related to the time specified for the integration to run (default is your current location's time zone).
- Repeat every 'x' weeks - the weekly frequency the integration should be executed.
On Certain Days of the Month:
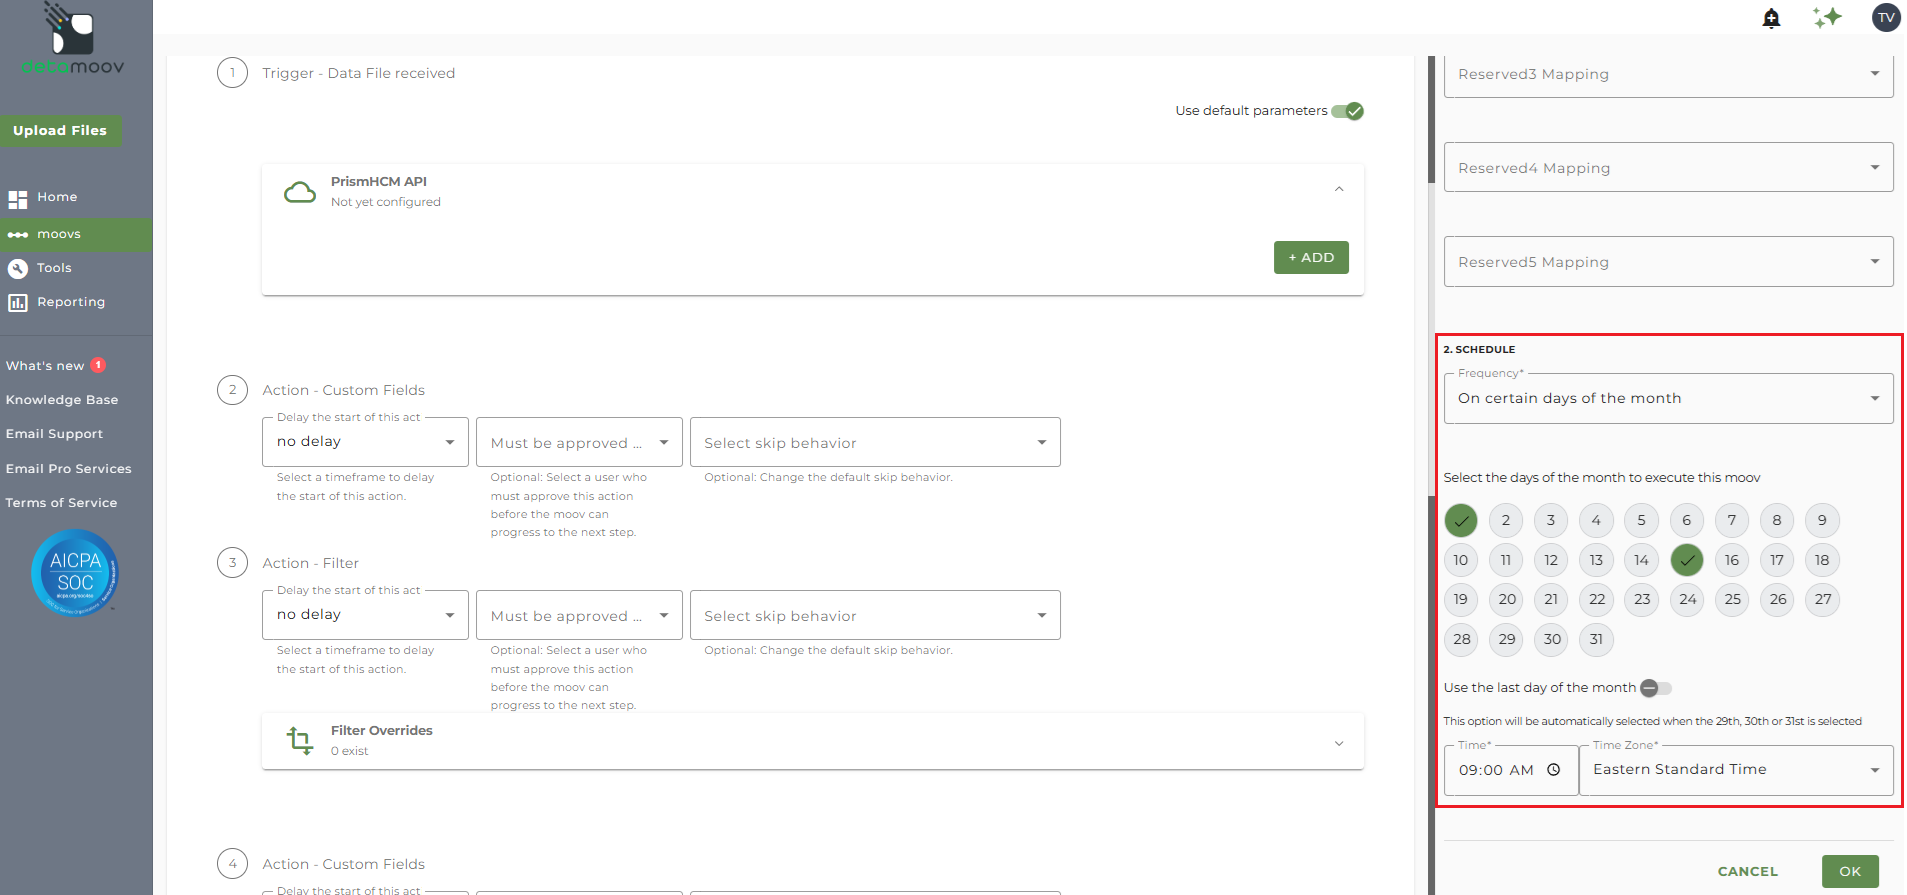
- Select the days of the month to execute this moov - these are the actual days of the month that the schedule will run for the specific Premier Integration
- If a selected day falls outside the last day of the month for a specific calendar month, the last day of the month will be used instead
- If the current date (today) falls outside the the last selected date, the first date selected will be the initial date of the first run of the Premier Integration
- example: if the selected days are the 1st and the 15th, but today is the 16th, the Premier Integration's first run will be the 1st of the next month
- Use the last day of the month - Check this option if the payroll date may occur at the end of a month where the selected day isn't available for a month. For example, if the 31st is selected, the 30th will be used for April, June, September and November. This option will be automatically selected when the 29th, 30th or 31st is selected
- Time - the time that the integration will run on the selected day(s) of the month
- Time Zone - the time zone related to the time specified for the integration to run (default is your current location's time zone)
To complete the setup, click OK and scroll down to the bottom of the page. Then click the Next button and then Save on the Review section.

