This article describes how to create a Transformation definition that generates a JSON format as the output. JSON (JavaScript Object Notation) is a human-readable, machine parsable text-based format for storing and exchanging data. It is commonly used in web development and can be used in a moov definition to communicate with a third-party API.
The data below is an example of source data for employee time:

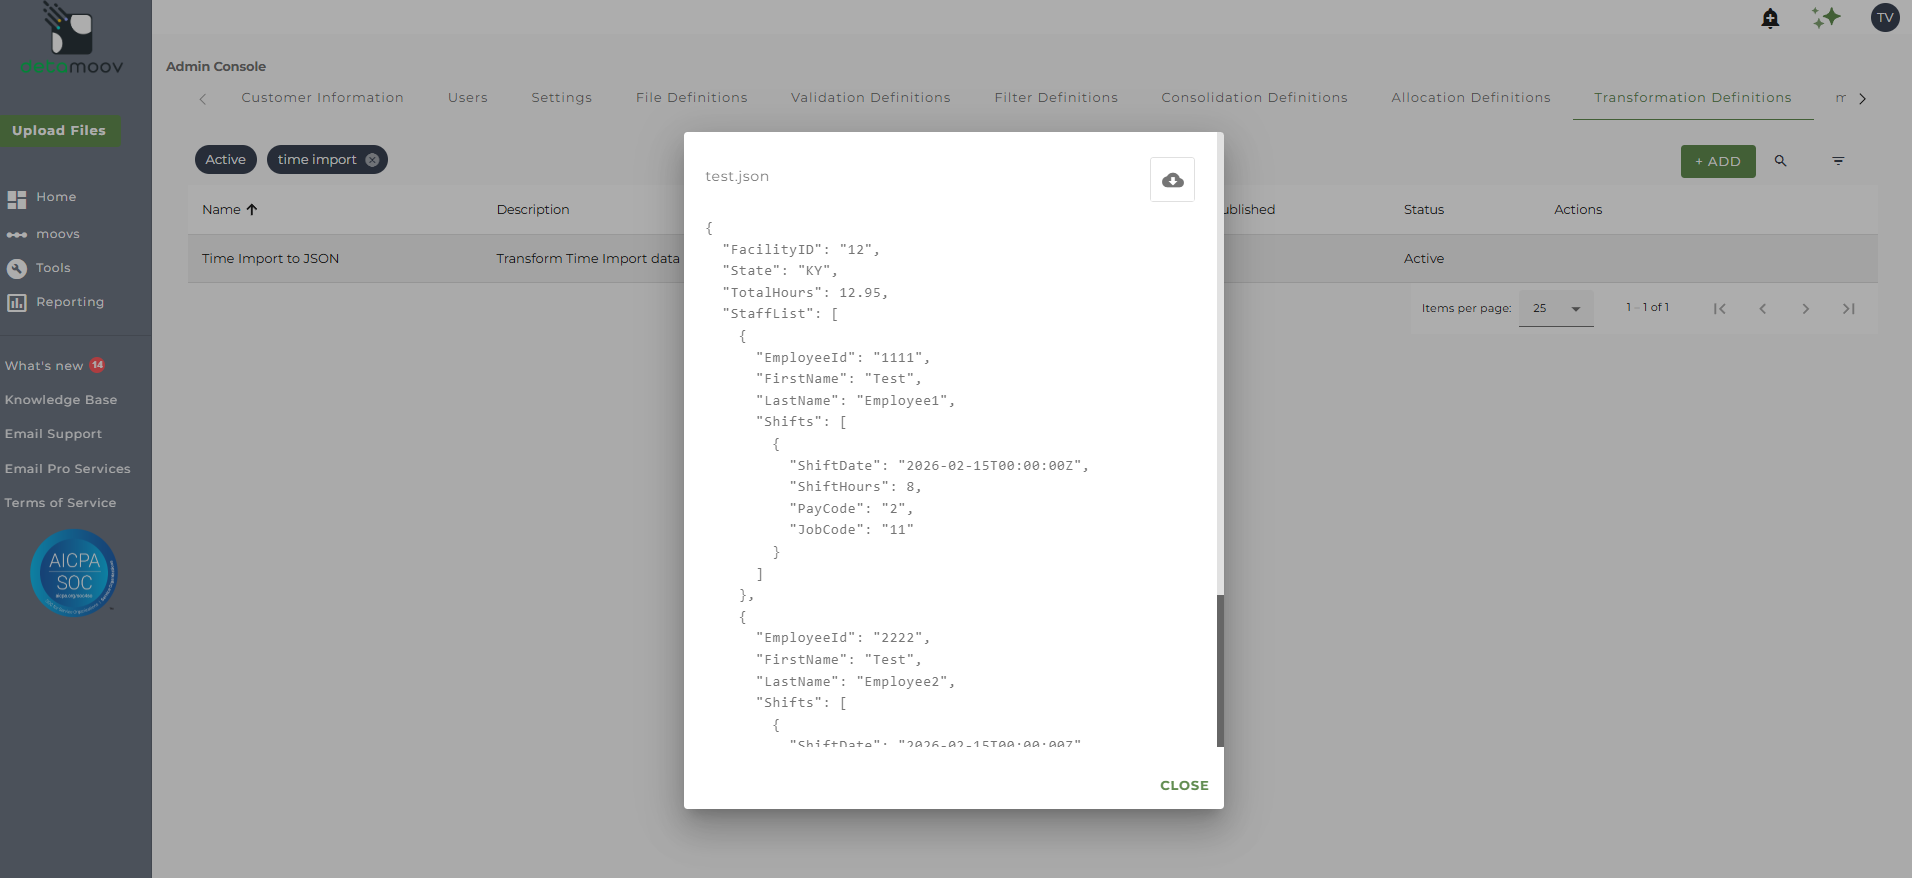
Using this data as the file definition, we are going to create a transformation definition to create the following JSON format:

To create a new transformation definition, access the Admin Console by clicking on your initials at the top right hand corner and then click the Transformation Definitions tab.

Then click the ADD button and select 'Create New Definition'.

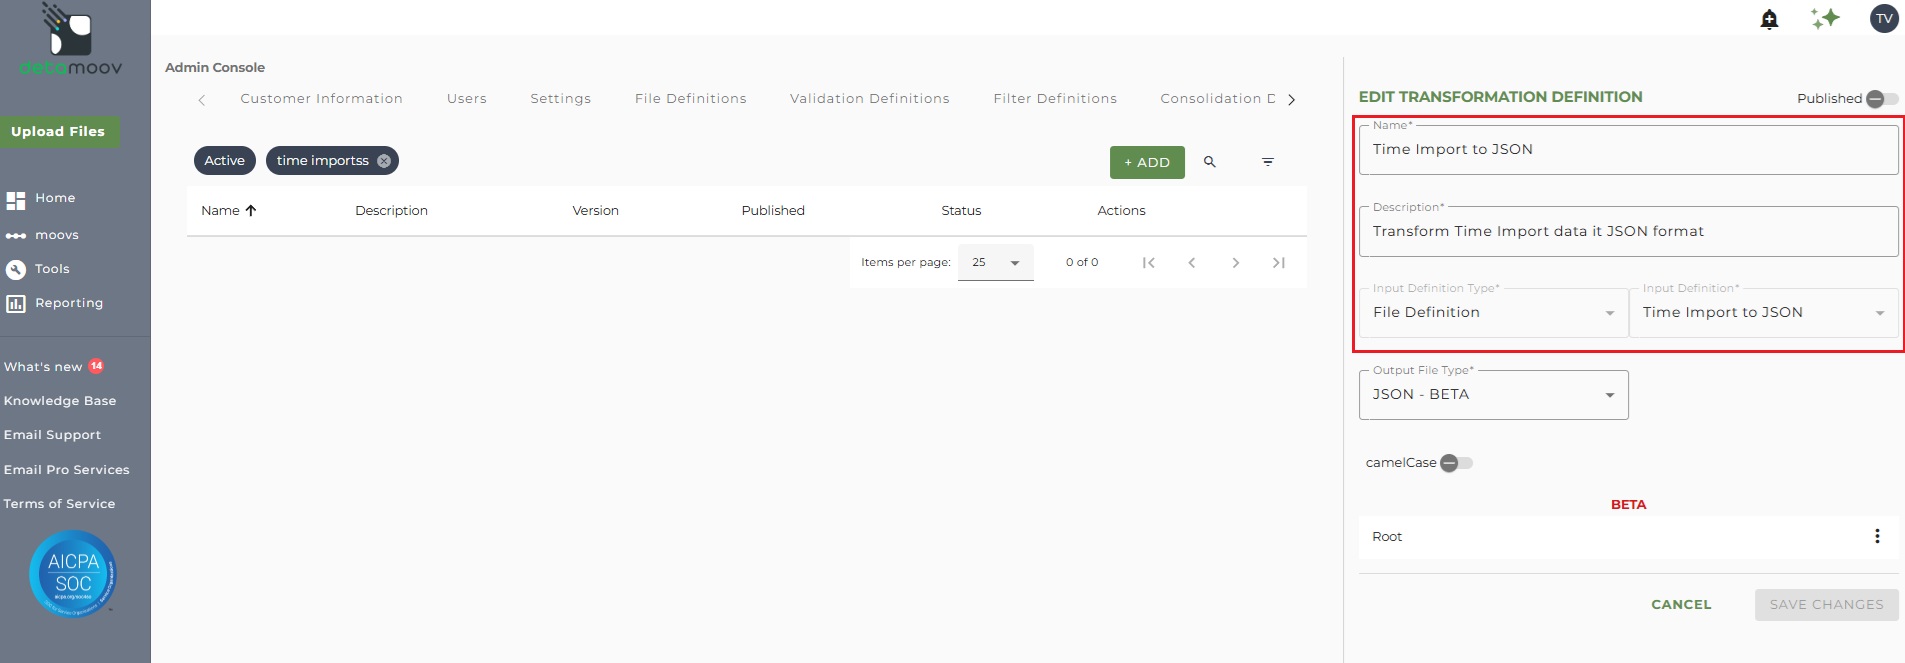
Enter in a Name and a Description for your transformation, then select an Input File Definition.
If you do not see a specific File Definition you have created, please refer to the How to create a new File Definition article and make sure the definition has been published.
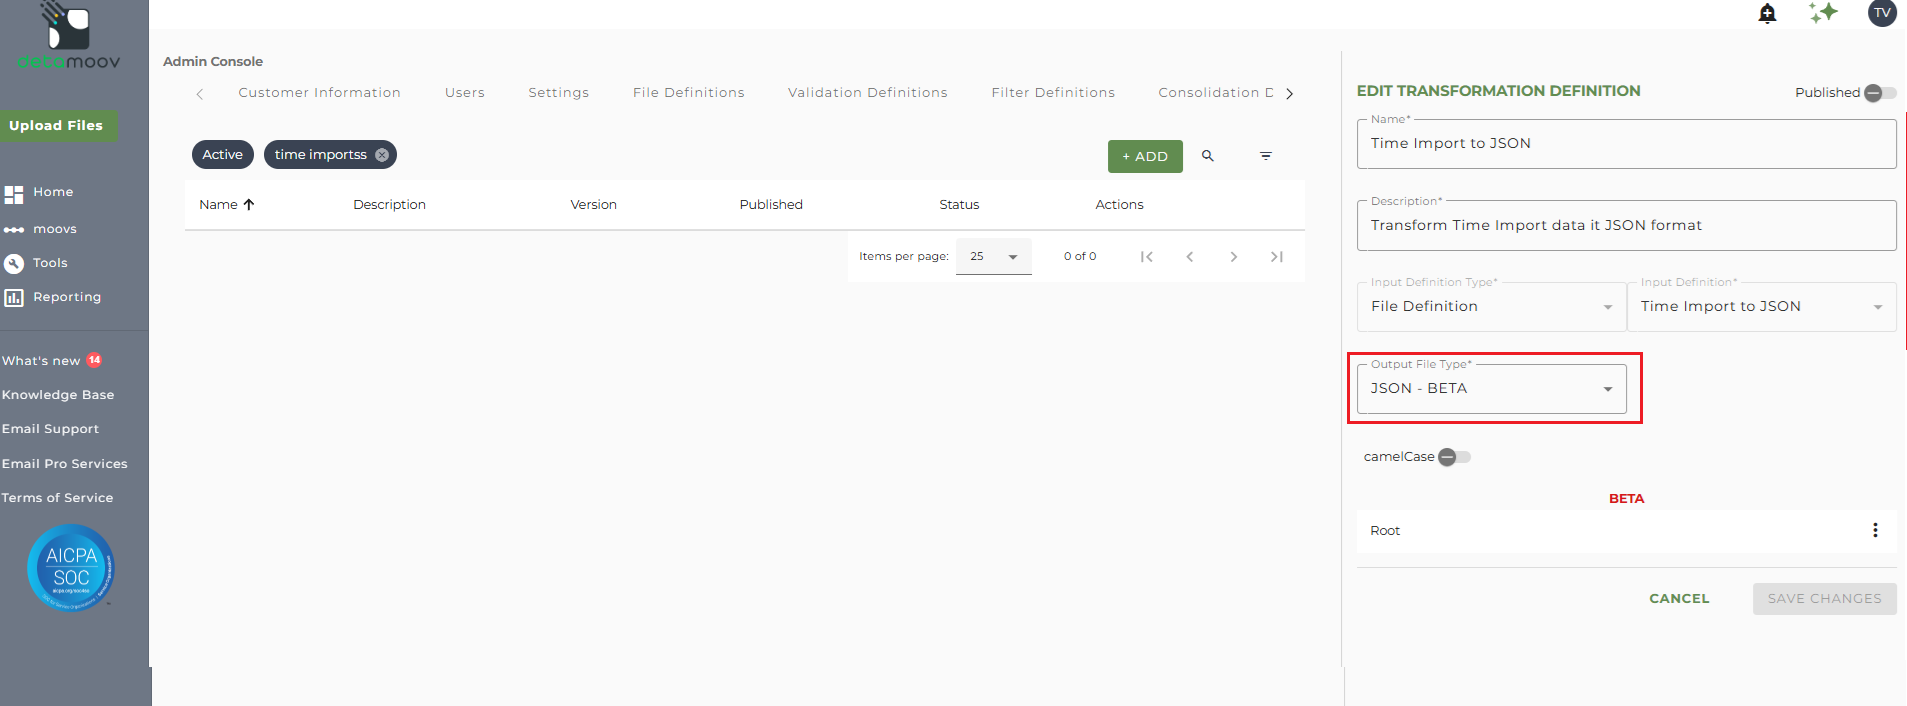
Select 'JSON - BETA' from the Output File Type dropdown.
camelCase - Toggle this ON if you want to ensure that the Name values you enter are in camel casing. For example, 'FacilityID' will be changed to 'facilityID' if this is active.
Before creating your JSON transformation, here are a few terms you should become familiar with:
Root - the outermost, or top-level, element in a JSON document
Attribute - an identifier or label for a specific piece of data. The attribute name is the unique identifier for the data within an object and is associated with a value. Attributes are denoted as "(A)".
Element - allows you to create a JSON object (default) or an array of attributes and/or other elements.
Calculated Attribute - allows you to calculate (either a sum or a count of records) from an existing attribute. Calculated Atrributes are denoted as "(CA)".
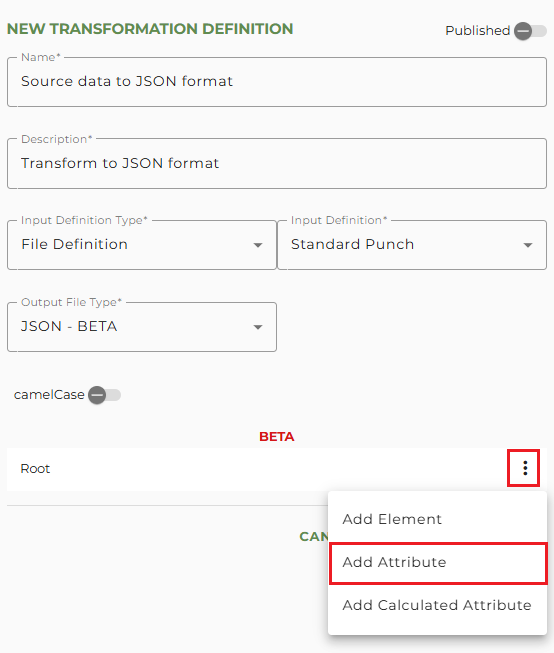
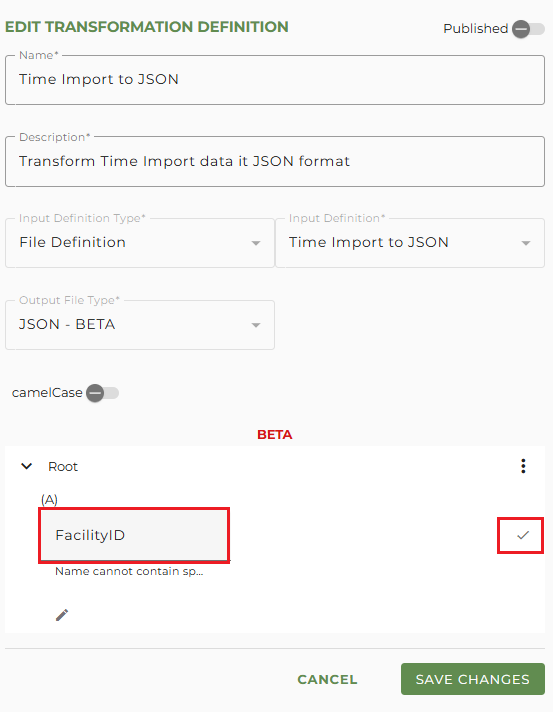
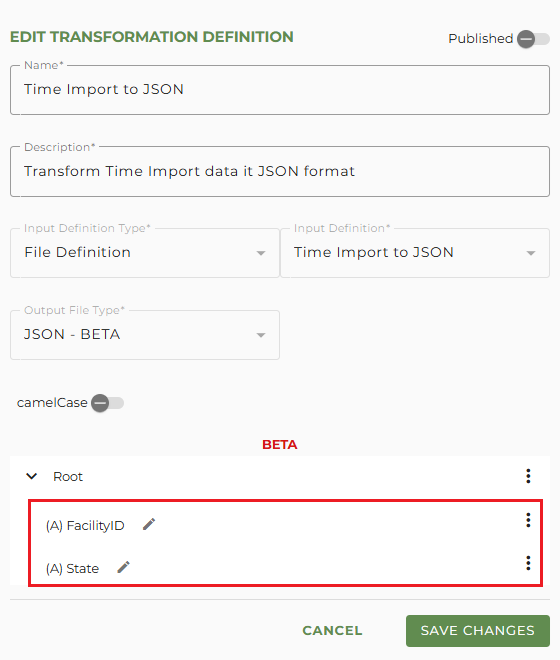
In our JSON format example, we need to create a "FacilityID" and "State" attribute. To add an attribute to the root, click on the vertical dot menu for Root and select Add Attribute.
Select the field from the source data to map to this attribute. In our example we'll select FacilityID and Click OK.
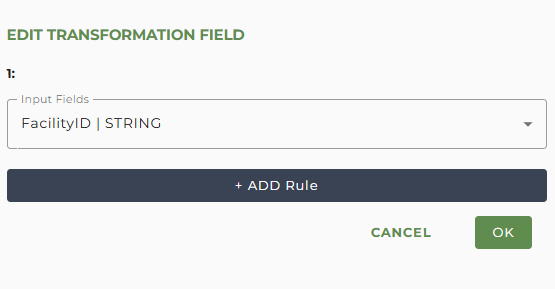
Next, give the Attribute a Name by clicking in the Name field and replacing "Name" with your attribute name. Then click the checkmark icon to save the name.
Note: Attribute names cannot contain spaces, cannot start with 'xml' and must start with a letter or underscore.
Repeat the attribute steps for any additional attributes in the JSON format.
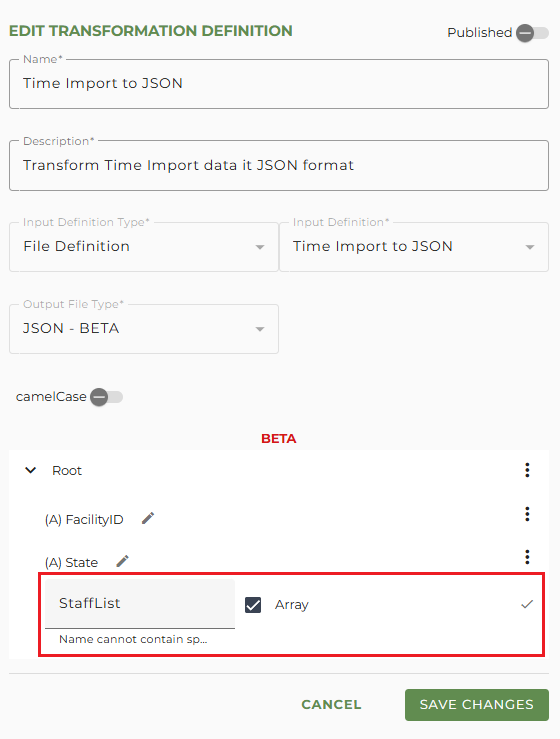
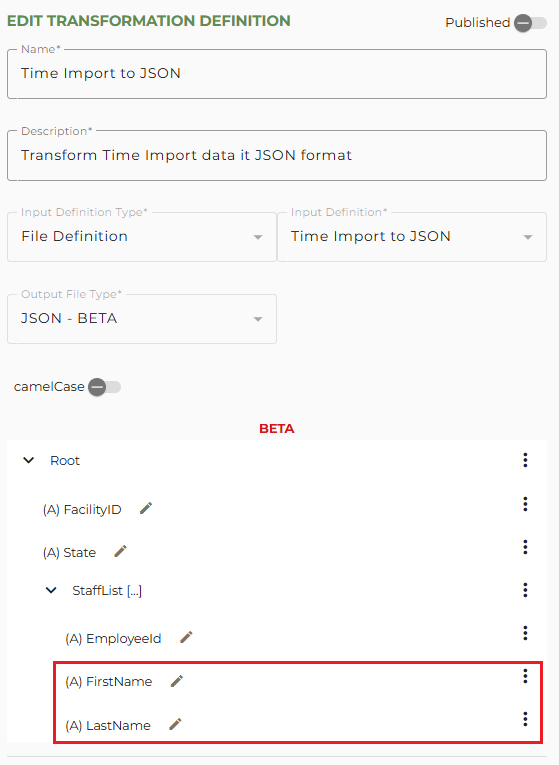
In our example JSON, we need to create an array of employees called "StaffList". This array can hold attributes related to each employee, or other elements (JSON objects or arrays).
To create the array element for the employees at the root, click on the vertical dot menu for Root and select Add Element.
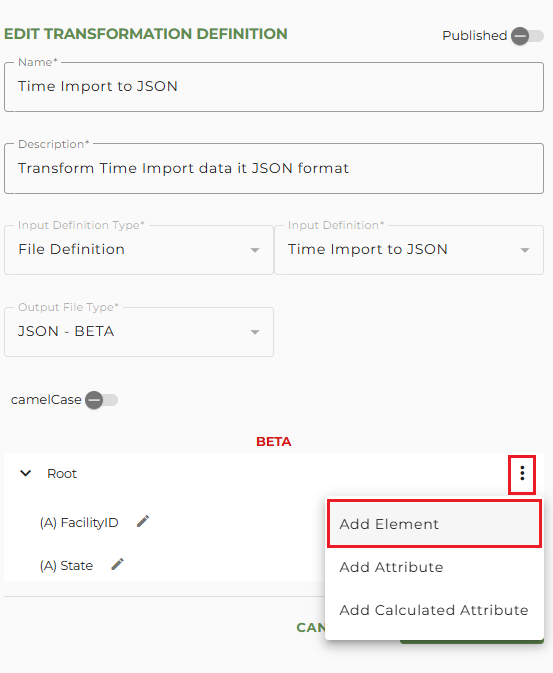
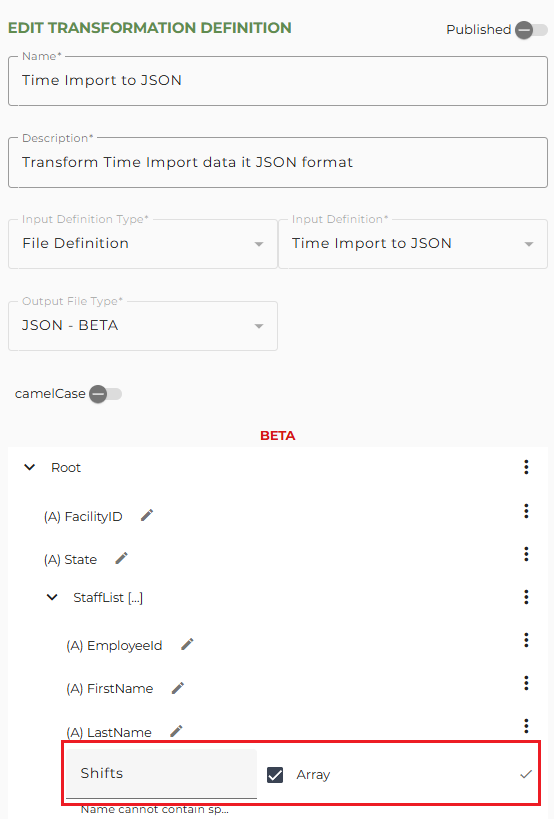
Then provide a name in the Name field and check the box "Array". Click the checkmark icon to save the element.
Note: if you do not check the "Array" box the element will be created as a JSON object by default.
Adding Attributes to an Element
The StaffList array element in our example is a representation of key attributes for each employee row in the source and an array element of their shifts.
To create the attributes for the StaffList element, click on the vertical dot menu for the StaffList element and select Add Attribute.
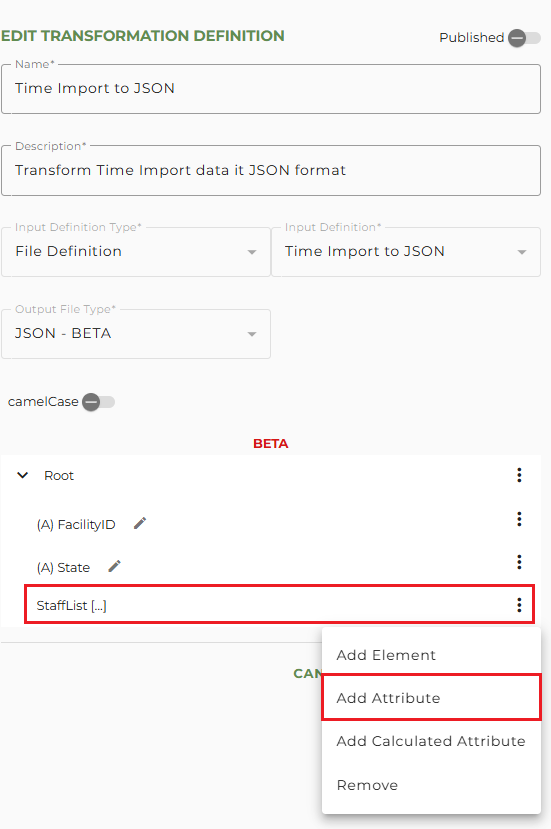
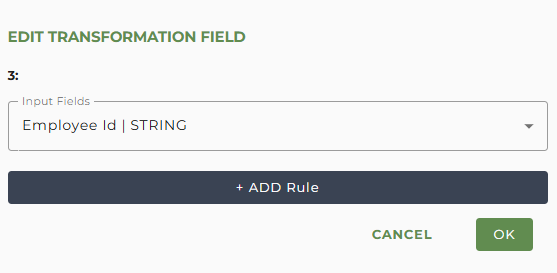
Select the appropriate field from the Input Fields dropdown and click OK.
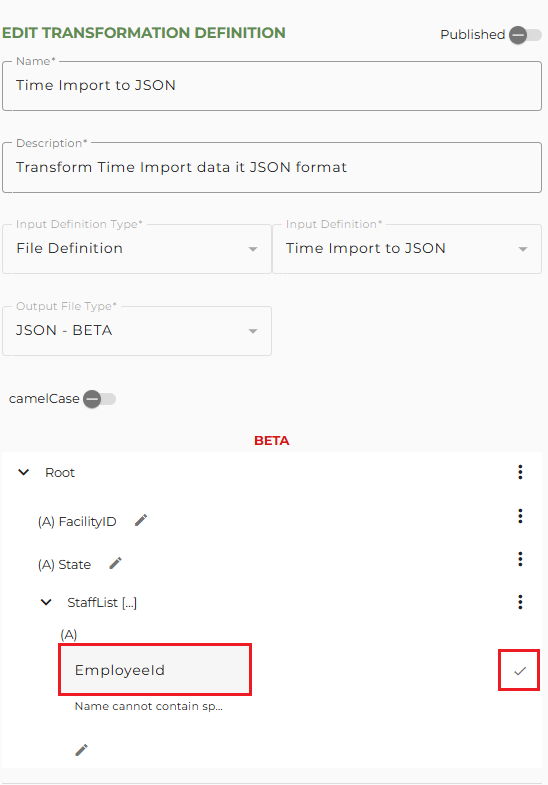
Next, give the Attribute a Name by clicking in the Name field and replacing "Name" with your attribute name. Then click the checkmark icon to save the name.
Note: Attribute names cannot contain spaces, cannot start with 'xml' and must start with a letter or underscore.
Create any additional attributes for the StaffList element.
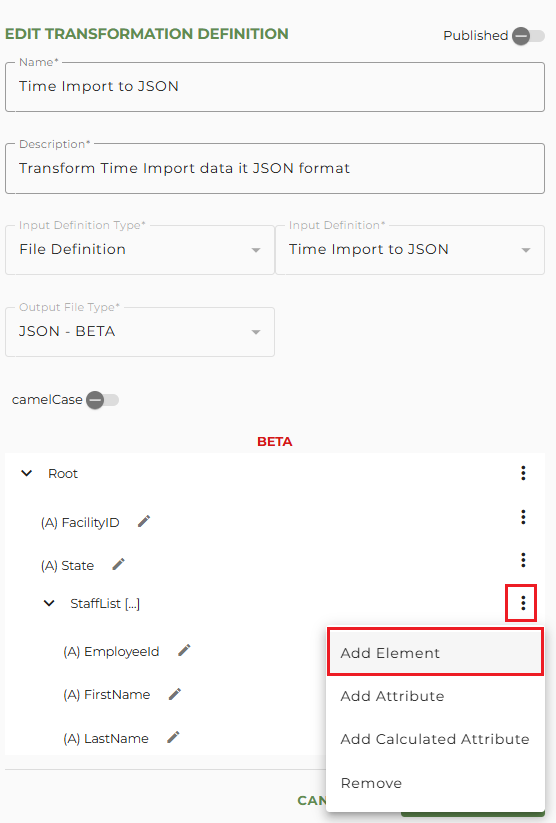
Adding an Element to an Element
A JSON element (object or array) can also contain another JSON element. In our example, the StaffList element contains an array element for the employee Shifts.
To create the array element for the employee shifts in the StaffList element, click on the vertical dot menu for StaffList and select Add Element.
Then provide a name in the Name field and check the box "Array". Click the checkmark icon to save the element.
Note: if you do not check the "Array" box the element will be created as a JSON object by default.
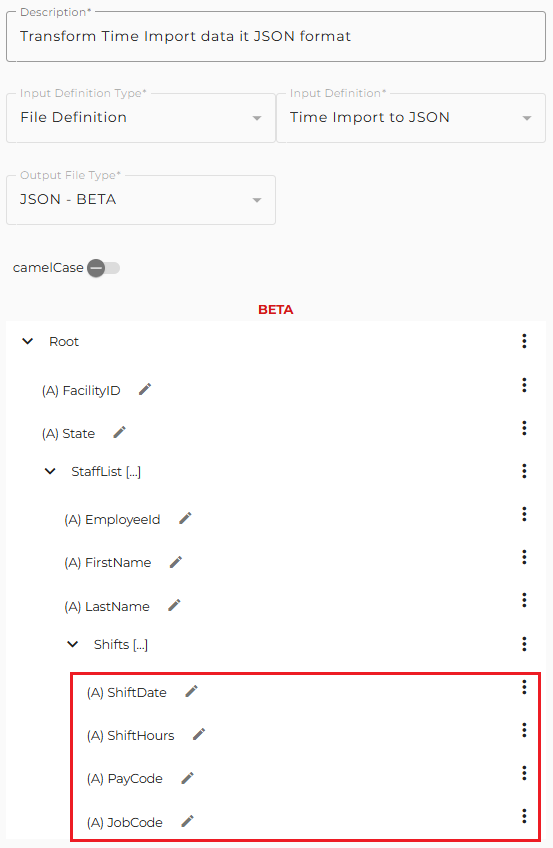
We can now add our attributes to the Shifts element array by following the prior steps.
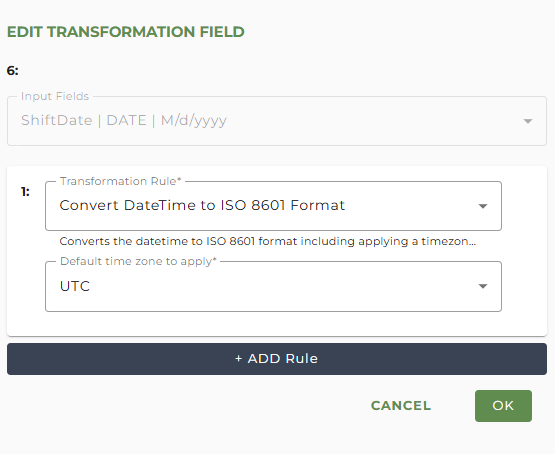
Transformation rules are available when selecting the attribute's Input Fields. For example, we need to change the DateTime format of the ShiftDate to match the desired JSON output. This can be accomplished by creating a new Attribute in the Shifts array element, selecting ShiftDate as the Input Field, and selecting the 'Convert DateTime to ISO 8601 Format' with a UTC time zone.
Creating a Calculated Attribute
A Calculated Attribute allows you to calculate (either a sum or a count of records) from an existing attribute. This can be useful if you need to send a count of records or a sum of a specific existing attribute.
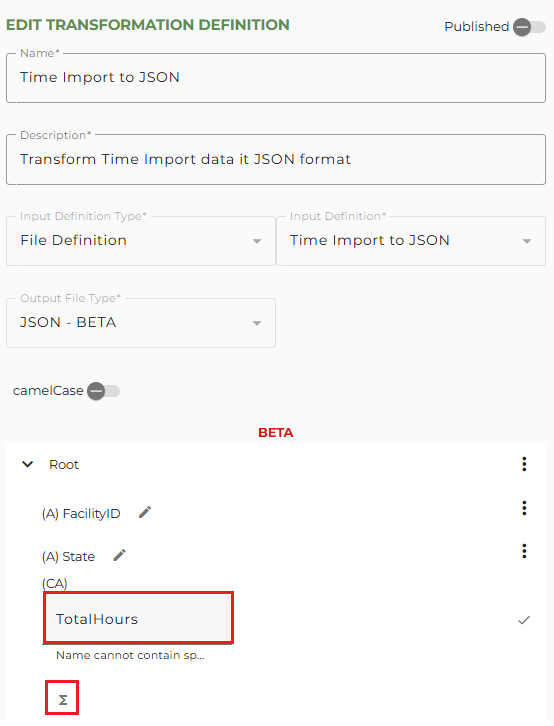
For example, if you need to send the Total Hours worked for the included employees, a calculated attribute can be created on the root to pass this total.
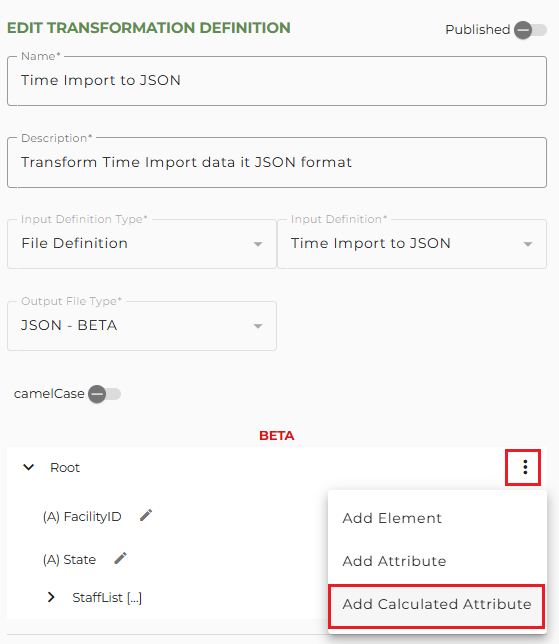
To add a Calculated Attribute to the Root, click on the vertical dot menu and select Add Calculated Attribute.
Next, give the Attribute a Name by clicking in the Name field and replacing "Name" with your attribute name. Then click the Edit Function (Sigma) icon.
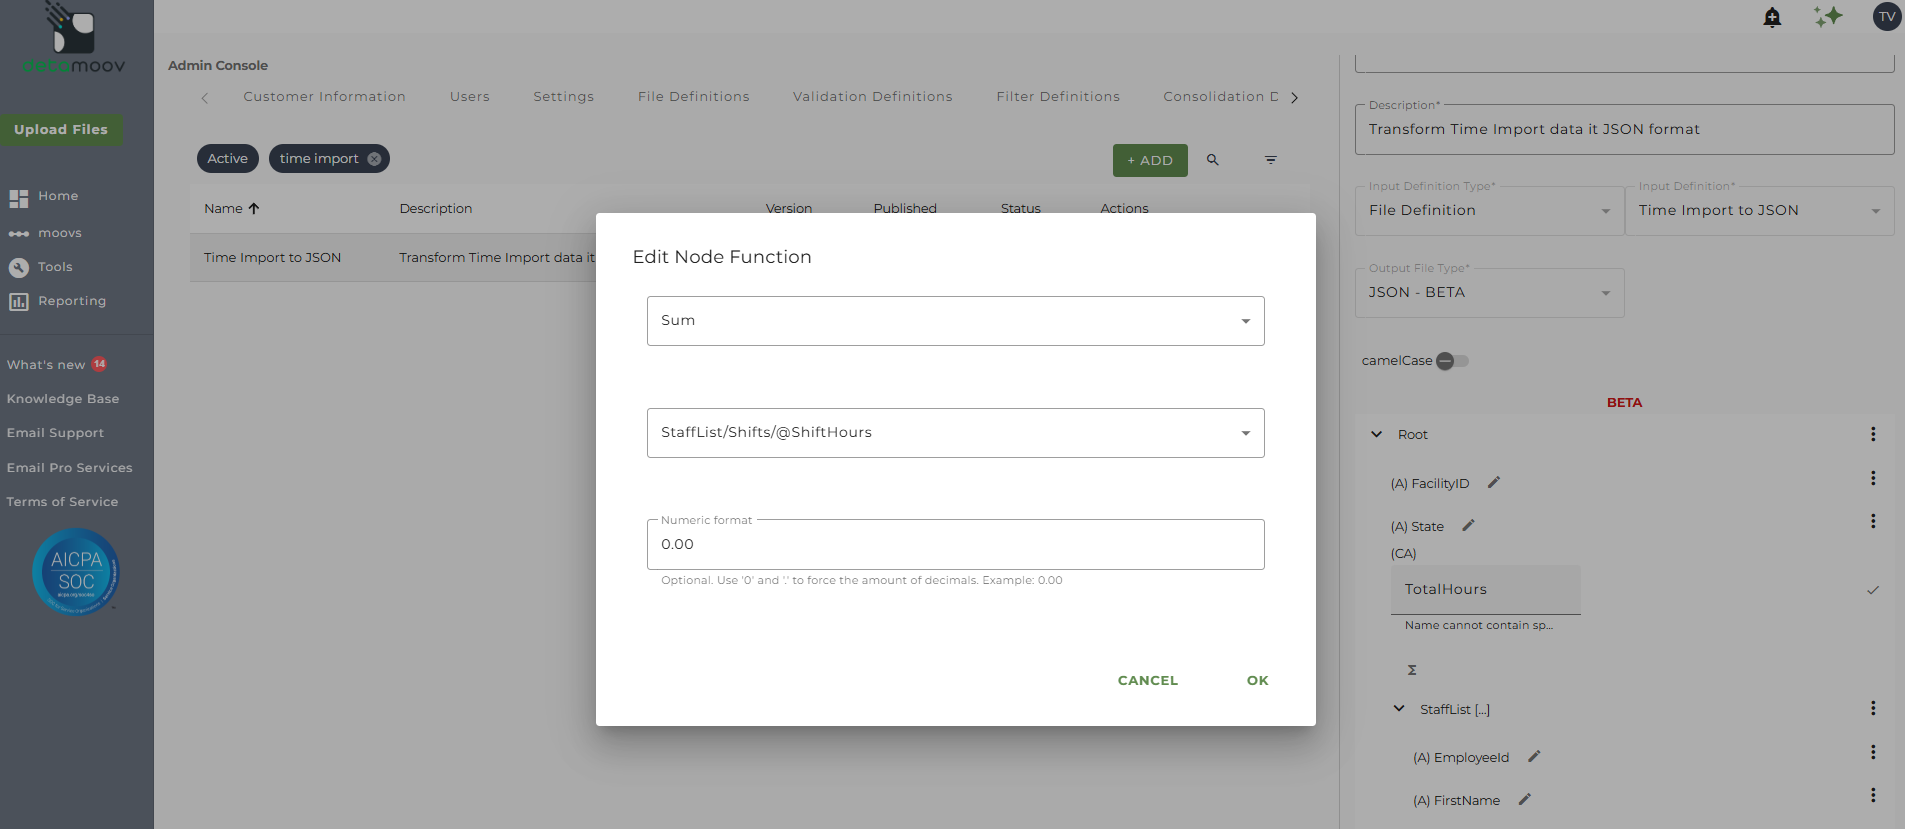
In the window that appears, select the Function (Count or Sum), the path to the values related to the calculated attribute, and the numeric format for the calculated attribute. Then click OK.
Previewing the Transformation Definition
At any time during the creation of the transformation definition, you can save your changes and use the preview function to review the JSON format.
To access the Preview function, hover over the transformation definition row in the table and click on the magnifying glass icon. Select the source data and click Open. A preview window will appear with the source data formatted in the JSON format you have built.