
To proceed in configuring an isolved moov, you will need the isolved API premier service enabled on your detamoov account. In isolved you will need to have the detamoov API enabled. If not currently enabled, please contact isolved support to enable the detamoov API for you within your isolved environment. Once complete, isolved support will send your API credentials to detamoov for us to add these into your detamoov account.
Once the API credentials have been added to your detamoov account, you will need to give the client access to the detamoov API user. Please see Configuring client access to the detamoov API user article.
To integrate with a Premier Service you will need to first make sure you have added a moov definition to your account.
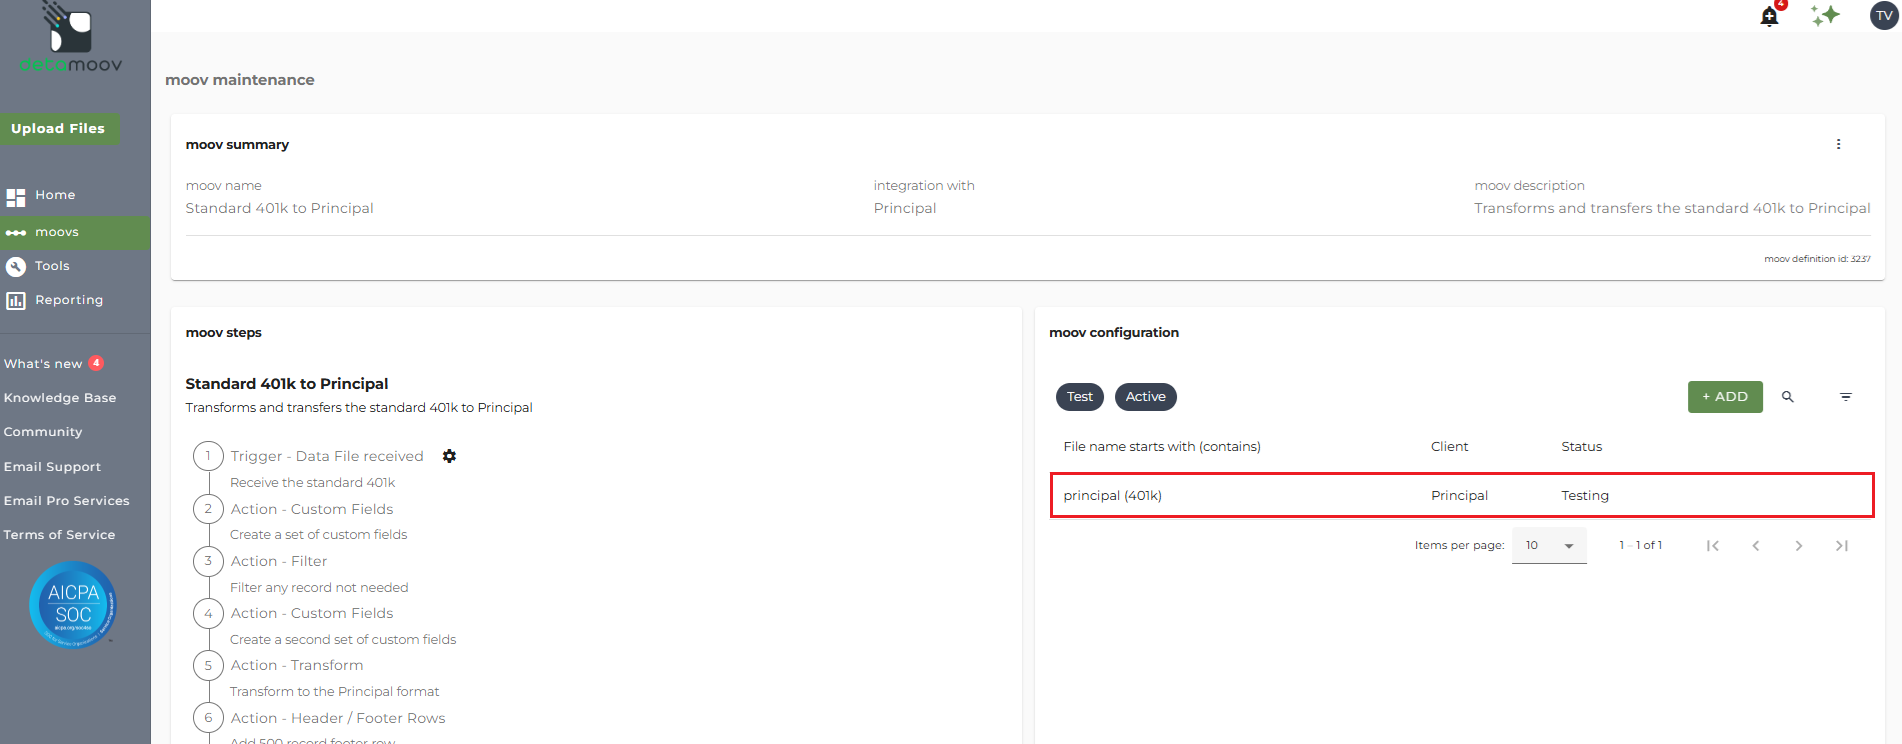
After adding a moov definition, click moovs on the left side menu and select the moov you want to configure with the premier integration.
Configuring a Premier Service Integration
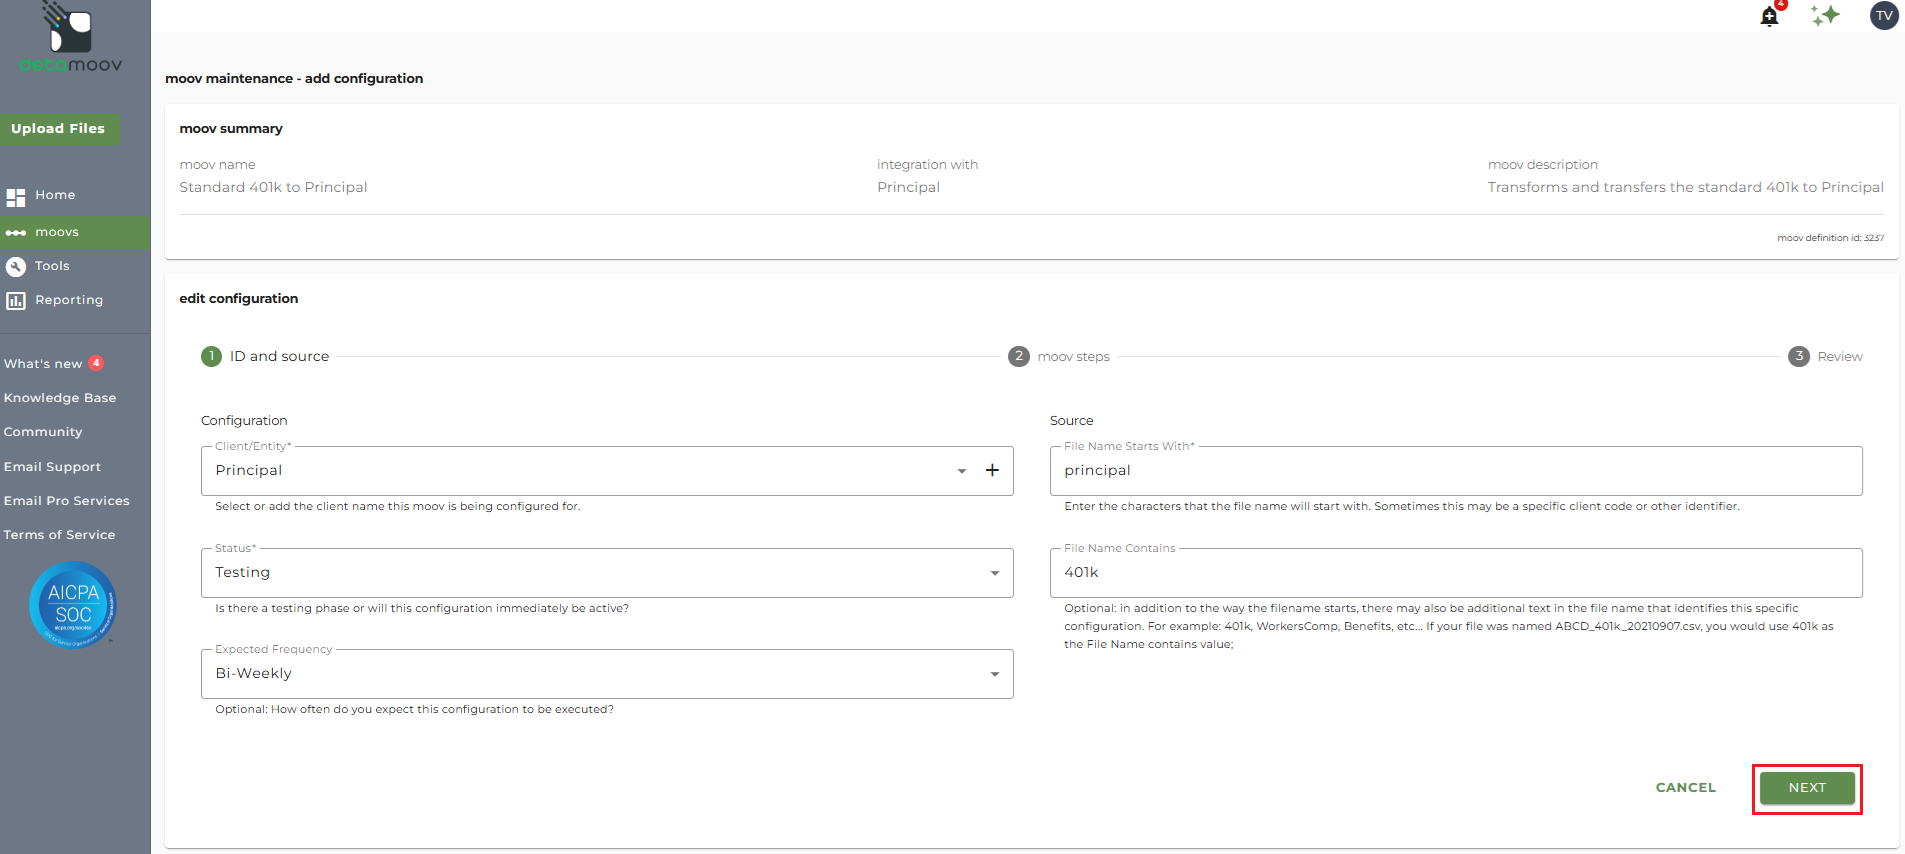
Select an existing moov configuration for your client, or create a new configuration, under the moov configuration section on the right hand side.
On the ID and source section click Next in the lower right hand side of the screen.
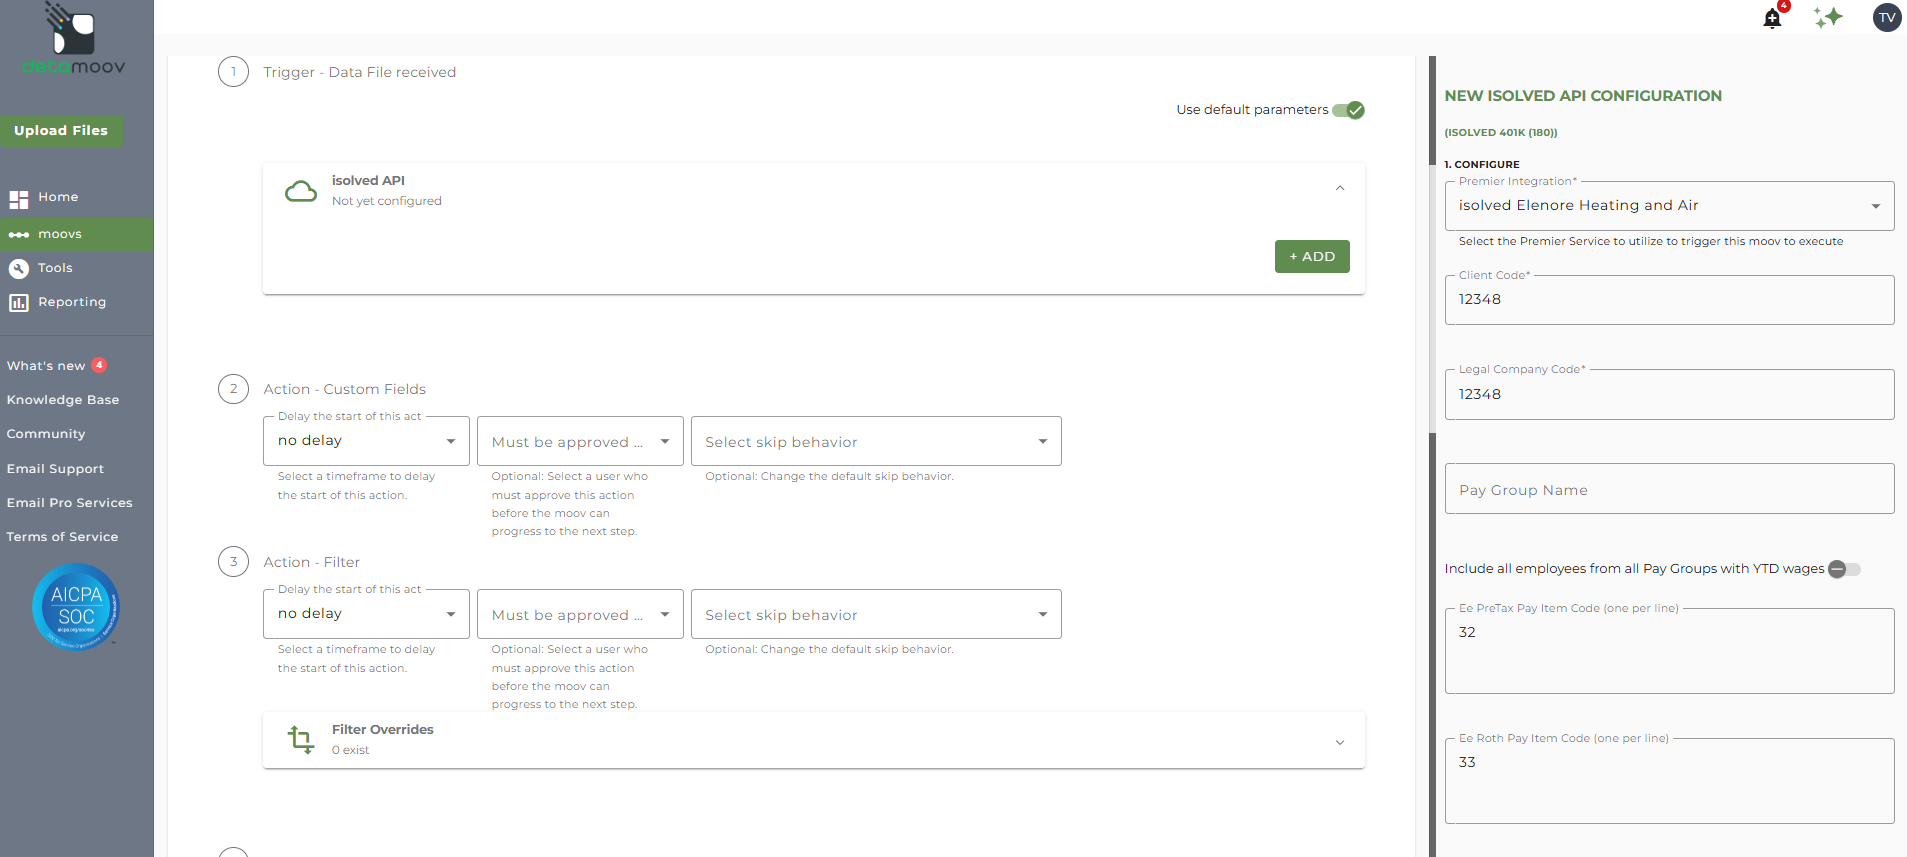
On the moov steps section, under 1 Trigger - Data File received, expand the isolved API panel and then click the ADD button.
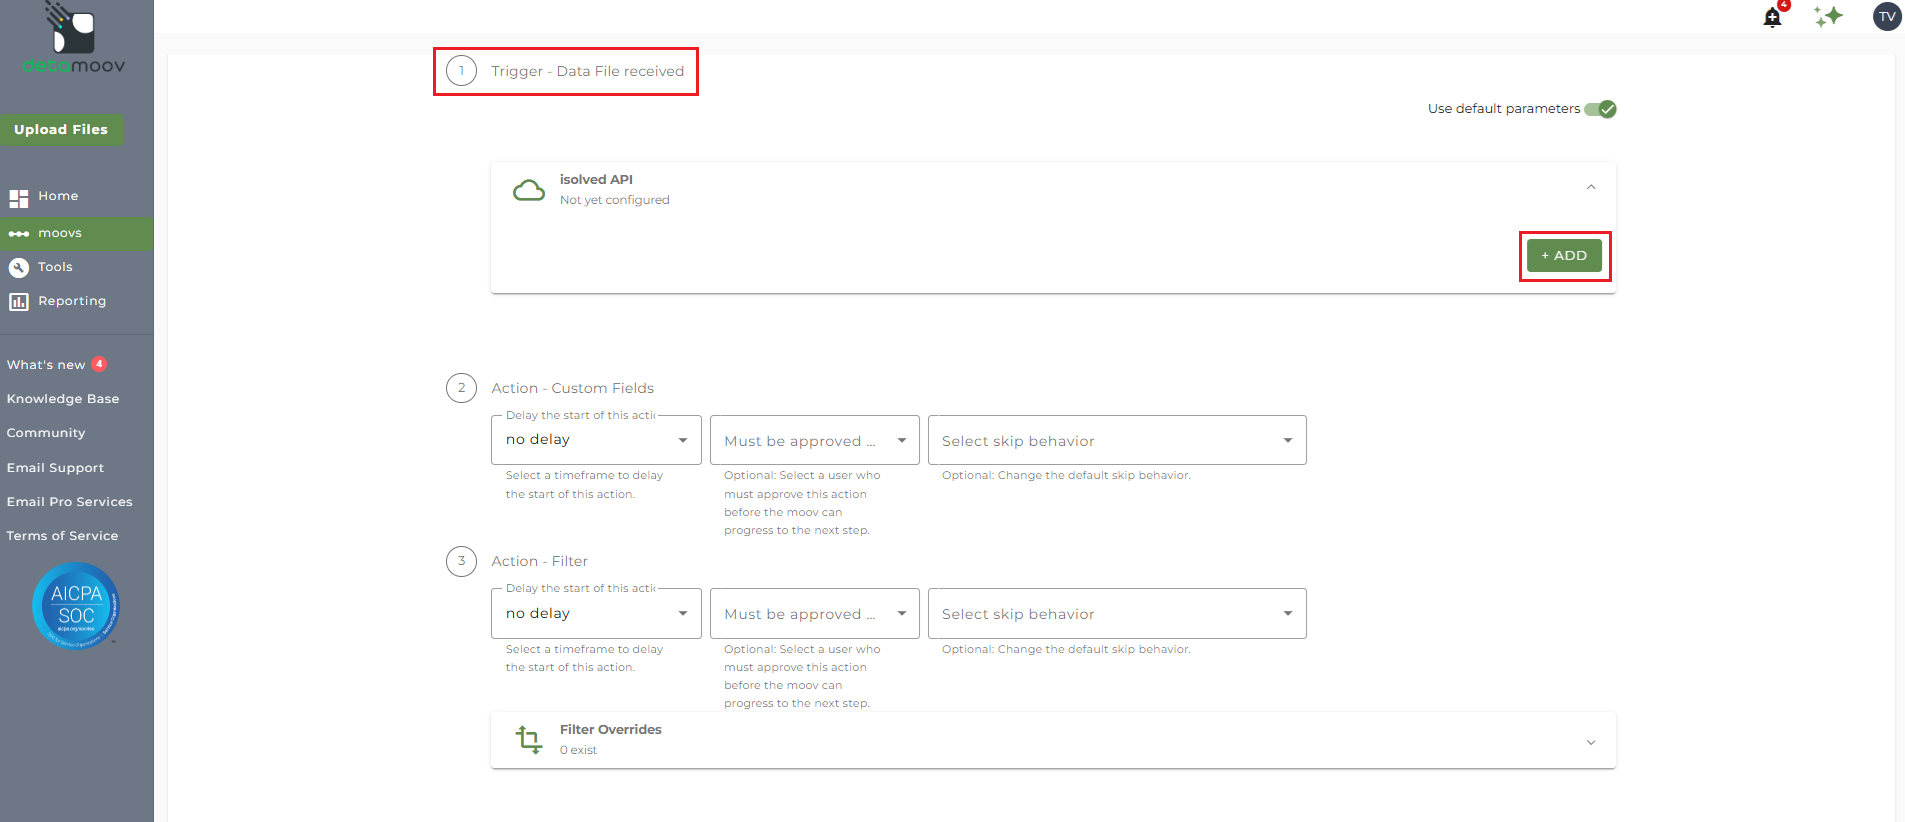
Note: If you do not see this option then the Premier Service has not been set up for your account. Please contact isolved support to enable the detamoov API for you within your isolved environment.
On the right side navigation that appears, select the name of the Premier Integration to configure for this moov. To set up the client for this Premier Service you will need:
- Client Code - the isolved client code
- Legal Company Name - the isolved legal company name
- Pay Group Name - (optional) the Pay Group Name associated with the Payroll Runs for this Client/Legal Company. This must be a valid Pay Group Name and must be entered exactly as it appears in isolved. If a valid Pay Group Name is provided, only Payroll Runs for that specific Pay Group will be pulled.
- Include all employees from all Pay Groups with YTD Wages - (optional) toggle this ON if you would like to include employees in all Pay Groups with YTD wages
- Pay Item Codes (one per line) - deduction and memo calculation pay item codes.
- Loan Pay Item Codes - loan pay item codes.
- Reserved Field Mapping - allows for flexibility in mapping certain data elements during configuration. For more information on Reserved field mapping, see the isolved - Reserved Field mapping article.
- Error Messages Email - You can optionally enter in one or more email addresses in the Error Messages Email. If left blank, all detamoov users on your account will receive emails if the isolved API step fails.
Scheduling a Premier Service Integration
A Premier service needs to be scheduled to run either every 'x' weeks, or on certain days of the month.
Every 'X' Weeks
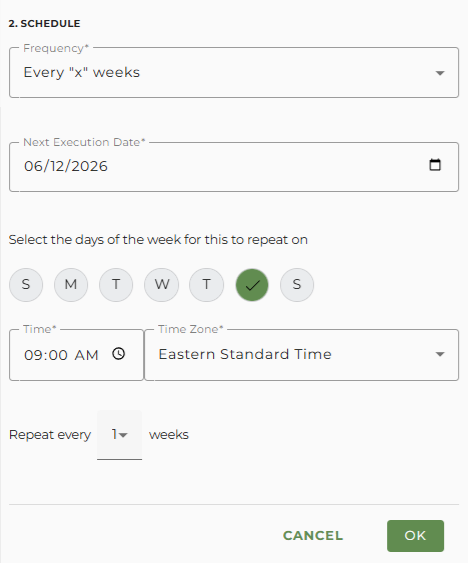
- Next Execution Date - the date that the integration will run next. Once a date is entered, that day of the week will be auto selected on the next step.
- Days of the week for the integration to repeat - days of the week the integration will executed.
- Time - the time that the integration will run on the days of the week for every 'x' weeks selected.
- Time Zone - the time zone related to the time specified for the integration to run (default is your current location's time zone).
- Repeat every 'x' weeks - the weekly frequency the integration should be executed.
On Certain Days of the Month:
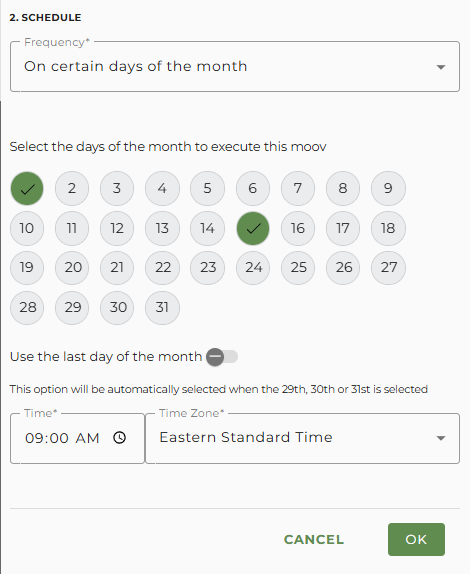
- Select the days of the month to execute this moov - these are the actual days of the month that the schedule will run for the specific Premier Integration
- If a selected day falls outside the last day of the month for a specific calendar month, the last day of the month will be used instead
- If the current date (today) falls outside the the last selected date, the first date selected will be the initial date of the first run of the Premier Integration
- example: if the selected days are the 1st and the 15th, but today is the 16th, the Premier Integration's first run will be the 1st of the next month
- Use the last day of the month - Check this option if the payroll date may occur at the end of a month where the selected day isn't available for a month. For example, if the 31st is selected, the 30th will be used for April, June, September and November. This option will be automatically selected when the 29th, 30th or 31st is selected
- Time - the time that the integration will run on the selected day(s) of the month
- Time Zone - the time zone related to the time specified for the integration to run (default is your current location's time zone)
To complete the setup, click OK and scroll down to the bottom of the page. Then click the Next button and then Save on the Review section.

