

This article describes how to configure a client for the Fidelity Loan Feedback to isolved Loan Deduction Update moov definition used for 360 integration. Each client configuration will vary based on their plan specification and will need to be configured accordingly.
To proceed in configuring the isolved moov, you will need the isolved API premier service enabled on your detamoov account. In isolved you will need to have the detamoov API enabled. If not currently enabled, please contact isolved support to enable the detamoov API for you within your isolved environment. Once complete, isolved support will send your API credentials to detamoov for us to add these into your detamoov account.
Once the API credentials have been added to your detamoov account, you will need to give the client access to the detamoov API user. Please see Configuring client access to the detamoov API user article.
Create an SFTP Account in detamoov
Fidelity will send the deduction feedback file to detamoov via SFTP. To create an SFTP account, make sure you are logged in with an administrator level account. Click on your initials in the top right corner and select the Admin Console link.

Within the Admin Console, select the Settings tab and click on the SFTP row. Once the SFTP area expands, click the ADD button to add a new SFTP account.

The side sheet will be where you'll enter information on your new SFTP account. All fields are required. Here's some information on each field:
- Username: required, cannot contain spaces and must be unique across all SFTP accounts.
- Password: required and must adhere to the standard detamoov password requirements.
- Confirmation password: required and must match the password field exactly (case sensitive).
- Description: required and used to describe why you're creating this account.
Once you've entered all the information above, click the SAVE button and your account will be created.
Provide Fidelity with the SFTP credentials created above to allow them to send the deduction feedback files for your client.
Host: sftp.prod.detamoov.com
Port: 22
Username: username created above
Password: password created above
After the isolved Premier Integration has been activated on your account and the SFTP account has been created, please add the Fidelity Loan Feedback to isolved Loan Deduction Update moov to your account by following these steps.
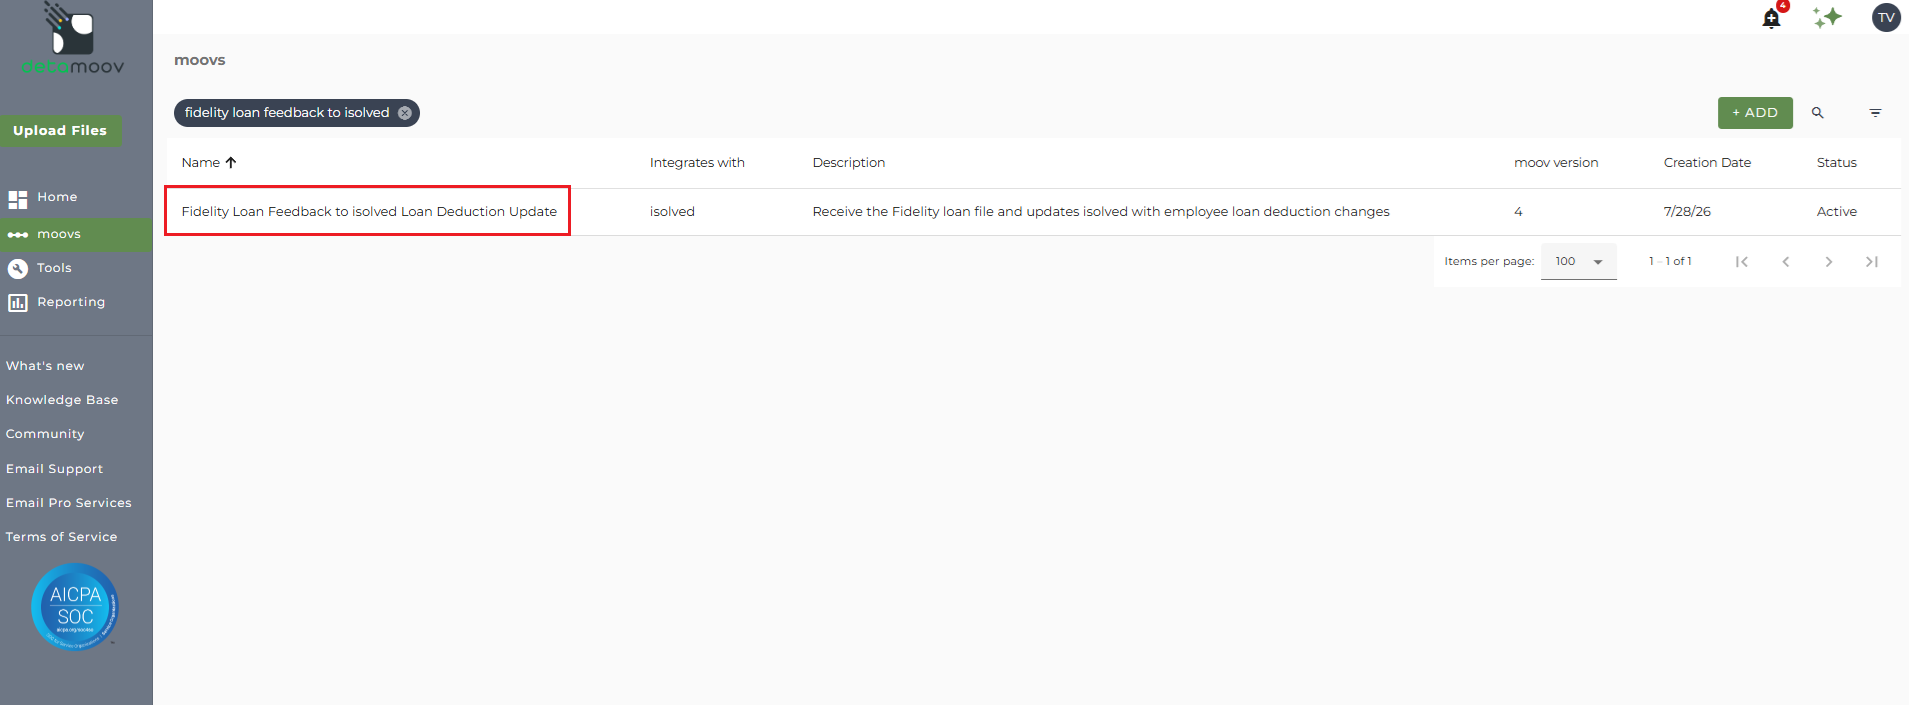
Once the Fidelity Loan Feedback to isolved Loan Deduction Update moov has been added to your account, access the moovs section on the left side menu and click on the Fidelity Loan Feedback to isolved Loan Deduction Update moov.
detamoov will validate the Fidelity loan data before importing it to isolved. During the preparation step, if the Pay Item is missing or invalid, if the Reference Number is missing, or if an error occurs connecting to the isolved API, a validation report will be sent via email.
Note: If the Pay Item is missing or invalid, or there is an error connecting to the isolved API, those employee records will be filtered out of the isolved Import. Records that do not have Reference Numbers (loan numbers) will be allowed to be imported into isolved.
An example of the validation report generated:

To ensure that you receive the validation notifications, click the cog icon under step 8: Action - Validate File on the left. Then toggle the "Use default parameters" off and enter in the email addresses you would like to receive the notification. If you would like to enter multiple email addresses, separate them with a comma. A Reply to email is also required in the event that a recipient of the notification replies to the email.
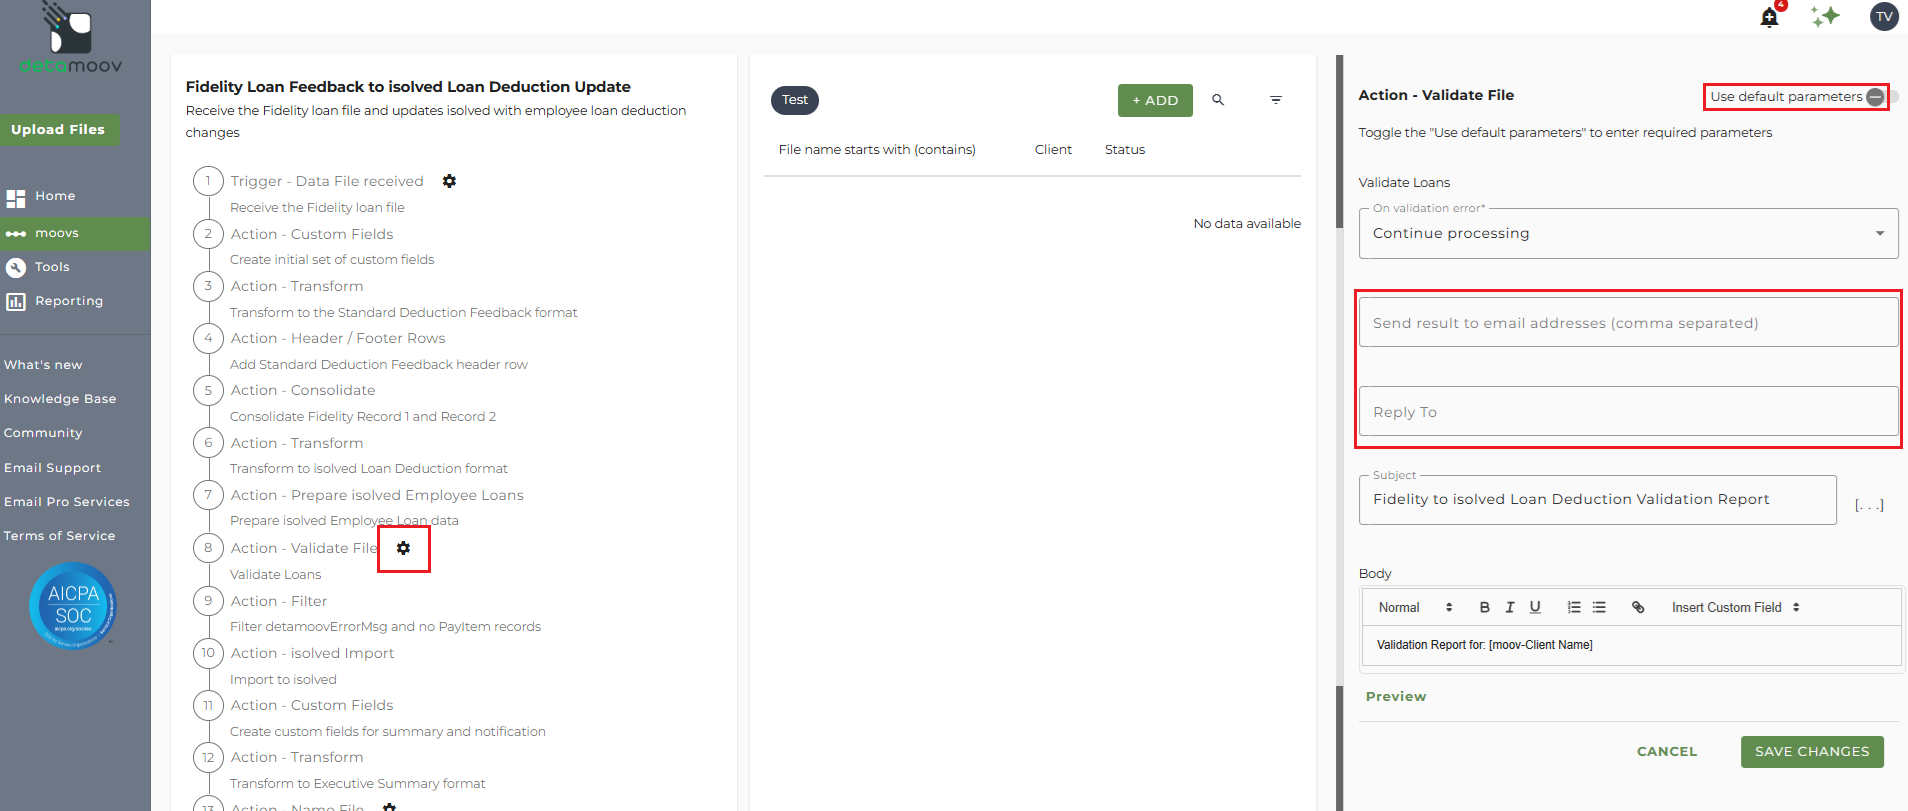
To save your parameters click the SAVE CHANGES button.
The Fidelity Loan Feedback to isolved Loan Deduction Update moov provides a notification once the moov is complete with a summary of the deduction changes that were made in isolved. The notification can be sent to any email address you wish and can also be configured to send to multiple email addresses.
To edit the send file step, click on the cog icon under step 14: Action - Send File on the left. Then toggle the "Use default parameters" off and enter in the email addresses you would like to receive the notification. If you would like to enter multiple email addresses, separate them with a comma. A Reply to email is also required in the event that a recipient of the notification replies to the email.
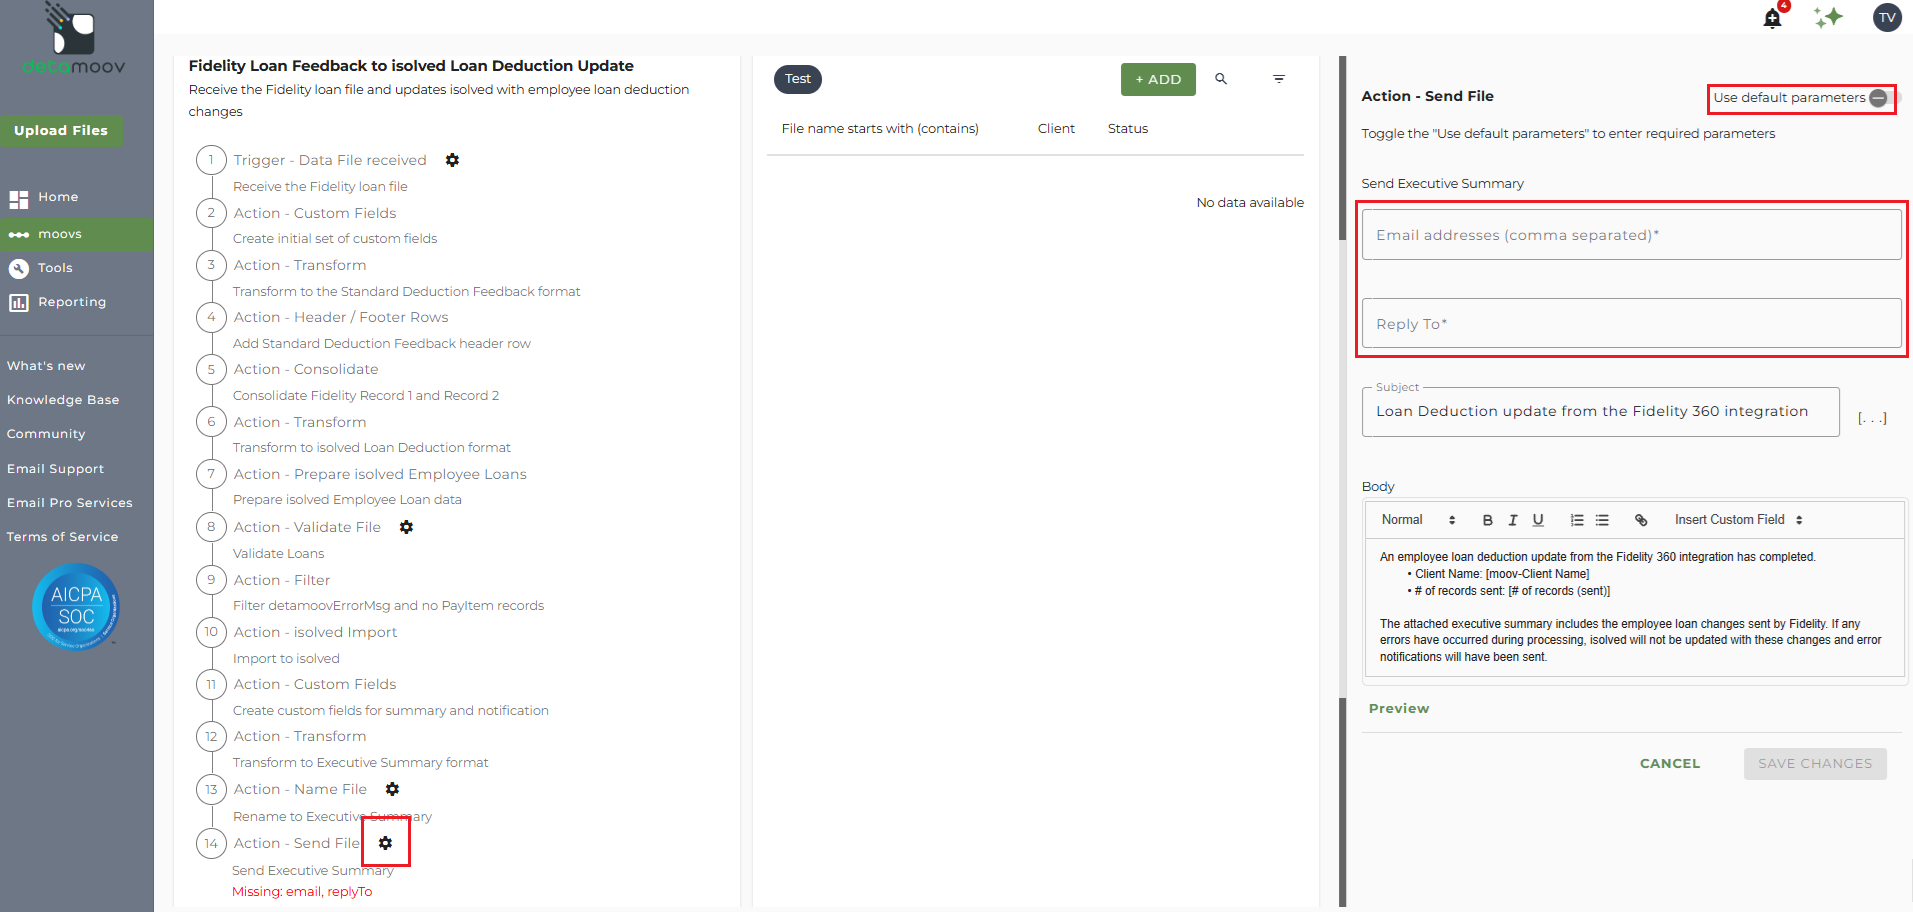
Note: these settings apply to any client configuration you set up for this specific moov. You also have the ability to configure the send file step for each client configuration if you wish to add or remove email addresses per client.
To save your parameters click the SAVE CHANGES button.
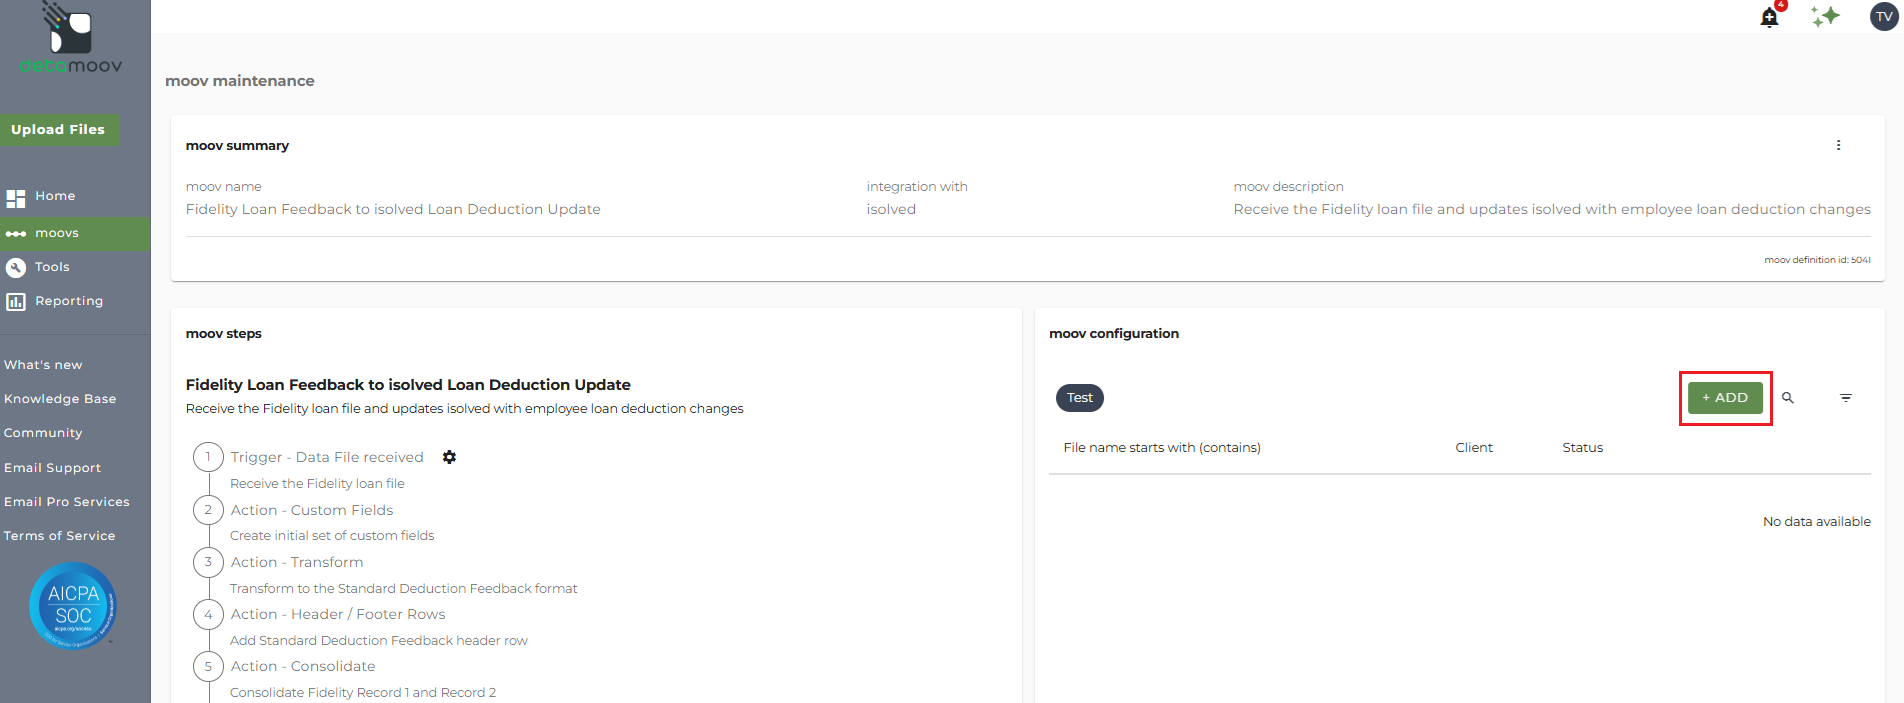
In the moov configuration section, click the ADD button to add a new client to the moov.
Client/Entity - either select an existing client or click the + sign to create a new client.
Status - Set to Active
Expected Frequency - the client's payroll frequency
File Name Starts With - odc[Fidelity provided value]
File Name Contains - lon
(The "l" in "lon" is a lower-case L)
Note: make sure that the File Name Starts with field matches as this can cause issues pulling the Fidelity feedback file and updating isolved.
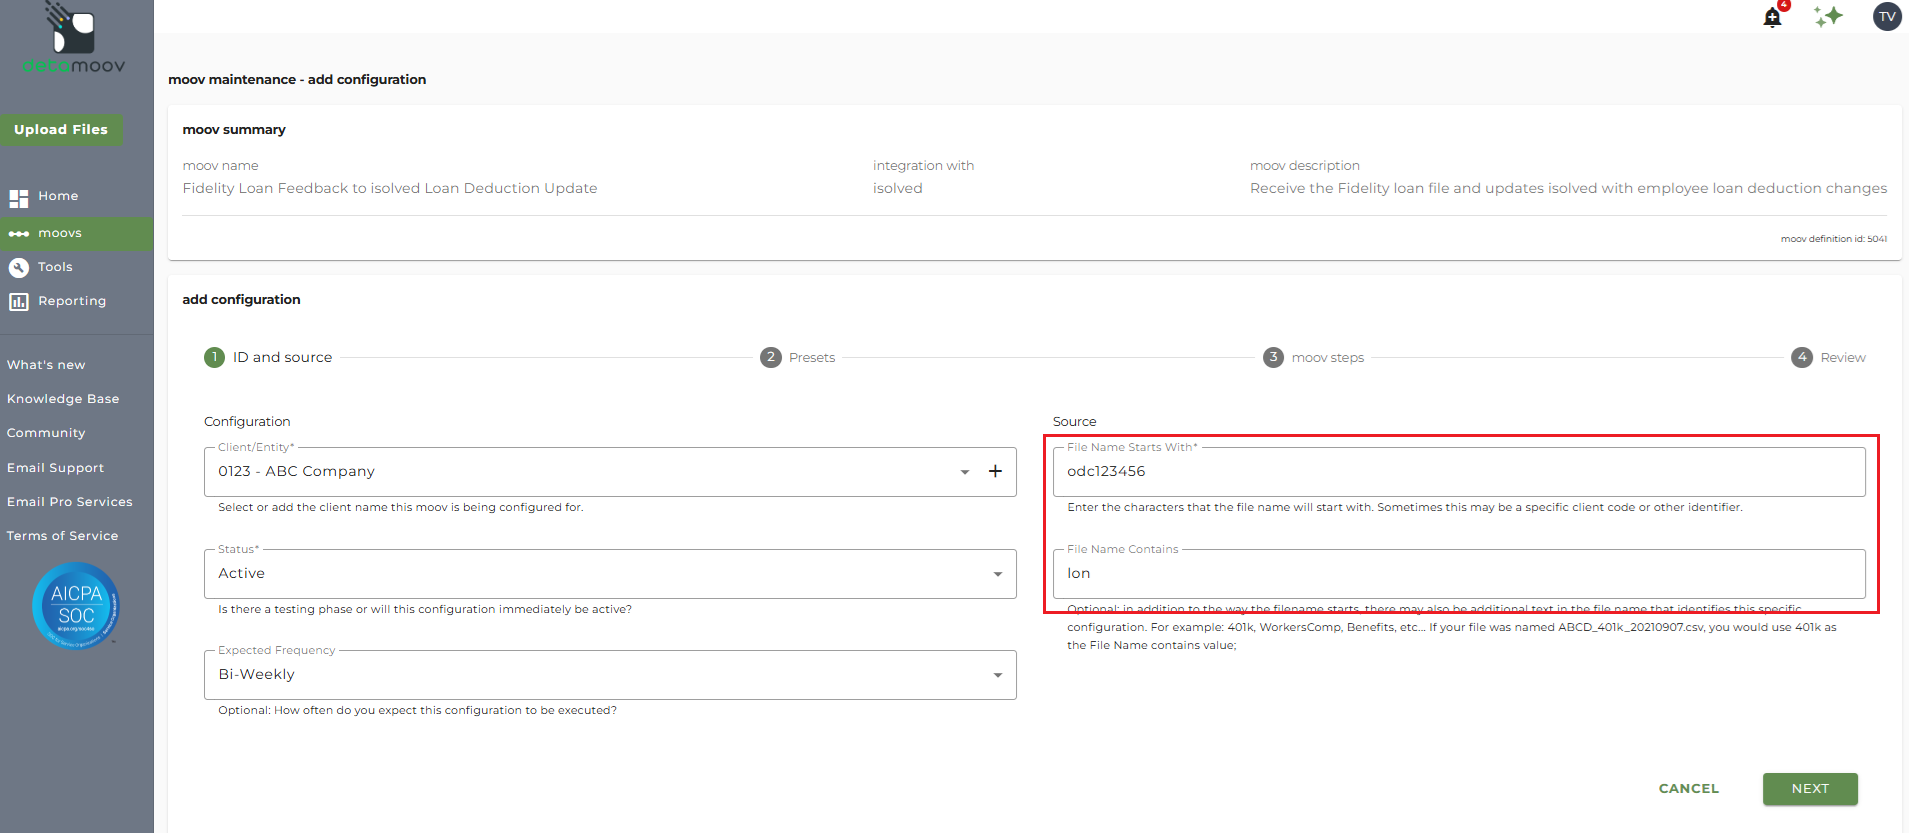
Click the NEXT button once you have completed the ID and source section.
To make configuring the isolved API easy, detamoov allows you to provide preset data for your client. On page 2: Presets you can fill in information that will be used to connect to your client's isolved account to make the necessary updates from Fidelity.
- Premier Integration: Select your isolved Premier Integration from the dropdown
- Client Code: Enter the client code from isolved
- Legal Company Code: Enter the legal company code from isolved
- Pay Group Name: Enter the pay group name (case-sensitive) from isolved
- Loan Pay Item Codes (one per line): Enter the isolved deduction Pay Item codes for loans. Enter these as they appear in the Code field inside isolved for each Pay Item, one code per line
- Loan Deduction Import Type: This field is set and should be left as 'Deductions' by default
- Import Key: This field is set and should be left as 'SSN' by default
- isolved Error Messages Email: Allows you to limit who receives notifications if there are errors when connecting to the isolved API. Enter one or more email addresses (separated by a comma), or leave this field blank and all detamoov users on your account will receive the notifications
- isolved Validation Messages Email: Allows you to limit will receives notifications if there are validation issues when connecting to the isolved API. Enter one or more email addresses (separated by a comma), or leave this field blank and all detamoov users on your account will receive the notifications
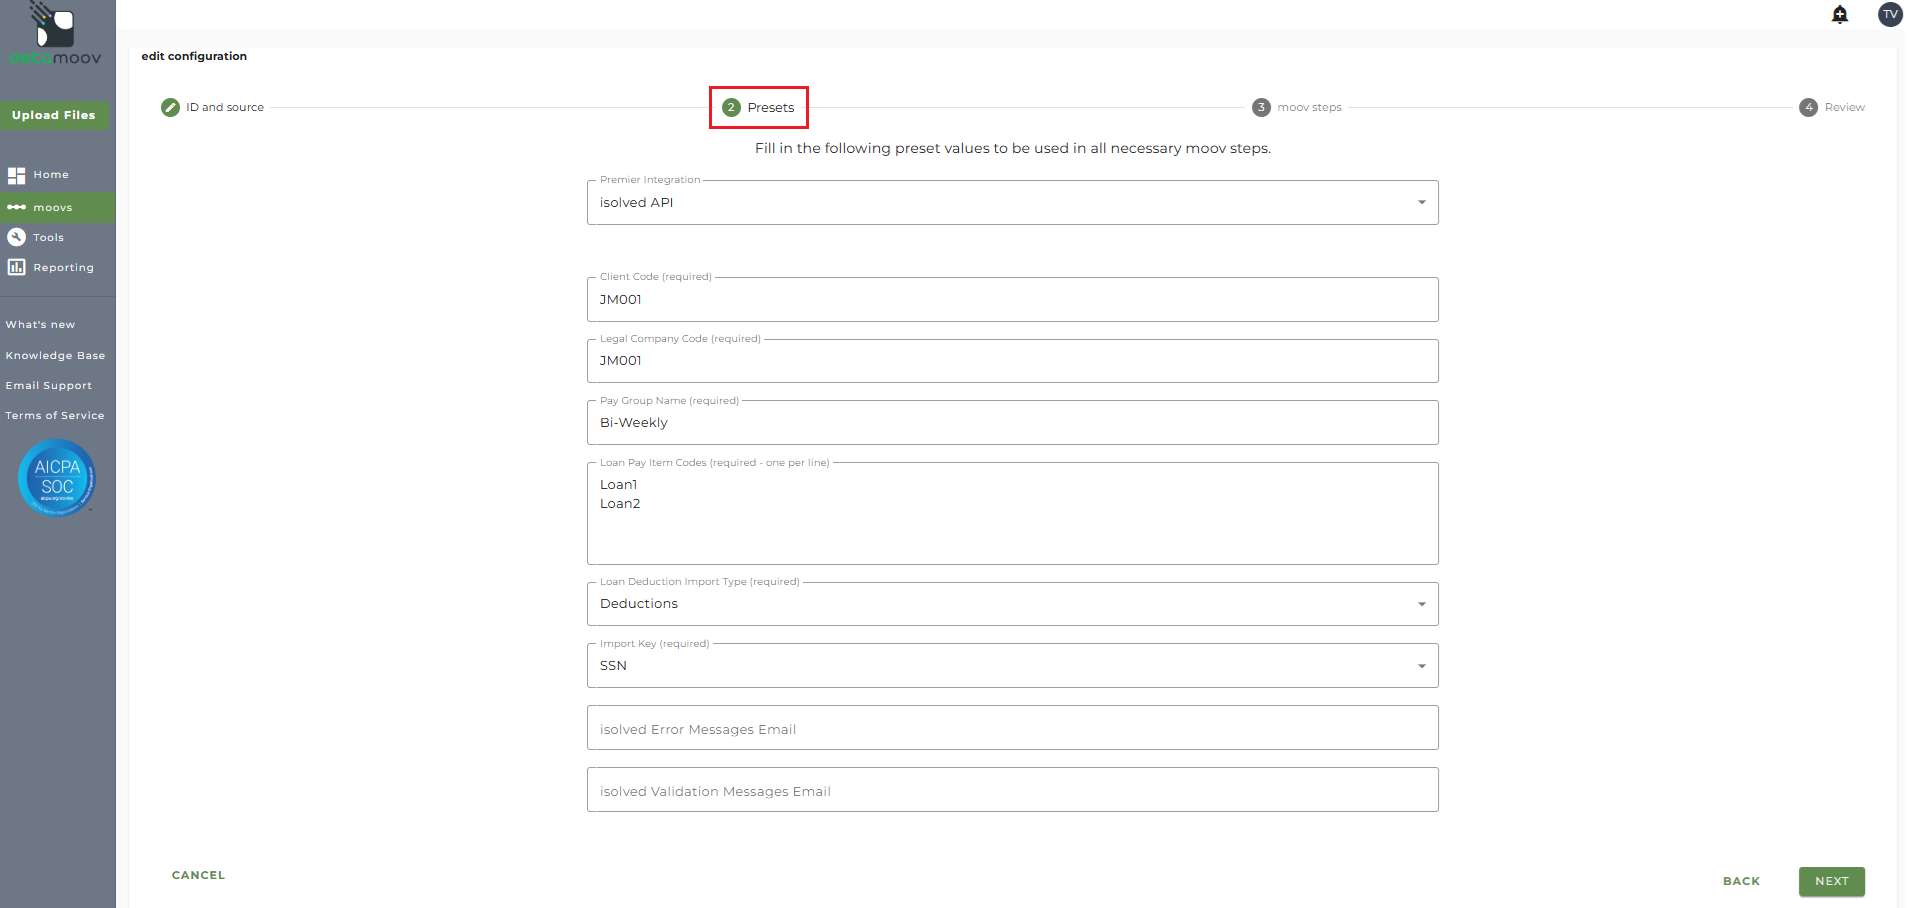
Click the NEXT button at the bottom of the page once you have entered in the preset fields.
Transformation Override - Balance for Goal Amount
Fidelity will send the employee Goal Amount in the feedback file. If any loan Deduction in isolved does not have the Declining Balance enabled, then a transformation override is required to remove the mapping for the Deduction Goal Amount field.
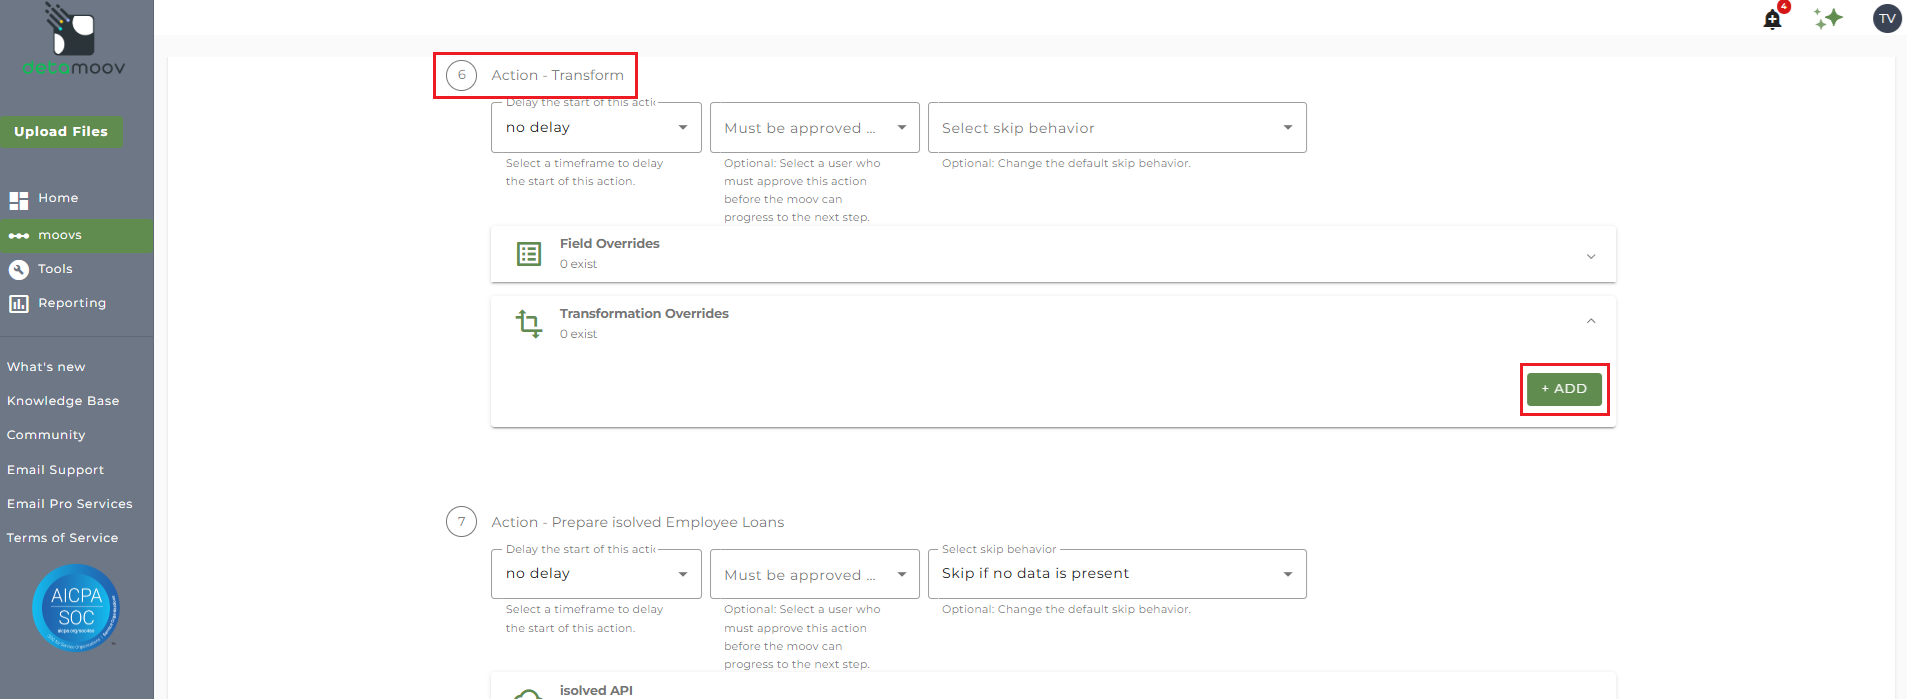
Note: There are three separate Transform steps on the Fidelity Loan Feedback to isolved Loan Deduction Update moov. Make sure you are creating the transformation override on step 6: Action - Transform.
To provide a transformation override, locate step 6: Action - Transform, expand the Transformation Overrides panel and click ADD.
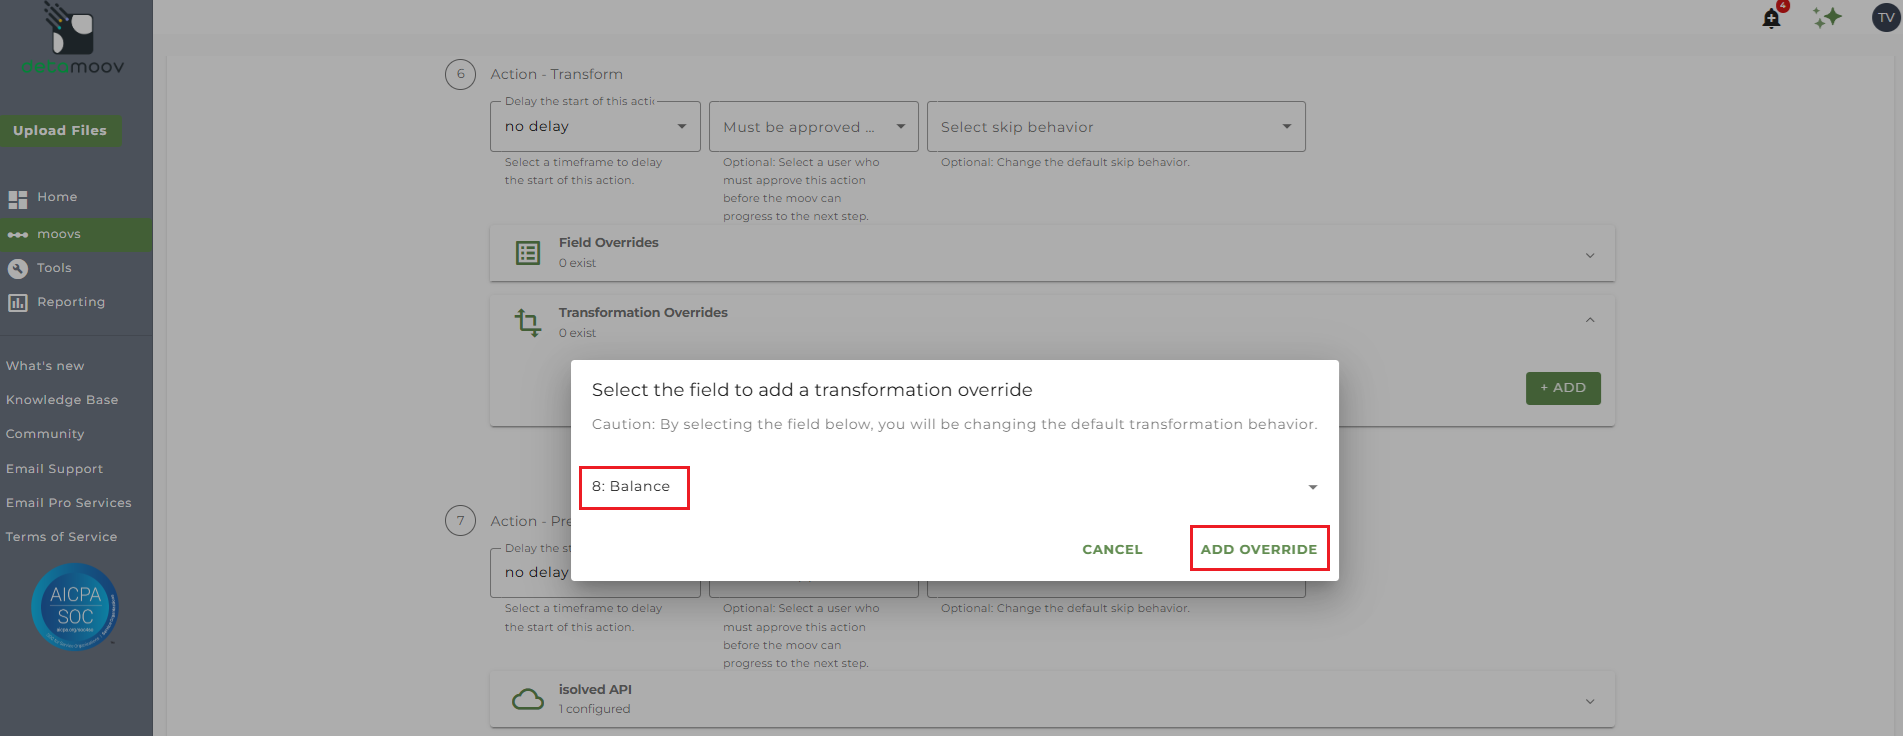
Then select field 8: Balance from the dropdown menu and click ADD OVERRIDE.
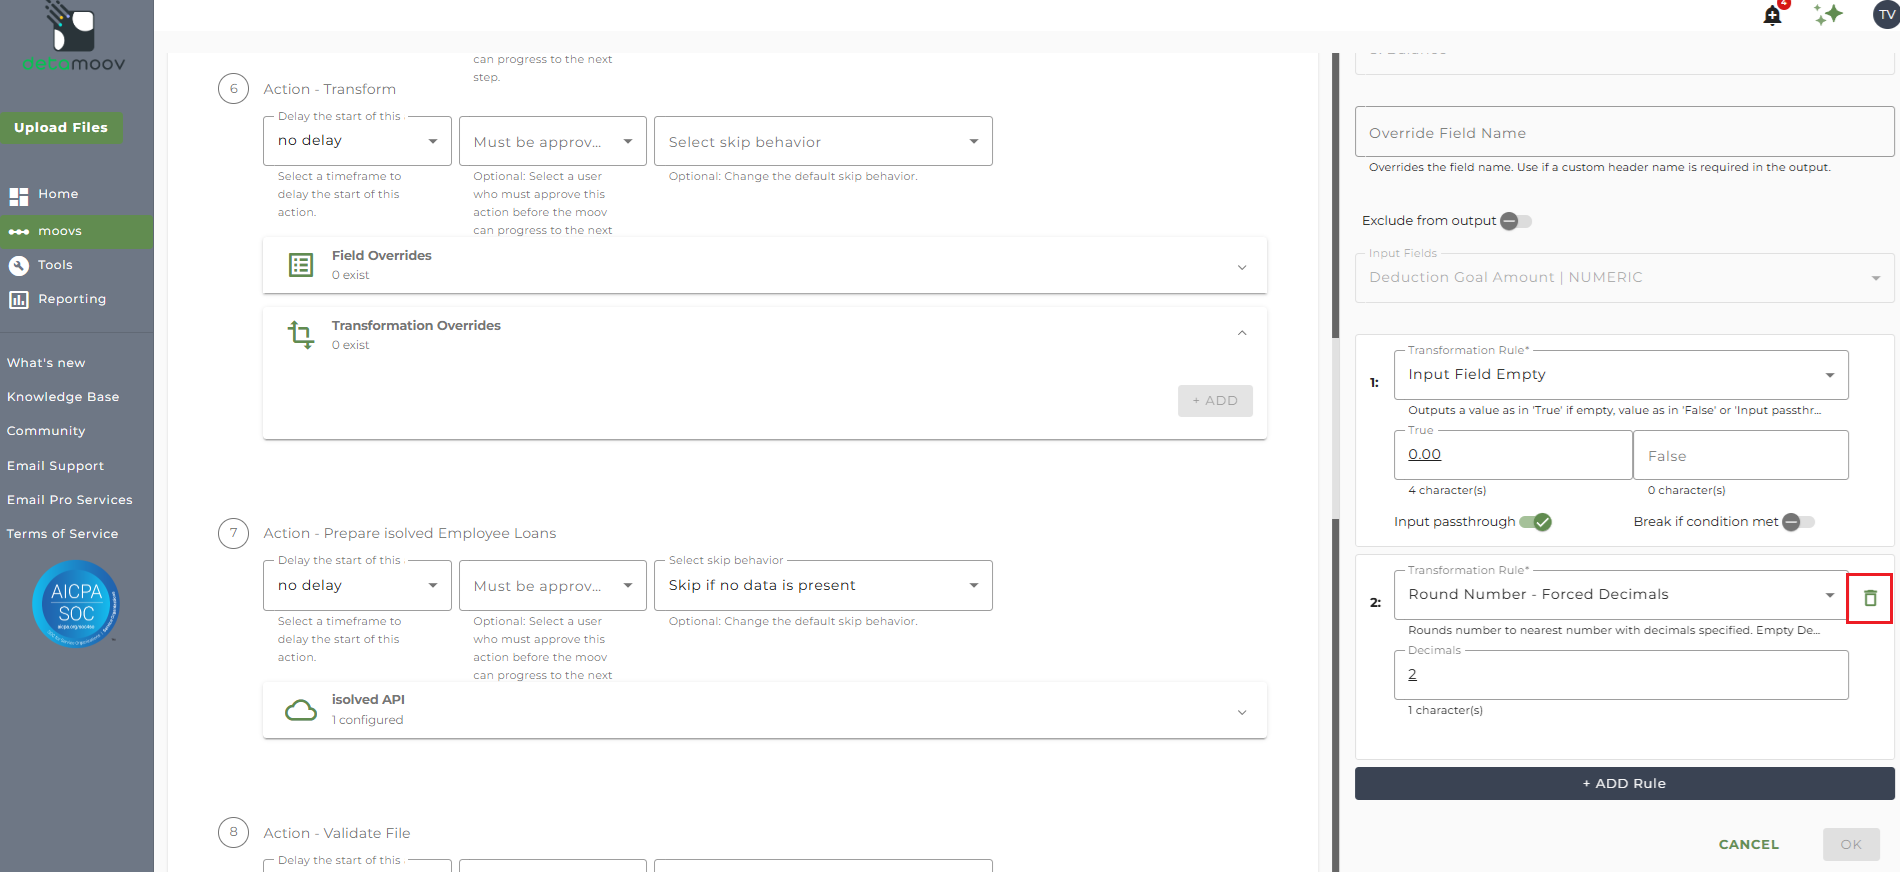
On the side panel that appears, hover over the Round Number - Forced Decimals and click the Trash Can icon.
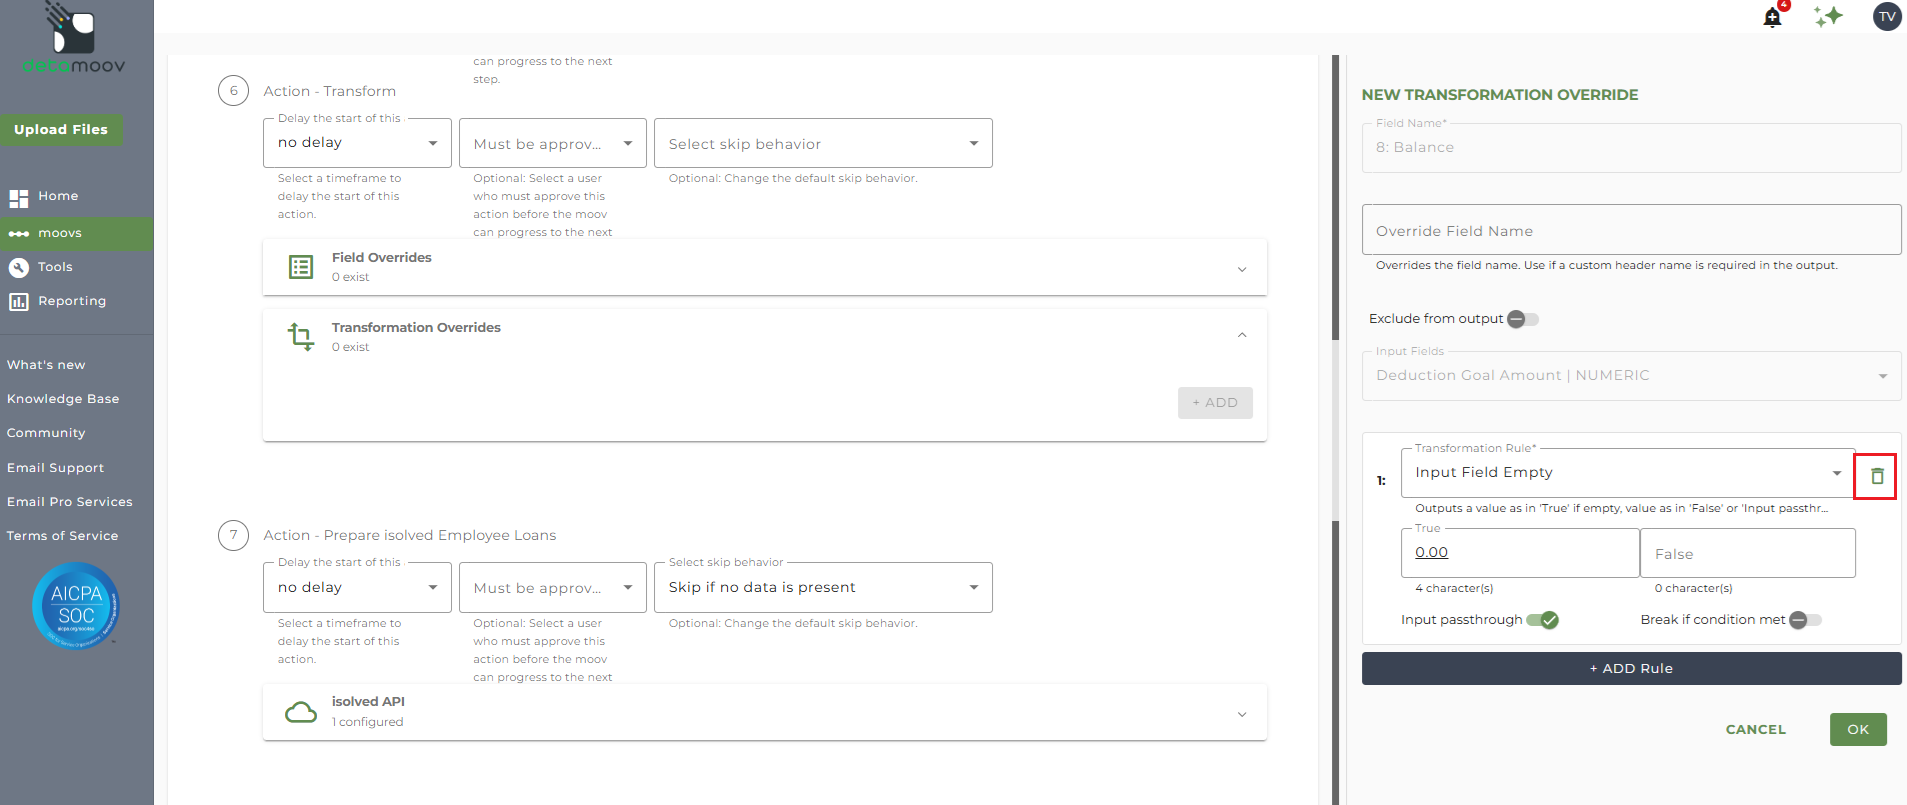
Then hover over the Input Field Empty rule and click the Trash Can Icon.
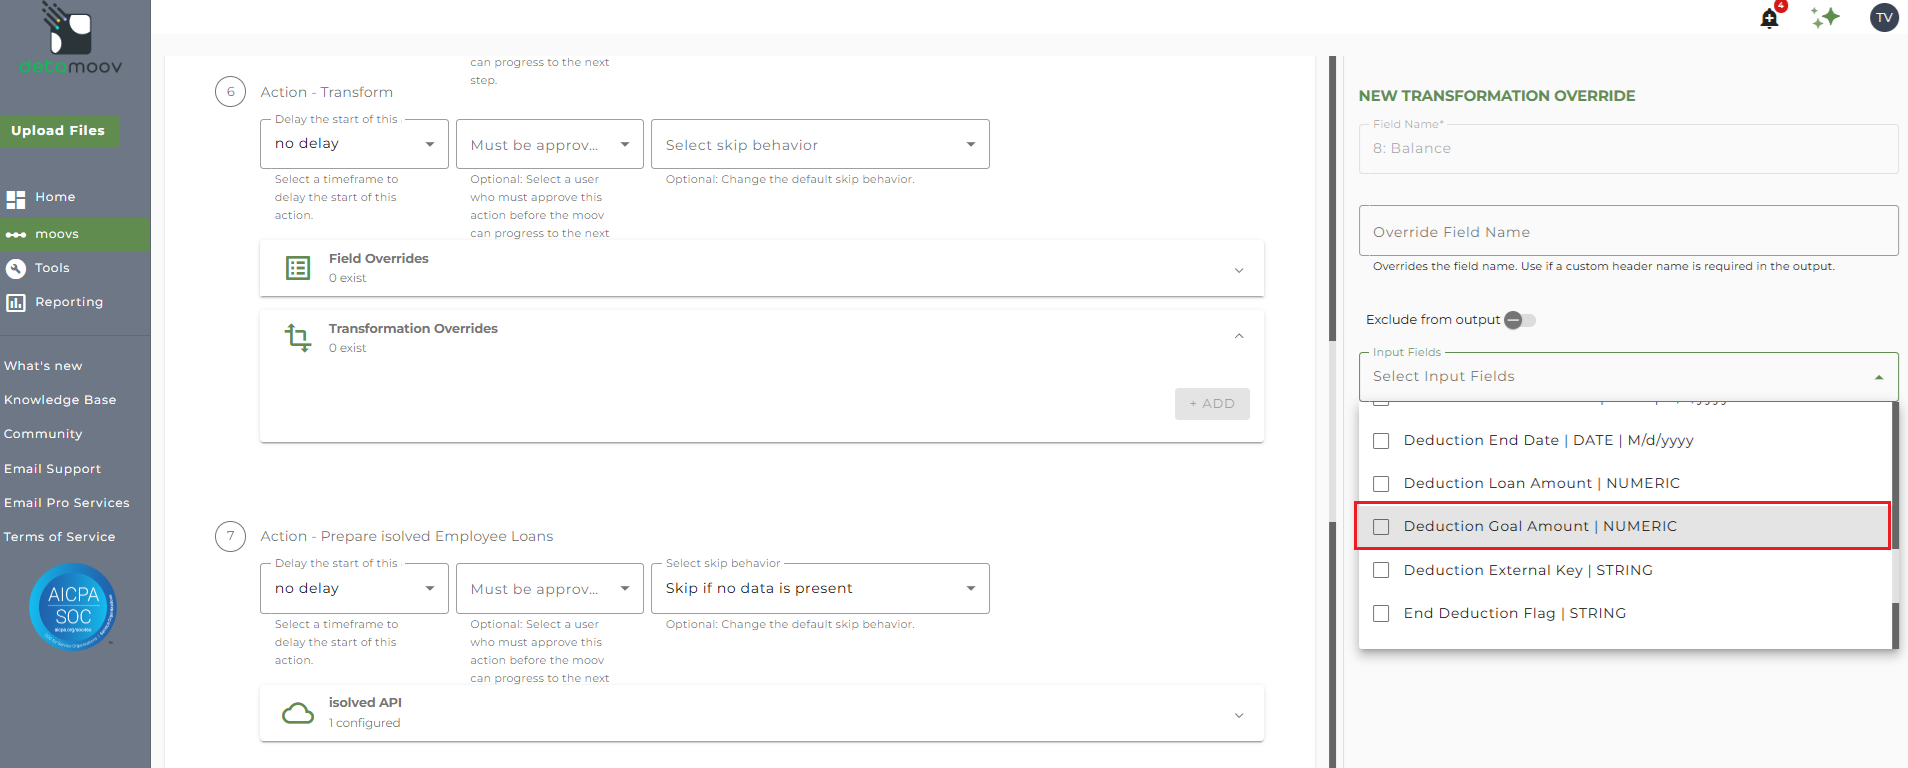
Then click the Input Fields dropdown and uncheck the 'Deduction Goal Amount' field and click OK.
At the beginning of this article you configured the send file step for the moov to send a notification once the moov had completed. You also have the ability to configure the send file step for each client configuration if you wish to add or remove email addresses per client.
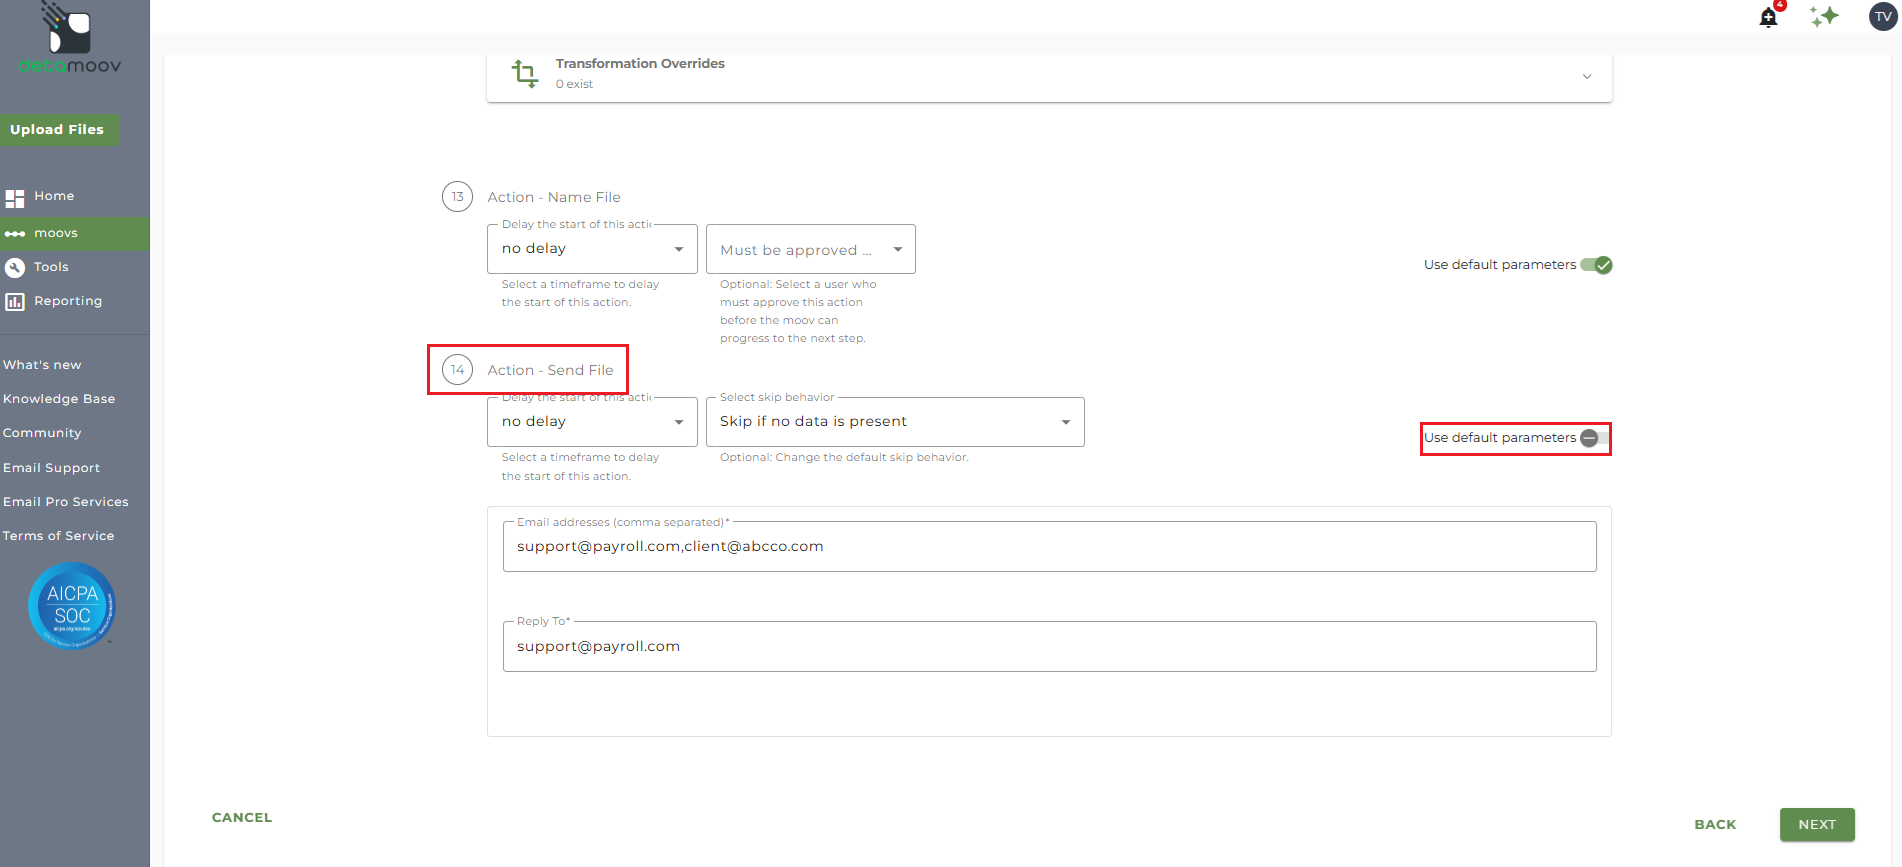
To override the send file step, locate step 14: Action - Send File and toggle the "Use default parameters" off and enter/remove email addresses from Email Address and Reply To fields. If you would like to enter multiple email addresses, separate them with a comma.
To complete the configuration for your client, click the NEXT button at the bottom of the page and then the SAVE button on the moov summary page.

